by Sarah Whitfield
What does it mean when a brake pedal suddenly demands twice the leg force it needed last week? The answer, in a high percentage of documented cases, traces directly to brake booster failure symptoms — and the earlier those symptoms are caught, the cheaper the repair. Our team has worked through these diagnoses across dozens of platforms, from compact sedans to full-size trucks. The brake booster amplifies pedal force using engine vacuum or hydraulic pressure. When it begins to fail, that amplification degrades or disappears entirely. Anyone experiencing brake irregularities should also review our troubleshooting category for related system faults that frequently occur alongside booster issues.
The consequences of a failed booster range from a stiff pedal requiring extreme effort to a near-total loss of braking assist. Neither scenario is safe. Our team documents the complete diagnostic and repair process below.

Contents
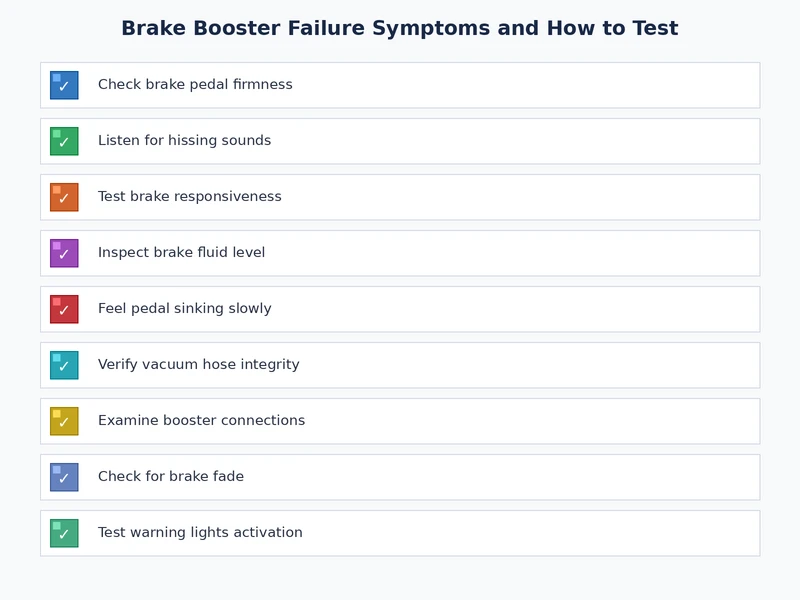
Brake booster failure symptoms present in three primary categories: pedal feel, audible cues, and engine behavior. Our team uses all three to triangulate the fault before ordering parts.
Pedal feel is the most reliable starting indicator. A functional booster delivers light, progressive resistance throughout the pedal stroke. When the booster begins to fail, pedal effort climbs sharply — often requiring two to three times the normal leg force to achieve equivalent stopping distances. This symptom intensifies during slow city driving and low-speed stops.
Additional pedal symptoms our team documents during intake:
Audible cues matter equally. A failing booster frequently produces a hissing or whistling sound with the engine running and foot on the brake. The noise originates from air bypassing a cracked diaphragm or deteriorated seals. On many vehicles, this hiss routes directly into the cabin through the firewall grommet — a detail that helps localize the fault.
A hissing brake pedal with the engine running almost always indicates either diaphragm failure or a cracked vacuum line — two different repairs at very different price points, so accurate identification before ordering parts is essential.
Engine idle disruptions provide a third confirmation layer. The brake booster draws vacuum from the intake manifold. A significant internal leak pulls excess vacuum from the engine at the moment of pedal depression, which manifests as a rough or suddenly dropping idle. Our team uses this behavior as secondary confirmation of diaphragm failure. Similar vacuum-cascade effects appear across other systems — our coverage of bad catalytic converter signs details how vacuum system faults propagate through unrelated components.
The standard three-step booster test requires no special equipment. Our team performs it as follows:
A functional booster causes the pedal to drop noticeably downward as engine vacuum builds behind the diaphragm. If the pedal does not move at engine start, the booster has lost vacuum assist entirely. If the pedal drops but then rises back within 30 seconds, the check valve or diaphragm is leaking vacuum back through the supply line.
With the engine running at idle:
A healthy booster retains stored vacuum and holds the pedal position firm throughout both intervals. A pedal that rises perceptibly during step 3 confirms internal vacuum loss. On many platforms, cruise control systems share the same vacuum infrastructure as the brake booster — our team frequently finds simultaneous cruise control faults when the booster diaphragm has started leaking, which is a useful cross-reference during diagnosis.
The visual and manual tests described above require no tools beyond the vehicle itself. However, confirming a booster fault versus a vacuum supply fault requires additional equipment. Our team's standard brake booster diagnostic kit includes:
On most domestic platforms, the full booster swap requires only basic hand tools. European and Asian platforms occasionally use metric fasteners in hard-to-reach firewall positions, so a flexible extension set is advisable.
A handheld vacuum pump with an integrated gauge is the single most valuable addition to the diagnostic process. Our team uses it to:
Entry-level vacuum pump kits run $20–$50 at any auto parts retailer. A digital vacuum gauge offers more precise readings but the analog versions are sufficient for pass/fail booster testing. Our team also keeps a brake pressure bleeder on hand — any booster replacement requires a full system bleed afterward, and a pressure bleeder cuts that time significantly.
The most expensive misdiagnosis our team encounters is replacing the brake booster when the master cylinder is the actual fault. The two components produce overlapping symptoms: both can cause a sinking pedal, both can cause inconsistent braking response, and both sit adjacent on the firewall.
The distinguishing test is straightforward. A master cylinder fault presents even with the engine off and the booster fully evacuated. Apply firm pedal pressure with no engine vacuum present. If the pedal sinks to the floor slowly, the master cylinder seals are bypassing — not the booster diaphragm. A booster-only fault produces a hard, unyielding pedal in that same condition.
Our team bench-tests any suspect master cylinder before condemning the booster. Skipping this step has led to unnecessary booster replacements on vehicles where a $60 master cylinder rebuild kit resolved the complaint entirely.
Our team has documented booster replacements that failed to resolve stiff pedal complaints because a collapsed brake hose was restricting fluid return — always pressure-test the hydraulic circuit before condemning the vacuum side of the system.
Many technicians replace the booster without verifying that the vacuum source is adequate. A weak intake manifold vacuum — common on high-mileage engines or after major intake work — causes any booster to underperform regardless of its internal condition. Intake vacuum below 15 inHg at idle points to engine problems, not a booster fault.
Turbocharged and supercharged vehicles add another layer of complexity. Forced-induction engines cannot supply reliable manifold vacuum under boost, so they rely on an electric vacuum pump to feed the brake booster. A failed electric pump produces symptoms identical to a dead booster. Checking pump operation takes under two minutes with a vacuum gauge applied at the booster inlet — and the pump itself costs $30–$120, far less than a replacement booster.
Our team also flags the check valve as a frequent culprit. This small one-way valve, located where the vacuum hose meets the booster inlet, holds stored vacuum when the engine is off. A failed valve bleeds vacuum back through the hose within minutes of engine shutdown, resulting in a hard pedal on the first brake application after sitting. Replacement cost is $10–$25. Checking the valve before replacing the booster is a mandatory step in our diagnostic sequence.
Brake booster pricing varies considerably by platform, source, and condition. Remanufactured units carry a lower upfront cost but our team's experience shows a higher failure rate within 24 months compared to OEM units. The National Highway Traffic Safety Administration (NHTSA) tracks brake-related defect reports by platform — our team cross-references that data when evaluating failure rates before recommending OEM versus aftermarket.
| Vehicle Type | Reman. Booster | OEM Booster | Check Valve | Vacuum Hose |
|---|---|---|---|---|
| Compact sedan | $45–$90 | $120–$220 | $10–$20 | $12–$35 |
| Mid-size SUV | $75–$140 | $180–$320 | $15–$25 | $18–$45 |
| Full-size truck | $90–$180 | $210–$450 | $15–$30 | $20–$55 |
| Luxury / European | $150–$300 | $350–$900 | $25–$60 | $30–$80 |
Brake booster replacement is a moderate-difficulty DIY job. The booster mounts to the firewall with four nuts accessible from the engine bay. The pushrod connects to the brake pedal arm inside the cabin, which requires reaching behind the dash — the most awkward step in the procedure. Total hands-on time for an experienced technician runs 1.5 to 2.5 hours.
Estimated total costs including parts and labor:
Our team recommends a full brake system bleed after any booster replacement. Air introduced during the swap can cause spongy pedal feel that persists for weeks if not addressed immediately. For reference, the systematic approach to brake-adjacent hydraulic inspection that our team uses mirrors the procedure detailed in our CV axle inspection guide — methodical, component-by-component, with no steps skipped.
The most consistent first sign is a noticeably stiff or hard brake pedal that demands significantly more leg force than normal. Most drivers initially attribute this to cold weather or brake pad wear. The symptom typically develops gradually over weeks before becoming severe enough to prompt inspection.
A partially failing booster may still allow the vehicle to stop, but with substantially reduced pedal assist. Our team considers any confirmed booster fault unsafe for normal traffic conditions. Emergency braking response is severely compromised, and stopping distances increase unpredictably under hard braking.
Most OEM brake boosters are engineered for 100,000 to 150,000 miles under normal operating conditions. Failures before 80,000 miles often indicate a secondary cause — a collapsed vacuum hose, failed check valve, or chronic moisture contamination in the brake fluid — rather than a booster that has simply worn out.
Not typically on most platforms. The brake booster is not monitored by the ECU directly. However, a large internal vacuum leak from the booster may trigger a lean condition fault code — P0171 or P0174 — on engines sensitive to intake vacuum changes. This is a secondary effect, not a direct booster monitor.
The check valve is a one-way valve located where the vacuum supply hose meets the booster inlet. Its function is to hold stored vacuum in the booster when the engine is off. When it fails, vacuum bleeds back through the hose within minutes of engine shutdown. The result is a rock-hard pedal on the very first brake application after the vehicle has sat, which then gradually improves as vacuum rebuilds.
The static vacuum test and dynamic brake hold test described above require no tools whatsoever — only the vehicle at rest on level ground. For definitive confirmation of diaphragm integrity, a handheld vacuum pump with gauge ($20–$50) allows direct measurement of how well the booster holds applied vacuum over a 60-second window.
Our team's standard checklist includes the master cylinder, all vacuum supply lines, the check valve, brake fluid condition and moisture content, and intake manifold vacuum output at idle. On turbocharged vehicles, the electric vacuum pump is inspected and load-tested as well. Resolving a confirmed booster fault without checking these adjacent components frequently leads to repeat failures within 12 months.
A hard brake pedal is never a minor inconvenience — it is a measurable loss of control, and diagnosing it correctly the first time is always cheaper than replacing the wrong part twice.
 |
 |
 |
 |

About Sarah Whitfield
Sarah Whitfield is a diagnostics and troubleshooting specialist who spent ten years as an ASE-certified technician before joining the editorial team. She specializes in OBD-II analysis, electrical gremlins, and the kind of intermittent problems that make most owners give up.
Get some FREE car parts & gear.. Or check out the latest free automotive manuals and build guides here.
Disable your ad blocker to unlock all the hidden deals. Hit the button below 🚗
| | | |