by Sarah Whitfield
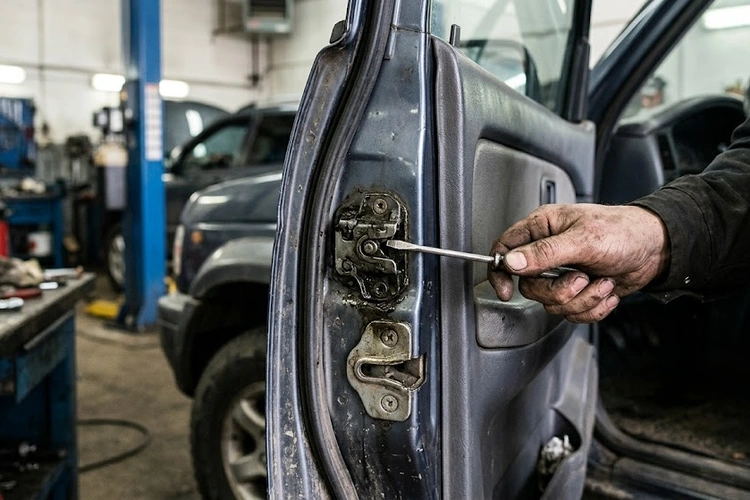
A parking garage, 7 a.m., and the driver's door swings back open every time it's pushed shut. The latch clicks but won't hold — the door bounces loose, the dome light stays on, and the car refuses to lock. A car door won't latch for several well-documented reasons, and the fix ranges from a five-minute lubrication job to a full latch assembly replacement. Drivers looking for a broad overview can start at the car door won't latch troubleshooting guide; this post covers the diagnostic and repair process in full detail.
Repeated forceful slamming, corrosion buildup, misaligned striker plates, and broken linkage rods are among the most common culprits. Most repairs cost between $20 and $200 depending on whether the work is done at home or at a shop. Identifying exactly what's failing inside the door is the fastest path to the right fix.
Contents
The door latch is a spring-loaded ratchet assembly mounted inside the door's trailing edge. When the door closes, a rotating arm called the fork bolt engages a metal post — the striker — that is bolted to the door jamb. A detent lever holds the fork bolt locked in position until the door handle pulls a linkage rod to release it. The entire sequence happens in a fraction of a second, thousands of times over a vehicle's lifespan.
According to the National Highway Traffic Safety Administration (NHTSA), door latch integrity is a federal motor vehicle safety standard requirement. Automakers must design latches to withstand specified crash loads and resist unlatching during a collision. In everyday use, failures are almost always the result of mechanical wear, corrosion, or impact damage rather than a manufacturing defect.
Six root causes account for the vast majority of latch failures:
Doors that partially latch but pop open on bumps typically indicate a worn fork bolt or misaligned striker. Doors that close firmly but won't lock electrically point to a failed actuator or disconnected rod. Pinpointing the exact symptom cuts diagnostic time significantly.
A latch that doesn't fully seat also leaves the door-ajar sensor in a triggered state, which keeps interior lights on and drains the battery over time. In vehicles with integrated security systems, this same fault is a common hidden cause behind a car alarm that keeps going off without an obvious trigger.
Having the correct tools before starting prevents broken trim clips and unnecessary delays. Most door panel repairs require only basic hand tools already found in a typical home garage.
Aftermarket latch assemblies from suppliers like Dorman or Standard Motor Products typically cost 40–60% less than OEM parts, with comparable durability for most non-luxury applications. Verify whether the latch and actuator are sold as a single integrated unit on the specific vehicle before ordering separately — on many modern vehicles, they are.
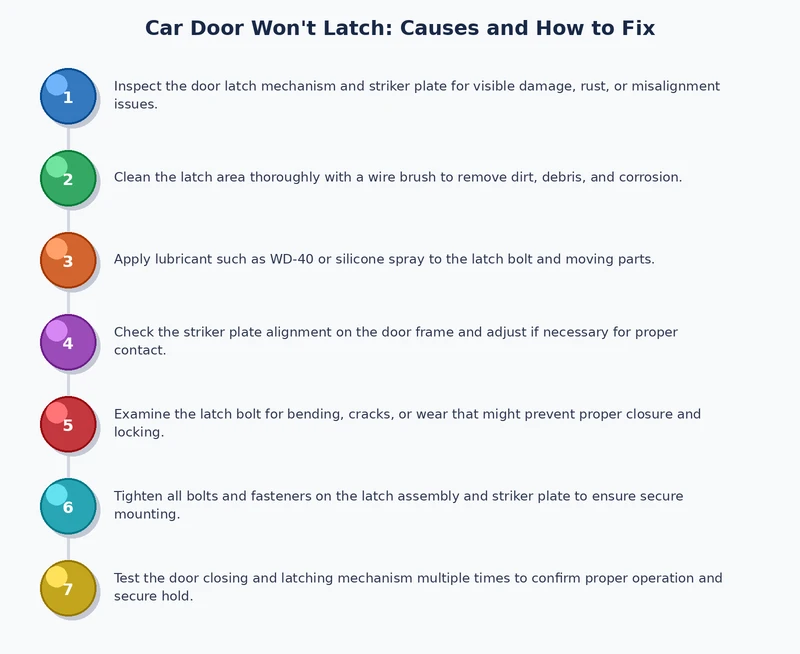
A meaningful percentage of latch failures resolve without ordering any parts at all. Three low-cost steps should be completed before any disassembly begins.
Dry or corroded latches are the most underdiagnosed cause of sticking or partial engagement. White lithium grease is the standard recommendation — it doesn't attract dirt the way petroleum-based grease does, and it handles temperature extremes reliably.
If a dry latch was the only issue, this fix takes under ten minutes and costs less than $10.
A misaligned striker is the second most common culprit. The striker plate is typically secured by two bolts backed by a large backing plate inside the door jamb, which allows horizontal and vertical positioning adjustments.
Striker adjustment resolves doors that require hard slamming, doors that don't sit flush when closed, and doors that rattle at highway speeds.
Debris and bent linkage rods are quick visual inspections that take two minutes:
If the latch moves freely, the striker is aligned, and the door still won't hold, the fork bolt spring is broken. Replacement is the only fix at that point — there is no repairing a broken detent spring in place.
Latch replacement is a moderate DIY task. Most vehicles require 60–90 minutes of working time. The door panel must come off to access the latch mounting bolts, and all linkage rods must be disconnected before the assembly can be removed.
Three handle tests narrow down the failed component before any disassembly:
Costs vary by repair type, vehicle platform, and local labor rates. The figures below use national average shop rates of $100–$150 per hour, which applies to most independent repair shops in mid-size U.S. markets.
| Repair Type | DIY Parts Cost | Shop Labor | Total at Shop |
|---|---|---|---|
| Latch lubrication only | $5–$10 | $0–$50 | $5–$60 |
| Striker plate adjustment | $0 | $50–$75 | $50–$75 |
| Latch assembly replacement | $15–$50 | $75–$150 | $90–$200 |
| Door hinge replacement | $20–$60 | $100–$200 | $120–$260 |
| Full door handle + latch R&R | $30–$80 | $100–$200 | $130–$280 |
For a straightforward latch assembly swap, DIY is the clear recommendation for any driver comfortable removing a door panel. The repair requires no specialized equipment, parts install in reverse order of removal, and shop labor accounts for 60–70% of total cost in most cases.
Luxury vehicles and full-size trucks with heavily electronic door panels — heated armrests, door-mounted displays, multi-zone speaker systems — add significant labor time and are best handled by technicians familiar with that platform's door architecture.
Even low-speed impacts can bend the door frame or shift hinge mounting points enough to misalign the fork bolt and striker. The latch assembly itself may be undamaged, but if the door can no longer reach the striker cleanly, replacing the latch won't solve the problem. Frame and hinge geometry must be corrected first before any latch-related repair will hold.
In most cases, yes. Applying a de-icer spray or silicone-based lubricant directly into the latch mechanism thaws frozen internals without requiring any disassembly. For long-term prevention, coating the latch with dry PTFE lubricant before winter keeps moisture from pooling and freezing inside the mechanism during cold snaps.
No. An unlatched door can swing open during sharp cornering, hard braking, or a secondary impact — creating a serious ejection hazard for occupants. Operating a vehicle with an unlatched door is also illegal in most U.S. states. Using a strap or rope to hold the door closed is only acceptable as a last resort to reach a repair facility, not as a recurring workaround.
Most latch replacements on standard vehicles take 60–90 minutes for a home mechanic following the process for the first time. A shop technician experienced with the specific model often completes the same job in 30–45 minutes. Doors with extensive electronic components — heated panels, door-mounted screens, integrated airbags — add meaningful time to both estimates.
Yes, and it is one of the most common causes of door rattles at highway speed. When the striker sits too loosely relative to the fork bolt, the door is free to vibrate slightly within the latch's engagement range, producing a metallic rattle from the door edge area. Repositioning or shimming the striker eliminates the rattle without replacing any components.
Yes. Most modern vehicles monitor door-ajar status directly through a contact switch integrated into the latch mechanism. A latch that doesn't fully seat registers as an open door in the body control module, which can trigger the alarm or prevent the security system from arming at all. This is a frequently overlooked cause of intermittent or persistent alarm activation.
The latch is the mechanical assembly that physically keeps the door closed — the fork bolt, detent lever, and ratchet spring. The actuator is a small electric motor that moves the latch's internal locking tab to prevent or allow the handle from releasing the fork bolt. Both components can fail independently. A door that won't stay closed has a failed latch. A door that closes but won't lock or unlock electrically has a failed actuator.
 |
 |
 |
 |

About Sarah Whitfield
Sarah Whitfield is a diagnostics and troubleshooting specialist who spent ten years as an ASE-certified technician before joining the editorial team. She specializes in OBD-II analysis, electrical gremlins, and the kind of intermittent problems that make most owners give up.
Get some FREE car parts & gear.. Or check out the latest free automotive manuals and build guides here.
Disable your ad blocker to unlock all the hidden deals. Hit the button below 🚗
| | | |