by Joshua Thomas
Have you ever pressed your horn in bumper-to-bumper traffic, only to be met with complete silence? A car horn not working strips away one of your most essential safety tools in an instant. Most drivers assume the entire horn unit has failed and brace for a costly repair — but the reality is far more manageable. In the vast majority of cases, the problem traces back to one of five specific components, and you can identify the culprit with a multimeter and basic hand tools in under an hour.
This guide covers every likely cause of a dead horn, a logical step-by-step diagnostic process, and a clear breakdown of when to handle the repair yourself versus when to hand it off to a professional. If you are already comfortable with basic automotive electrical work — such as knowing how to reconnect a car battery — the concepts here will feel immediately familiar. Read on to restore your horn to full operation.

Contents
A vehicle horn is not optional equipment. According to the National Highway Traffic Safety Administration (NHTSA), a functioning horn is a federally mandated safety device required on all passenger vehicles sold in the United States. In most states, a vehicle with an inoperative horn will fail a safety inspection outright.
Beyond legal compliance, the horn serves a communication role that no other component replicates. It alerts distracted pedestrians, warns cyclists of your approach, and signals other drivers in situations where a lane change or merge creates sudden danger. Drivers who treat a dead horn as a minor inconvenience are underestimating how quickly that gap in their safety toolkit becomes critical.
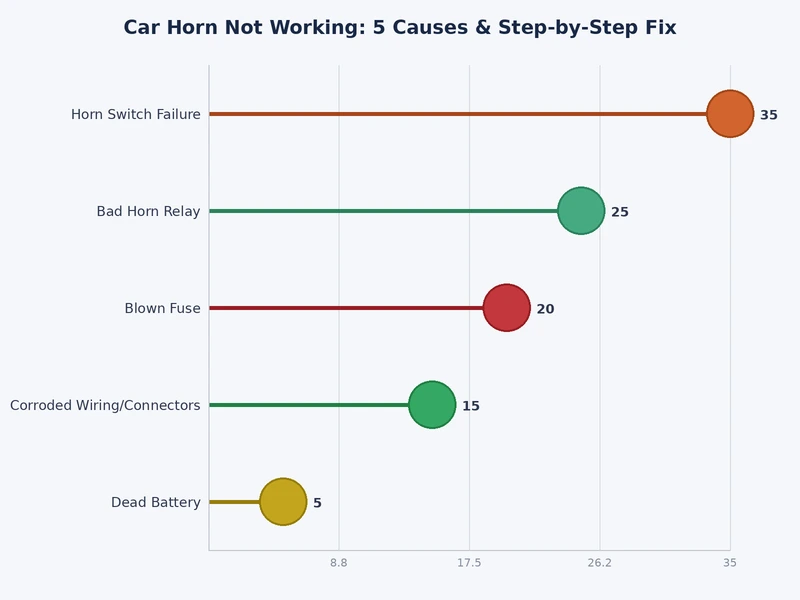
The horn circuit itself is deceptively simple. It consists of five components working in sequence: a power feed from the battery, a fuse, a relay, a switch embedded in the steering wheel, and the horn unit mounted at the front of the vehicle. When any link in that chain breaks, the horn falls silent. That simplicity is actually good news. It makes systematic diagnosis very achievable for any driver with basic mechanical confidence.
Safety Note: An inoperative horn may result in a failed vehicle inspection in most states. Address the problem before your next safety check — not after.
Electrical failures like a dead horn share structural similarities with other component failures on your vehicle. Just as flickering headlights often point to a loose ground or failing relay, the horn circuit responds to the same diagnostic logic: work through each component in order, eliminate possibilities systematically, and you will find the fault.
Before you disassemble anything, understanding what you are looking for will cut your diagnostic time significantly. Each of the five causes below produces recognizable symptoms. Learning those distinctions before you open the hood is time well spent.
The fuse is the first component to check and the most common cause of a dead horn. Horn fuses are typically rated between 10A and 20A and are located in the under-hood fuse box, the interior fuse panel, or both, depending on your vehicle. A blown fuse leaves no ambiguity — the horn produces zero sound, and the fuse element is visibly broken or charred when inspected directly.
One important rule: fuses blow for a reason. If a replacement fuse blows immediately upon pressing the horn, the circuit has a downstream short. Do not continue swapping fuses. Locate and repair the short before proceeding.
The horn relay acts as a high-current switch. When you press the horn button, a low-current signal from the steering wheel triggers the relay, which then completes the high-current circuit to the horn unit itself. A failed relay produces the same symptom as a blown fuse: complete silence. The relay is typically located in the under-hood fuse center and clearly labeled in your owner's manual.
Relays are inexpensive — usually $5 to $15 — and require no tools to swap. Many vehicles use the same relay across multiple accessories, so you can pull a matching relay from a non-critical slot to test the circuit without purchasing a part first.
The clock spring is a coiled electrical connector housed inside the steering column. It maintains continuous electrical contact between the steering wheel's horn switch and the vehicle's wiring harness, even as the wheel rotates through its full range of motion. When the clock spring fails — typically due to age, wear, or rough steering inputs — the horn switch loses its electrical path entirely.
A failing clock spring rarely goes silent without warning. Watch for these precursor symptoms:
If any of these accompany your dead horn, the clock spring is the primary suspect. Clock spring replacement typically costs $150 to $300 in parts and labor.
The horn unit itself — the physical disc or dual-tone assembly mounted behind the front grille or in the engine bay — can fail after years of exposure to moisture, road grime, and sustained vibration. A corroded or mechanically failed horn unit will not respond even when the rest of the circuit is intact. You can confirm this by bypassing the normal circuit and applying direct battery voltage to the horn unit's terminals. If it remains silent under direct power, the unit is dead and requires replacement.
Horn units typically cost $15 to $50 for a quality aftermarket replacement. Installation is straightforward and requires only a socket wrench and basic hand tools in most vehicles.
Damaged wiring or a corroded ground connection can interrupt the horn circuit just as effectively as any failed component. Ground connections are especially vulnerable in older vehicles and in regions where roads are treated with salt in winter. A compromised ground creates high circuit resistance, which may produce a weak, raspy horn before it stops working entirely — rather than an abrupt failure.
Inspect the wiring harness near the horn unit for chafing, pinched insulation, or melted sections. A multimeter set to continuity mode will identify any open circuits in the harness within minutes.
Work through these steps in order. Each step either resolves the problem or narrows the fault to the next component in the circuit. Do not skip ahead — the sequence is designed to save you time and money, not add to either.
Locate the horn fuse using your owner's manual. Remove it with a fuse puller or needle-nose pliers. Inspect the element visually — a blown fuse has a broken or melted bridge visible inside the transparent plastic housing. Confirm with a multimeter set to continuity: a good fuse produces a tone; a blown fuse produces nothing. Replace with a fuse of the identical amperage rating. If the new fuse blows the moment you press the horn, skip to Step 5 and look for a short circuit in the wiring.
Locate the horn relay in the fuse center and identify it using your owner's manual or the diagram printed on the fuse box cover. Swap it with an identical relay from another non-critical slot — the fuel pump or headlight relay is often the same part number. Press the horn. If it now functions, replace the relay. If swapping makes no difference, move to the next step.
Pro Tip: Most vehicles use the same relay type across multiple circuits. Swapping before purchasing lets you confirm the fault for free, without a parts-store trip.
Locate the horn unit — typically behind the front grille, near the radiator, or inside the wheel well. Disconnect the horn's wiring connector. Using two short jumper wires, connect the horn terminals directly to the positive and negative battery terminals. A functional horn will sound immediately. A horn that remains silent under direct power is faulty and must be replaced.
If the horn sounds when powered directly, the problem lies upstream in the circuit — in the relay, the clock spring, or the wiring between the fuse box and the horn. Continue to the next step.
Testing the clock spring requires accessing the steering column. Disconnect the battery and wait at least 10 minutes before touching any airbag-related components — this allows the airbag capacitors to discharge fully. Remove the airbag module following the procedure in your vehicle's service manual. Use a multimeter to test continuity across the clock spring connector terminals while a helper turns the steering wheel through its full range. Loss of continuity at any point in the rotation confirms a broken clock spring.
This step is where many DIY repairs appropriately become professional jobs. If you are not comfortable disabling the airbag system and working inside the steering column, stop here.
Trace the horn's wiring harness from the horn unit back toward the fuse box, inspecting for frayed insulation, pinch points where wires pass through body panels, and corrosion at connectors and terminal ends. Locate the horn's ground wire, which terminates at a ground bolt on the body or chassis near the horn unit. Clean corroded connections with a wire brush, apply dielectric grease to prevent future oxidation, and retest the horn after each individual repair. Isolating the fault to a single connection is faster than cleaning everything at once and retesting blindly.

Not every car horn repair belongs in a home driveway. The correct answer depends on which component has failed and your comfort level with the tools and systems involved. Be honest with yourself about both factors before you begin.
The following repairs are well within the reach of most vehicle owners with basic tools and a willingness to follow a process:
These four repairs require no specialized equipment, carry no safety risk when executed correctly, and can be completed in any driveway. Electrical failures like these — similar in structure to diagnosing a car battery that keeps dying — reward methodical thinking rather than expensive guesswork.
Two scenarios call for professional service without exception:
Warning: Never disable the airbag system without following your vehicle's exact service procedure. An accidental deployment can cause severe, permanent injury.
Understanding the cost and effort involved before you start allows you to make an informed decision about whether to proceed yourself or schedule professional service. The table below covers every repair scenario you are likely to encounter, from the simplest fuse swap to the most involved clock spring replacement.
| Cause | DIY Parts Cost | Shop Total Cost | Difficulty | Time Required |
|---|---|---|---|---|
| Blown Fuse | $1–$3 | $40–$60 (diagnostic) | Very Easy | 5–10 min |
| Faulty Relay | $5–$15 | $50–$90 | Very Easy | 10–15 min |
| Failed Horn Unit | $15–$50 | $80–$150 | Easy | 30–45 min |
| Wiring / Ground Fault | $5–$30 | $100–$250 | Moderate | 1–3 hours |
| Broken Clock Spring | $50–$150 | $200–$400 | Difficult | 2–4 hours |
The pattern here is unmistakable: fuse and relay failures are the cheapest and fastest repairs in all of automotive maintenance. Address those first — every time. Paying a shop $80 to replace a fuse you could have swapped in five minutes is money spent on avoidable labor. Reserve professional service for the jobs that genuinely require it.
The same cost hierarchy applies to comparable electrical system failures. The diagnostic process for windshield wipers that stop working follows identical logic: simple components first, complex assemblies last, and no parts purchased until the fault is confirmed.
Several common errors transform a straightforward horn repair into an expensive, time-consuming ordeal. Each of the following mistakes is completely avoidable with the right approach.
The single most costly mistake is purchasing a replacement horn unit before verifying the fuse. A $45 horn will not fix a problem caused by a $2 fuse. The fuse check takes less than ten minutes and costs nothing if you already own a multimeter. Make it non-negotiable — the first step, every time, on every electrical failure.
Equally important: when a new fuse blows immediately upon pressing the horn, do not install a higher-amperage fuse to compensate. That approach bypasses the protection the fuse provides and risks igniting a wiring fire inside your vehicle. Find and eliminate the short circuit. There is no acceptable shortcut.
A clock spring rarely fails without advance warning. An airbag warning light, unresponsive cruise control, intermittent audio controls, or a faint crackling sound from the steering column are all early indicators of clock spring degradation. Drivers who dismiss these symptoms often discover — while diagnosing a dead horn — that they also need airbag system recalibration after the clock spring replacement, adding significant cost to what could have been a single, earlier repair visit.
Treat those early symptoms as alerts, not nuisances. The clock spring is communicating its decline well before complete failure. Responding early is always cheaper than responding late.
A corroded or loose ground connection is one of the most consistently overlooked causes of electrical system problems, including a weak or intermittent horn. Drivers who replace fuses, relays, and even the horn unit without inspecting the ground wire often cycle through expensive parts without resolving the actual fault. The fix — cleaning a corroded ground bolt — takes five minutes and costs nothing.
Clean every ground connection in the horn circuit before drawing conclusions about component failure. Eliminating the ground as a variable is the fastest way to narrow your diagnosis and avoid unnecessary parts purchases.
In most U.S. states, a functioning horn is required to pass a vehicle safety inspection, and driving without one places you in violation of vehicle equipment laws. Beyond the legal dimension, operating a vehicle without a horn removes a critical safety tool from your arsenal. Address the repair promptly rather than deferring it.
Remove the fuse from the fuse box and inspect the element visible inside the transparent housing. A blown fuse has a visibly broken or melted bridge connecting the two terminal ends. Confirm the diagnosis with a multimeter set to continuity mode — a functional fuse produces a tone; a blown fuse produces no reading at all.
A horn that activates without any input from the driver typically indicates a stuck horn button, a short circuit in the steering wheel wiring, or a failing clock spring that is creating an unintended electrical connection. Disconnect the horn relay immediately to silence it without disabling other systems, then diagnose the circuit systematically before reconnecting it.
Most factory horn units are designed to last the life of the vehicle — often 150,000 miles or more — under normal operating conditions. Sustained exposure to heavy moisture, road salt, and physical vibration accelerates corrosion and mechanical wear. A horn that begins producing a weak or raspy tone before going silent entirely is usually nearing the end of its service life.
Clock spring failures are generally covered under a new vehicle's bumper-to-bumper warranty if they occur within the coverage period, typically three years or 36,000 miles. On older vehicles, coverage depends on any extended warranty in effect. Some manufacturers have issued technical service bulletins for clock spring failures in specific models — search your VIN through the NHTSA recall database to check for open bulletins on your vehicle.
A failed relay does not typically cause collateral damage to other circuits. However, if you borrow a working relay from another slot to test the horn circuit and that relay turns out to be faulty as well, you may create a secondary problem. Always replace a confirmed bad relay with a new part rather than moving it to another circuit slot.
Fuse and relay replacements at a shop typically cost $40 to $90, with the majority of that reflecting diagnostic labor rather than parts. Horn unit replacement runs $80 to $150 depending on the vehicle. Clock spring replacement is the most expensive scenario, typically ranging from $200 to $400 in total cost — a figure that rises further if airbag system recalibration is required after the repair.
 |
 |
 |
 |
About Joshua Thomas
Joshua Thomas holds a Bachelor of Science in Mechanical Engineering from San Diego State University and has spent years applying that technical foundation to hands-on automotive work — from routine maintenance to full mechanical repairs. He founded CarCareTotal in 2017 to give car owners the kind of clear, practical guidance that helps them understand what is happening under the hood and make smarter decisions about upkeep and repairs. At CarCareTotal, he oversees editorial direction and covers automotive fundamentals, maintenance guides, and troubleshooting resources for everyday drivers.
Get some FREE car parts & gear.. Or check out the latest free automotive manuals and build guides here.
Disable your ad blocker to unlock all the hidden deals. Hit the button below 🚗
| | | |