by Sarah Whitfield
A car radio not working is almost always caused by a blown fuse, a loose wiring connection, or a failed head unit (the main stereo module). Most cases can be diagnosed and fixed at home in under an hour.
Radio failures tend to appear without warning. One drive everything works fine; the next, complete silence. The stereo shares power and ground circuits with other accessories, so a fault in one area can take down the whole unit. It's a similar pattern to a remote start not working — both issues often trace back to the same shared electrical circuit.
This guide covers the six most common causes of a car radio not working, how to test for each one, and the steps to fix the problem. For other electrical and system failures, the troubleshooting section offers a broader reference.
Contents
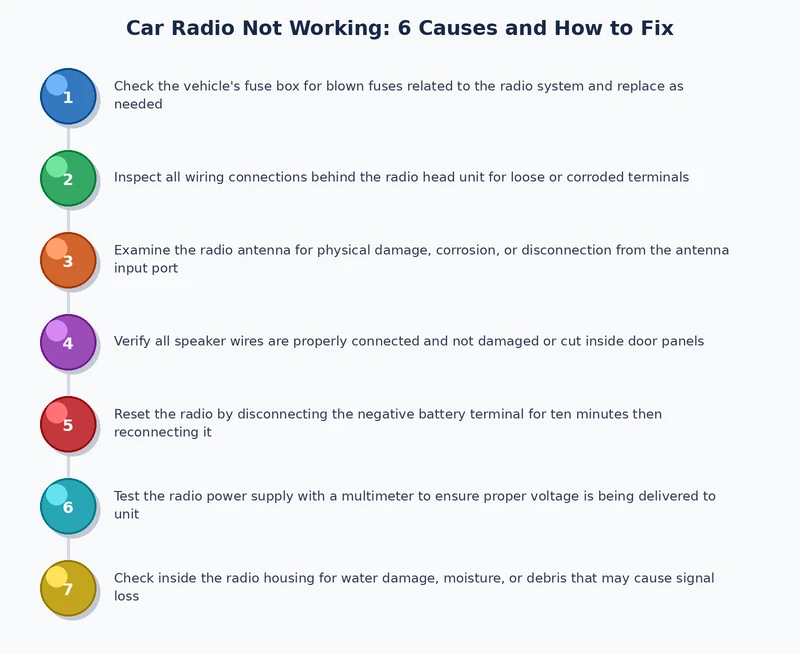
Most car radio problems fall into one of six well-known categories. Identifying the right cause before swapping parts saves time and avoids unnecessary expenses.
The radio fuse protects the circuit from power surges. When it blows, the radio goes completely dead — no display, no sound. This is the most common cause and the easiest to fix. A replacement fuse costs less than a dollar.
Wiring behind the dashboard loosens over time, especially after rough roads or a previous DIY installation. Corroded connectors block the electrical signal just as effectively as a cut wire. The result is an intermittent radio that cuts in and out — or stops working entirely.
Every car radio needs a solid ground connection to complete the circuit. A loose or corroded ground wire causes static, distortion, or a unit that won't power on at all. A weak battery stresses the entire electrical system and accelerates ground problems — which is why understanding how to extend car battery life matters for long-term radio reliability too.
The head unit can fail from age, moisture exposure, or a power surge. When internal components go bad, no amount of fuse-replacing or rewiring brings the radio back. Common symptoms include random resets, a frozen display, or total silence despite confirmed power at the wiring connector.
A broken or disconnected antenna only affects FM/AM reception — not Bluetooth, USB, or auxiliary input. If the radio powers on but picks up only static on broadcast stations, the antenna cable or the external antenna mast is the likely culprit. Everything else on the radio works normally.
Many factory radios include a security code system. If the battery is disconnected or replaced, the radio locks itself and shows a "CODE" prompt. Without the correct entry, the unit stays silent. Problems with a key fob not working at the same time suggest the car's anti-theft system may have been more broadly triggered.
A methodical approach to diagnosis avoids replacing parts that aren't broken. Skipping steps leads to wasted money and repeated trips to the parts store.
Open the fuse box — typically under the driver's-side dashboard or in the engine bay. Locate the fuse labeled "radio," "audio," or "ACC" using the diagram on the fuse box lid or in the owner's manual. Pull it out with a fuse puller or needle-nose pliers. A blown fuse shows a broken wire or a darkened element inside the plastic body.
Always replace a blown fuse with the exact same amperage rating — using a higher-rated fuse can damage wiring or start an electrical fire.
If the fuse is intact, use a multimeter (a device that measures voltage and resistance) to check the wiring connector at the back of the radio. The unit should receive 12 volts on both the constant power wire and the switched ignition wire. The ground wire should read near 0 ohms resistance. Any reading outside those ranges points to a wiring or connection issue.
When power and ground check out, the head unit itself is the next suspect. Disconnect it from the wiring harness and inspect the connector pins for corrosion or damage. A local car audio shop can bench-test the unit in minutes using a dedicated power supply — a quick way to confirm whether the unit is dead before spending money on a replacement.
The right tools make the difference between a clean repair and a cracked dashboard trim panel. Most of these items cost under $30 and are available at any auto parts store.
| Tool | Purpose | Estimated Cost |
|---|---|---|
| Multimeter | Test voltage, continuity, and resistance in wiring | $15–$40 |
| Fuse puller or needle-nose pliers | Remove fuses safely without damaging fuse box tabs | $5–$10 |
| Panel removal tool set | Pry dashboard trim panels without cracking plastic | $10–$20 |
| DIN radio removal keys | Release single-DIN or double-DIN factory head units | $5–$15 |
| Wire crimping tool | Repair or splice damaged wiring connections cleanly | $10–$25 |
| Electrical contact cleaner | Dissolve corrosion from connectors and terminals | $8–$15 |
Most jobs don't require all six tools at once. A multimeter and a fuse puller handle the majority of diagnostic work. Panel removal tools and DIN keys only become necessary when pulling the head unit out of the dash for inspection or replacement.
Electrical contact cleaner is underrated — spraying it on corroded connectors often restores a dead radio without any parts replacement at all.
This is the fastest fix. The steps take less than five minutes:
If the new fuse blows immediately, there is a short circuit somewhere in the wiring. Stop replacing fuses and find the short first — repeated fuse failures always mean a deeper problem.
Pull the head unit out using the correct removal tools. Inspect every connector behind the radio for bent pins, loose plugs, or white or green corrosion deposits. Spray each connector with electrical contact cleaner and allow it to dry fully. Re-seat all connectors firmly and reinstall the unit. Intermittent radio problems often disappear after this step alone — without touching a single part.
The ground wire (usually black) runs from the head unit to a bare metal point on the car's chassis. Remove it, clean the contact surface with fine sandpaper, and reattach it tightly. Confirm success with a multimeter reading of near-zero ohms. A clean, tight ground connection eliminates static, distortion, and unexplained shutoffs in one step.
When power, ground, and all wiring are confirmed good, the head unit itself has failed. Options include:
Swapping a head unit involves pulling the same dashboard panels needed for other electronics repairs. The process is similar to what's involved when a backup camera is not working and requires access to the rear wiring harness through the same dash assembly.
Start by checking the antenna cable connection at the back of the radio — it's a round push-in connector that can loosen over time. If that's secure, inspect the external antenna mast or shark-fin housing for damage. A corroded or broken mast is inexpensive to replace. Universal aftermarket antennas fit most vehicles and restore full reception quickly.
Locate the radio code in the owner's manual, on a card inside the glove box, or on a sticker attached to the unit itself. If the code is lost, a dealership can look it up using the vehicle identification number (VIN). Enter the code using the radio's preset buttons as directed in the manual. The lockout clears immediately once the correct code is accepted.
Some car radio repairs are straightforward home jobs. Others carry real risk of making the problem worse — or voiding a warranty.
Good candidates for DIY:
Better handled by a professional:
Newer vehicles increasingly bundle the radio into a central infotainment module. A failure there can affect heated seats, climate controls, and other connected systems simultaneously. A shop with a factory-level diagnostic scanner isolates the fault without guesswork — and sometimes a simple software update is all it takes.
According to Wikipedia's overview of car audio systems, modern head units have become deeply integrated with vehicle electronics — which is exactly why professional diagnosis matters more on late-model cars than it did on older standalone stereo setups.
On factory-integrated infotainment systems, a dealership software update sometimes fixes a car radio not working — no hardware swap required.
The circumstances surrounding a radio failure often point directly to the cause. Context narrows the diagnosis before a single tool is picked up.
This is almost always an anti-theft lockout. The unit lost power during the swap and locked as a security measure. No parts are needed — just the correct unlock code. Enter it using the preset buttons and the radio returns to normal.
Vibration can shake loose wiring connectors behind the dashboard. Pulling the unit and reseating all connectors is the first step. A momentary short during the vibration may also have blown the radio fuse — check that next if reseating the connectors doesn't help.
Intermittent failures almost always point to a loose ground wire, a corroded connector, or a head unit with worn internal components. The symptom tends to worsen over time. Catching it early makes diagnosis far simpler than waiting until the unit fails completely.
When other accessories function normally, the fault is isolated to the radio circuit. Start with the radio-specific fuse. If the fuse is good, move to the wiring harness and then the head unit. A backup camera on the same circuit that is also not working may share the same fuse — a useful clue during diagnosis.
A unit that shows a display but plays nothing usually points to a failed amplifier section, a disconnected speaker wire, or a software glitch. Start with a factory reset through the radio's menu. If sound doesn't return, check the speaker wiring at the head unit connector for loose or corroded terminals.
The most common reasons are a blown fuse, a loose wiring connection, or an anti-theft lockout triggered by a battery disconnect. Checking the fuse first takes under five minutes and resolves a large share of cases without any additional work.
Open the fuse box — typically located under the driver's-side dashboard — and check the diagram printed on the fuse box lid or in the owner's manual. Look for labels like "radio," "audio," or "ACC." The diagram shows the exact position and amperage rating of the correct fuse.
Yes. A severely discharged battery may not supply enough voltage to run the radio. A battery replacement or disconnect can also trigger the anti-theft lockout, requiring the radio code to be entered again. Keeping the battery healthy reduces this risk — this guide on extending car battery life covers practical maintenance steps.
The radio has entered anti-theft lockout mode after losing power. This happens most often after a battery replacement. The correct unlock code must be entered using the preset buttons as described in the owner's manual. The code can be found in the manual, on a card in the glove box, or through the vehicle's dealership using the VIN.
For simple issues like a blown fuse or a loose wire, repair is almost always worth it. For a completely failed head unit on an older vehicle, aftermarket replacements are often cheaper than OEM repairs and add features like Bluetooth, USB, and Apple CarPlay. On newer vehicles with integrated infotainment, professional diagnosis is the smarter starting point.
No. A broken or disconnected antenna only affects FM/AM broadcast reception — it won't prevent the unit from powering on or playing audio through Bluetooth, USB, or auxiliary inputs. If the radio is completely dead with no display, the antenna is not the cause. The fault lies in the power circuit, fuse, or head unit.
Most of the time, a car radio not working comes down to a $1 fuse or a loose connector — the fix is simpler than the silence suggests.
 |
 |
 |
 |

About Sarah Whitfield
Sarah Whitfield is a diagnostics and troubleshooting specialist who spent ten years as an ASE-certified technician before joining the editorial team. She specializes in OBD-II analysis, electrical gremlins, and the kind of intermittent problems that make most owners give up.
Get some FREE car parts & gear.. Or check out the latest free automotive manuals and build guides here.
Disable your ad blocker to unlock all the hidden deals. Hit the button below 🚗
| | | |