by Sarah Whitfield
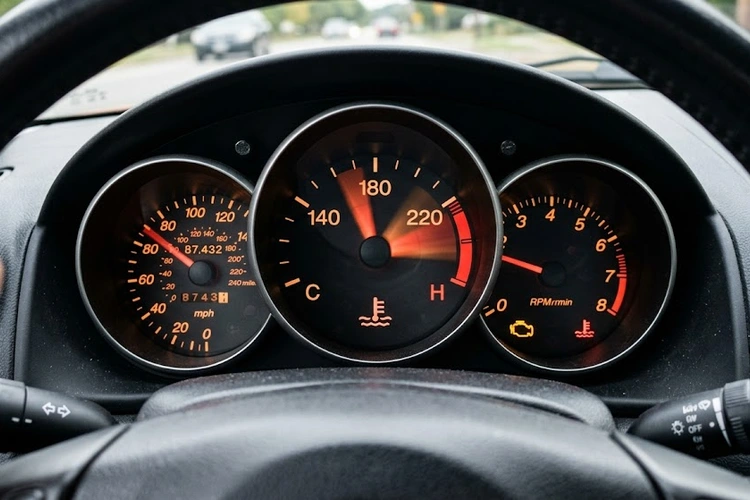
A temperature gauge fluctuating is almost always a cooling system problem. The needle moving erratically signals disrupted coolant flow, a faulty sensor, or heat building in places it shouldn't. Most drivers wait until the gauge hits red — that delay often turns a $50 fix into a $2,000 repair.
This guide covers every major cause, from low coolant to a failing head gasket, with a systematic diagnostic approach and repair cost estimates for each. Drivers looking for a broader reference on gauge behavior can start with the temperature gauge fluctuating category page for additional context by vehicle type.
Contents
Not every erratic needle points to catastrophic failure. Some causes cost under $30 to fix. Others require immediate engine-off action. Knowing the difference is the first diagnostic step.
Low coolant is the most common cause of gauge fluctuation. When coolant drops, air pockets enter the system. The coolant temperature sensor reads air instead of liquid — producing false, erratic readings.
Drivers who notice the low coolant light on alongside gauge movement should treat both as a single, urgent cooling system event — not two separate issues.
The thermostat regulates coolant flow between the engine block and the radiator. A thermostat that sticks or fails intermittently is one of the most direct causes of a fluctuating temperature gauge.
Thermostat replacement is straightforward on most engines. The part costs $10–$50; labor typically runs $100–$200. It is the first component to replace when low coolant has been ruled out.
The engine coolant temperature sensor (ECT/CTS) converts coolant temperature into a voltage signal read by the ECU and the instrument cluster. A failing sensor generates incorrect voltage — the gauge needle swings without any actual thermal change in the engine.
The water pump keeps coolant moving through the entire system. A worn impeller or failing bearing reduces flow rate. Hot spots develop in sections of the engine while the sensor area stays cooler — the gauge fluctuates as temperature gradients shift.
A blown or seeping head gasket allows combustion gases to enter the coolant passages. These gases displace liquid coolant and create large air pockets — temperature readings become unpredictable and may climb rapidly with no warning.
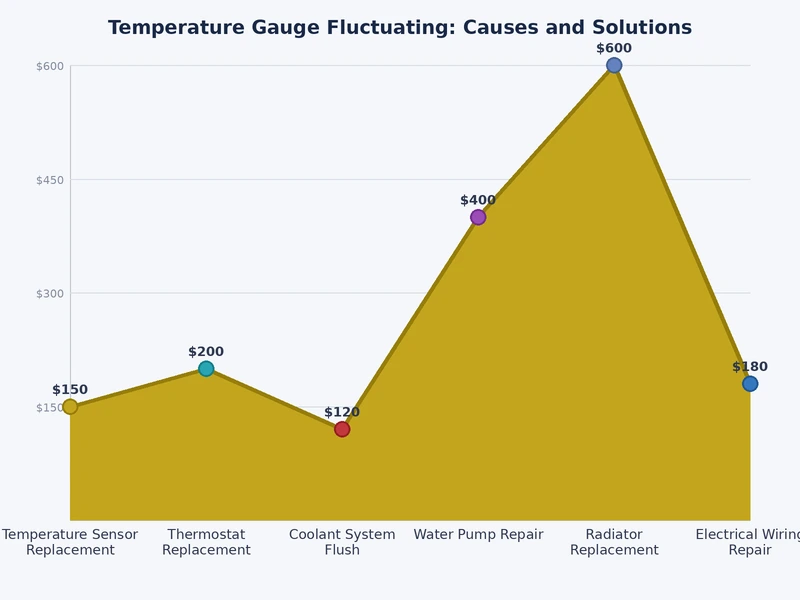
| Cause | Severity | DIY Feasible? | Estimated Cost (Parts + Labor) |
|---|---|---|---|
| Low coolant | Low–Moderate | Yes | $10–$30 |
| Faulty thermostat | Moderate | Yes (most engines) | $110–$250 |
| Bad coolant temp sensor | Low | Yes | $50–$150 |
| Radiator blockage | Moderate–High | Partial | $100–$900 |
| Water pump failure | High | Difficult | $300–$750 |
| Head gasket leak | Critical | No | $1,500–$3,500+ |
A structured diagnostic process avoids throwing parts at the problem. The right sequence moves from free visual checks to low-cost tool-based tests before any money changes hands.
Begin with a cold-engine inspection. Many causes reveal themselves without tools.
When coolant level keeps dropping with no external puddles under the car, the leak is internal. At that point, a combustion leak test or pressure test becomes necessary before any further speculation.
A cooling system pressure tester identifies slow leaks and internal failures. Most auto parts retailers loan the tool at no cost.
Pair the pressure test with an OBD-II scan. Codes P0115–P0119 point to CTS circuit faults. P0217 flags engine overtemperature events. P0128 suggests the thermostat is staying open too long.
Once the root cause is confirmed, the repair path becomes clear. Preventing recurrence requires following a cooling system maintenance schedule — most failures are predictable and avoidable.
Neglecting the cooling system accelerates wear on every component listed above. A consistent service interval prevents most fluctuating temperature gauge events from occurring.
Reactive repairs cost more than proactive monitoring. Experienced technicians use specific tools and habits to catch cooling system degradation before it becomes a temperature gauge fluctuating emergency.
A mildly fluctuating gauge during warmup is often harmless — thermostats open and close during initial heat cycling. These patterns require immediate engine shutdown:
Running an overheated engine for more than 30–60 seconds risks warped cylinder heads and irreversible block damage. Pulling over immediately and allowing the engine to cool before inspection is always the correct response.
Factory dashboard gauges are often imprecise — they display a narrow range around "normal" and compress the upper and lower extremes. OBD-II Bluetooth adapters paired with apps like Torque Pro or Car Scanner ELM OBD2 bypass the factory gauge and display actual ECU coolant temperature data.
Vehicles exhibiting unusual performance changes alongside temperature issues — such as a car that won't accelerate past a certain speed — may have entered limp mode. The ECU activates engine protection protocols when overtemperature conditions are detected, deliberately limiting power output to prevent internal damage.
A temperature gauge fluctuating is the cooling system sending an early warning. Drivers who check coolant level, test the thermostat, and scan for fault codes before the problem escalates resolve most causes for under $200. Those who ignore the needle until the engine overheats routinely face repair bills ten times that amount. The immediate next step is straightforward: pop the hood, inspect the coolant reservoir cold, run an OBD-II scan, and rule out the simple causes before booking an expensive shop visit.
 |
 |
 |
 |

About Sarah Whitfield
Sarah Whitfield is a diagnostics and troubleshooting specialist who spent ten years as an ASE-certified technician before joining the editorial team. She specializes in OBD-II analysis, electrical gremlins, and the kind of intermittent problems that make most owners give up.
Get some FREE car parts & gear.. Or check out the latest free automotive manuals and build guides here.
Disable your ad blocker to unlock all the hidden deals. Hit the button below 🚗
| | | |