by Joshua Thomas
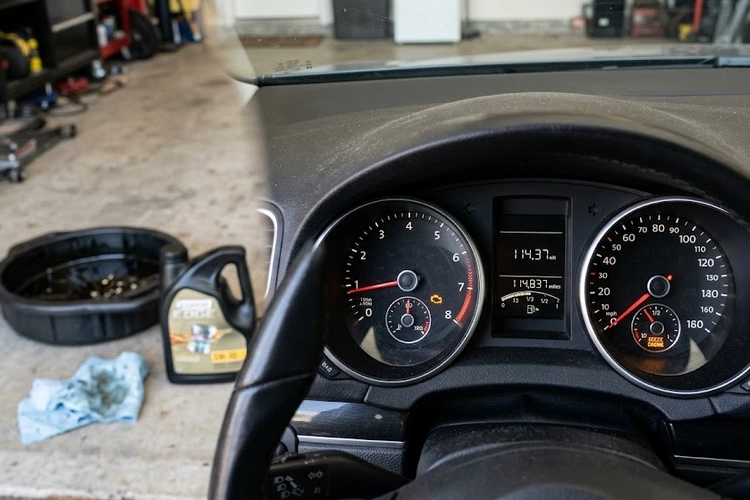
Did your check engine light come on right after an oil change? You are not alone — and the fix is often simpler than you expect. The check engine light after oil change scenario is one of the most common post-service surprises drivers report. In most cases, a technician left the oil cap loose, disturbed a sensor connector, or used the wrong oil viscosity. In other cases, a pre-existing issue surfaced at the same moment. Either way, ignoring that amber light is not safe. This guide covers every likely cause, how to read the fault code, and when to get professional help. For related repair guides, start with the troubleshooting section.
Contents
An oil change involves removing the drain plug, replacing the filter, and accessing the engine bay. Each step creates an opportunity for an error that trips a fault code. Here are the four most common culprits.
This is the leading cause by a wide margin. A loose or missing oil filler cap disrupts crankcase pressure. The engine control module (ECM) interprets the pressure drop as an evaporative emission leak and logs a fault code. The fix takes ten seconds.
Overfilling is a documented shop error. Too much oil aerates in the crankcase, forming foam. Foam does not lubricate. The ECM picks up abnormal readings across multiple sensors simultaneously. Underfilling is equally problematic — low oil pressure triggers a separate warning that can appear alongside the check engine light.
Knowing how oil degrades over time helps you avoid future fill errors. See how long does engine oil last in a car for a full breakdown.
Technicians working quickly can knock loose a wiring harness or vacuum line. Even a partially disconnected connector generates fault codes. Common components disturbed during an oil change include:
A visual sweep of all connectors in the engine bay takes under five minutes. Check for any harness that is obviously unseated or hanging loose.
Modern engines with variable valve timing (VVT) systems depend on precise oil viscosity to control cam phasing. Installing 5W-30 in an engine that requires 0W-20 alters hydraulic pressure in the VVT actuators. Timing faults and misfires follow quickly.
Check the oil filler cap or your owner's manual for the exact grade specification. If you are unsure whether synthetic or conventional oil is right for your engine, review synthetic blend vs. full synthetic oil before your next change.
Work through this process in order. Do not clear codes before reading them — erasing codes destroys the freeze frame data you need for accurate diagnosis.
Every vehicle sold in the United States since 1996 supports the OBD-II diagnostic protocol. According to Wikipedia's OBD-II overview, any compatible scanner can retrieve stored fault codes from the ECM in under two minutes. Basic code readers start at $20.
Common fault codes after an oil change include P0300 (random misfire), P0171 and P0174 (lean fuel condition from a disturbed vacuum hose), P052B (cold start oil pressure), and evaporative emission codes from a loose oil cap.
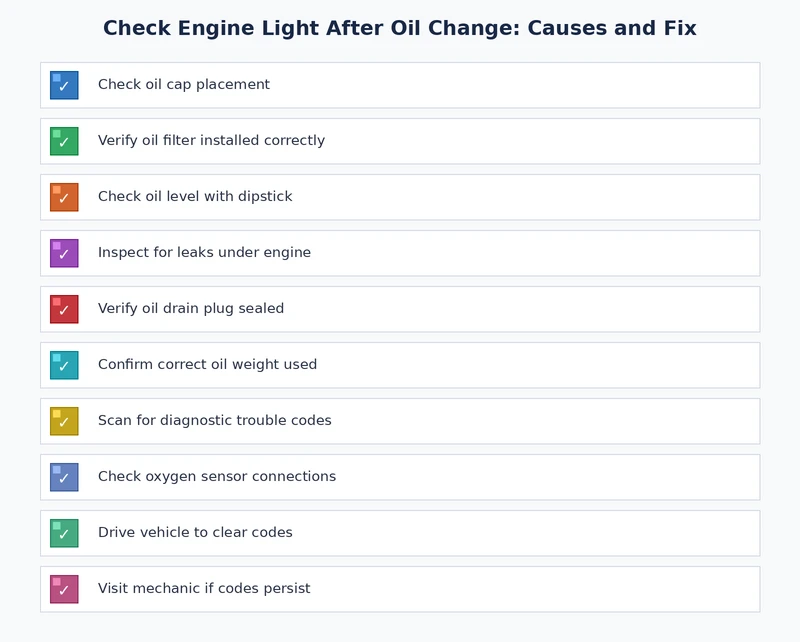
Before visiting a shop, run through this checklist:
Pro tip: If the check engine light appears within 24 hours of an oil change, return to the shop immediately. Most reputable shops will diagnose and correct their own errors at no charge.
The behavior of the check engine light tells you how serious the situation is. Read the signals correctly before deciding whether to drive on.
A steady, non-flashing light means the ECM detected a fault but the condition is not immediately catastrophic. You can typically drive short distances to a shop or home.
If the car also stalls or hesitates alongside the check engine light, that changes the picture. Read about engine stalling when accelerating to understand what a concurrent stalling symptom indicates.
A flashing check engine light signals an active misfire severe enough to damage the catalytic converter. This is a stop-now situation — not a drive-to-the-shop situation.
A flashing light combined with noticeable power loss under load is a serious red flag. See car loses power going uphill for overlapping symptoms and what they signal.
Both approaches carry specific failure points that can trigger a check engine light. Knowing the common errors for each narrows your diagnosis faster.
| Risk Factor | DIY | Professional Shop |
|---|---|---|
| Wrong oil grade or viscosity | Moderate | Low–Moderate |
| Loose or missing oil cap | Moderate | Moderate |
| Drain plug damage | Moderate (overtightening) | Low–Moderate (cross-threading) |
| Sensor connector disturbance | Low | Moderate |
| Oil filter seating error | Moderate | Low |
| Overfill or underfill | Low (you control the volume) | Moderate |
Most post-oil change check engine light causes are inexpensive to correct. A handful are not. The table below covers realistic cost ranges for each common scenario.
| Cause | DIY Cost | Shop Cost (Parts + Labor) |
|---|---|---|
| Retighten loose oil cap | $0 | $0 |
| Replace oil cap | $5–$15 | $15–$40 |
| Drain plug replacement | $5–$20 | $30–$80 |
| Oil filter replacement | $8–$25 | $25–$60 |
| Drain excess oil (overfill correction) | $0 | $20–$50 |
| Oxygen sensor replacement | $20–$80 | $150–$300 |
| Oil pressure sensor replacement | $15–$60 | $100–$200 |
| Oil pan gasket replacement | $30–$80 | $200–$500 |
A check engine light combined with visible oil on the garage floor points to an active leak. The two primary suspects after a service are the drain plug and the oil filter housing. If the leak originates from the rear of the engine rather than the bottom, a rear main seal may be the culprit — see rear main seal leak symptoms and replacement cost for a detailed diagnosis guide.
Blue-gray exhaust smoke after an oil change suggests oil is burning in the combustion chamber. An overfill can push oil past the PCV valve and into the intake manifold. To separate normal condensation from a real exhaust problem, see exhaust pipe dripping water.
You do not need a dealership to handle most post-oil change check engine lights. A small toolkit covers the majority of diagnosis scenarios.
An OBD-II scanner is the single most valuable tool a car owner can keep in the garage. Prices have dropped significantly. Options range from $15 Bluetooth adapters to $300 professional units.
If the stored code points to a catalytic converter, variable valve timing actuator, or anything beyond a sensor reset, a professional diagnosis is the appropriate next step. Always document what the codes are before erasing them from the ECM.
Yes. An oil change can indirectly trigger the check engine light if the oil cap is left loose, the oil level is incorrect, the wrong viscosity is used, or a sensor connector is disturbed during service. All of these are fixable without major repairs in most cases.
Read the OBD-II fault code first. Codes tied to evaporative emissions, oil pressure, lean fuel conditions from a dislodged vacuum hose, or cold start oil pressure are strong indicators the oil change is the source. Codes involving spark plugs, transmission, or ABS point to a pre-existing, unrelated issue.
Often yes. After correcting the fault, the ECM typically clears a minor code within one to three drive cycles. If the light is still on after several trips, use an OBD-II scanner to manually clear the code and confirm the fault does not return.
It depends on the light. A steady, non-flashing light means you can generally drive cautiously to a shop for diagnosis. A flashing check engine light means stop immediately — an active misfire is damaging the catalytic converter with every mile you drive.
Yes. Excess oil aerates into foam inside the crankcase. Foamy oil loses its lubricating properties. The resulting pressure changes and erratic sensor readings can trigger multiple fault codes at once, including codes for misfires and fuel system lean or rich conditions.
The most frequently reported post-oil change codes include P0300 (random or multiple cylinder misfire), P0171 and P0174 (fuel system lean — often from a disturbed vacuum hose), P052B (cold start oil pressure performance), and evaporative emission system codes from a loose or missing oil cap.
Start with the basics yourself — check the oil cap, verify the oil level, and scan the engine bay for obvious disconnected connectors. If you find the cause, correct it and monitor the light. If it is unclear or persists after your fixes, return to the shop. Most reputable shops will diagnose their own service errors at no charge.
Yes, particularly on engines with variable valve timing systems. VVT actuators rely on precise hydraulic pressure regulated by oil viscosity. Using a grade heavier than specified can restrict actuator movement, delay cam phasing, and generate timing-related fault codes that mirror misfire symptoms.
 |
 |
 |
 |
About Joshua Thomas
Joshua Thomas just simply loves cars and willing to work on them whenever there's chance... sometimes for free.
He started CarCareTotal back in 2017 from the advices of total strangers who witnessed his amazing skills in car repairs here and there.
His goal with this creation is to help car owners better learn how to maintain and repair their cars; as such, the site would cover alot of areas: troubleshooting, product recommendations, tips & tricks.
Joshua received Bachelor of Science in Mechanical Engineering at San Diego State University.
Get some FREE car parts & gear.. Or check out the latest free automotive manuals and build guides here.
Disable your ad blocker to unlock all the hidden deals. Hit the button below 🚗
| | | |