by Joshua Thomas
Dashboard lights flickering is almost always a sign of an unstable voltage supply — most commonly traced to a weak battery, a failing alternator, or a compromised ground connection. Identifying the specific cause early prevents a minor electrical issue from escalating into a substantially more costly repair.
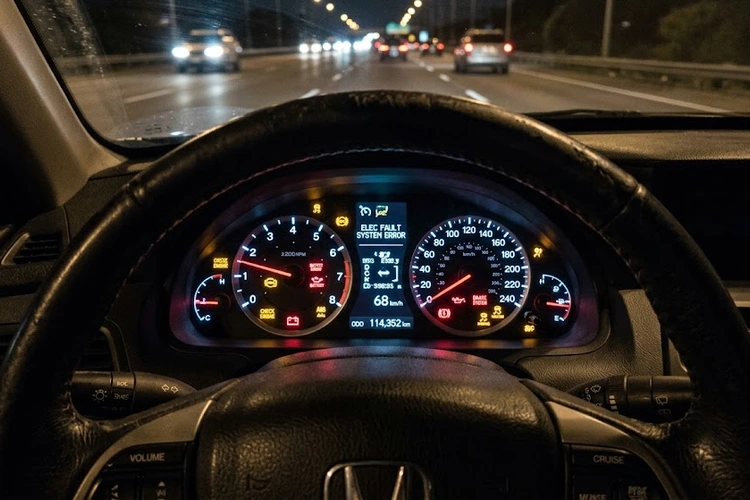
When your instrument cluster begins to flash, dim, or illuminate erratically, the vehicle is signaling that something in its electrical circuit is not operating within normal parameters. The timing and conditions under which dashboard lights flickering occurs — whether at startup, at idle, or while driving — provide critical diagnostic clues. This guide examines seven root causes and presents a structured approach to diagnosing each one. If your vehicle is also displaying an illuminated traction control light at the same time, a shared electrical fault is frequently the common denominator.
Contents
Your vehicle’s instrument cluster requires a steady voltage supply — typically between 13.5 and 14.5 volts when the engine is running — to operate reliably. When voltage drops below or rises above this window, even momentarily, the cluster may respond with flickering, sudden dimming, or the simultaneous brief illumination of multiple warning indicators. The automotive alternator maintains this voltage while the engine turns; the battery supports electrical loads during startup and at moments of peak demand when alternator output alone is insufficient.
A voltage sag lasting less than one second can trigger dashboard lights flickering across the entire cluster at once. That simultaneous behavior — every indicator affected together — is a key diagnostic signal. It points toward a system-wide supply problem rather than a fault within a single warning light circuit, and it should direct your attention toward the battery, alternator, and ground system before anything else.
Timing and context narrow the field of probable causes considerably. Flickering that appears only during cold starts suggests a battery struggling under increased load in low temperatures. Flickering that is most pronounced at idle but diminishes as engine RPM rises points toward insufficient alternator output at low speeds. Flickering that surfaces intermittently while driving — especially when the vehicle moves over rough terrain — may indicate a loose connection or a wiring harness fault responding to vibration. Noting these patterns before opening the hood saves diagnostic time and reduces the risk of unnecessary parts replacement.
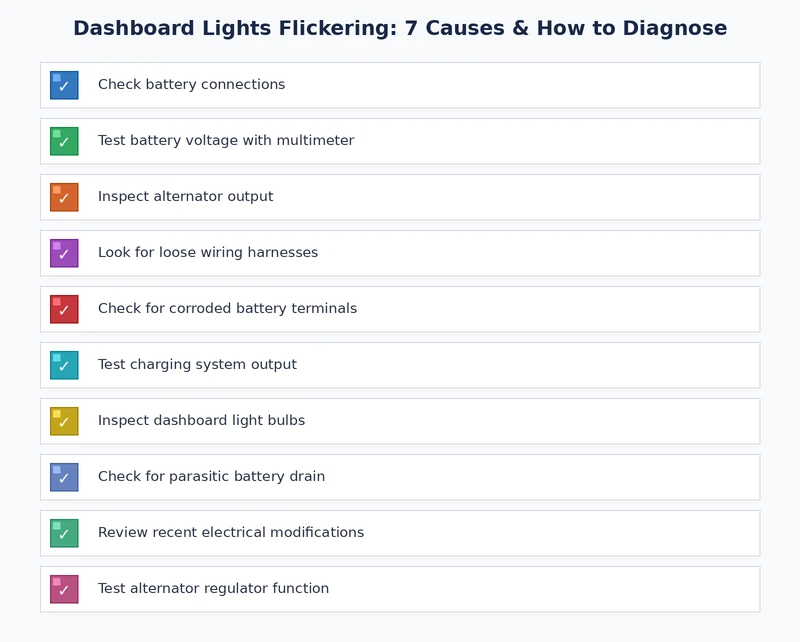
The table below summarizes all seven causes of dashboard lights flickering alongside their primary indicators and general diagnostic accessibility for a home mechanic.
| # | Cause | Primary Indicator | DIY Diagnosable? |
|---|---|---|---|
| 1 | Weak or failing battery | Flickering at cold start; slow cranking | Yes — multimeter or load tester |
| 2 | Failing alternator | Flickering at idle; battery warning light | Yes — multimeter at battery terminals |
| 3 | Loose or corroded battery connections | Flickering under accessory load; visible corrosion | Yes — visual and manual inspection |
| 4 | Faulty ground cable | Erratic gauges; multiple simultaneous faults | Yes — visual inspection at both ends |
| 5 | Body control module malfunction | Stored fault codes; no voltage abnormalities found | Scan tool required |
| 6 | Damaged wiring harness | Flickering over bumps; intermittent and unpredictable | Difficult — requires harness trace |
| 7 | Failing instrument cluster | Flickering despite stable supply voltage | No — specialist or remanufacturer required |
A battery approaching the end of its service life develops higher internal resistance and loses its ability to deliver consistent current. When high-draw accessories — headlights, rear defroster, air conditioning — are activated, voltage may dip momentarily below the instrument cluster’s stable operating threshold. The cluster responds with a visible flicker. Most automotive batteries carry a rated service life of three to five years; beyond that point, voltage instability under load becomes progressively more frequent even under ordinary operating conditions. A battery load tester provides the most accurate assessment, since a standard resting voltage reading may appear acceptable on a battery that fails the moment current demand rises.
The alternator generates electrical power while the engine runs and simultaneously recharges the battery. Worn internal brushes, a failed rectifier diode, or bearing deterioration can cause the alternator to produce inconsistent or insufficient output voltage. Dashboard lights flickering at highway speeds — particularly when multiple accessories are active — is one of the stronger indicators of alternator strain. A healthy alternator maintains 13.5 to 14.5 volts at the battery terminals while the engine runs. Readings outside this range point directly to alternator output problems. If you observe that headlights flickering accompanies the dashboard instability, both symptoms originate from the same charging system fault, and the alternator should be your primary suspect.
Battery terminals coated with corrosion deposits or that have loosened over time introduce resistance into the primary power path. That resistance causes voltage to fluctuate under load in a manner nearly indistinguishable from a failing battery or alternator. Inspect both the positive and negative terminals for white, blue-gray, or powdery buildup. A terminal that shifts by hand without a wrench is not adequately secured. Cleaning the terminals with a wire brush and a diluted baking soda solution — followed by firm tightening — frequently resolves flickering without replacing any components. For step-by-step guidance on safely disconnecting and reinstalling the battery during this process, the instructions at how to reconnect a car battery provide a reliable reference.
The negative ground cable connects the battery to the vehicle chassis, completing the return path for every electrical circuit in the car. Corrosion at the chassis bolt, a frayed cable, or a loosened attachment point disrupts this return path and introduces resistance that affects all electrical systems simultaneously. The symptoms can appear identical to a charging system fault — flickering dashboard lights, erratic gauge readings, and intermittent power anomalies across unrelated systems. Inspect the ground cable at the battery terminal and at the chassis or engine block connection. Replacing a corroded or damaged ground cable is an inexpensive repair that eliminates one of the more commonly overlooked causes of complex electrical behavior.
In many modern vehicles, the body control module (BCM) manages instrument cluster illumination as part of its broader role overseeing lighting, power accessories, and other electronic subsystems. A BCM experiencing a software error or hardware fault may send incorrect voltage signals to the cluster, producing flickering or the erroneous activation of warning indicators. This cause is considerably less common than battery or alternator problems but merits consideration when all physical electrical components test within normal parameters. Diagnosis requires a scan tool capable of reading BCM-specific fault codes — a basic multimeter is insufficient for this investigation.
Wiring harnesses are susceptible to damage from prolonged heat exposure, vibration, rodent activity, and insulation breakdown over time. A wire that has been partially severed or whose insulation has worn through creates an intermittent connection that may only fail under specific conditions — when the engine vibrates at a particular frequency, when the vehicle flexes over a road imperfection, or when thermal expansion causes a marginal contact to open momentarily. These faults are among the most time-consuming to trace because they rarely produce consistent, reproducible behavior. A systematic inspection of the harness routing near the battery, firewall, and instrument panel is the recommended starting point.
When the battery and alternator both test as healthy and all connections are confirmed secure, the instrument cluster itself may be the source of the problem. Internal solder joint failures, a deteriorating printed circuit board, or a failing backlight driver can cause the cluster display to flicker independently of the supply voltage reaching it. Distinguishing internal cluster failure from an external electrical cause is straightforward: confirm that battery voltage remains steady at 13.5 to 14.5 volts while the flickering is actively occurring. If supply voltage is stable, the fault is internal to the cluster. If your speedometer is not working at the same time, that combination strongly reinforces the diagnosis of internal cluster failure.
Before using any diagnostic tools, conduct a thorough visual inspection. Open the hood and examine both battery terminals for corrosion deposits. Attempt to move each terminal by hand — it should not shift at all. Trace the negative ground cable from the battery to its chassis connection point and confirm the fastening bolt is tight and the contact surface is clean. Look for any visible damage, abrasion, or melting along accessible wiring near the battery, firewall, and fuse box. A notable proportion of dashboard lights flickering cases are resolved at this stage without any additional equipment or expense.
With the engine off, connect a multimeter across the battery terminals. A fully charged battery should read between 12.6 and 12.8 volts. A reading below 12.4 volts with the engine off indicates a discharged or weakened battery. Start the engine and observe the voltage — it should rise to between 13.5 and 14.5 volts as the alternator begins charging. A reading below 13.5 volts with the engine running points to alternator undercharge; a reading above 14.8 volts indicates overcharging, which can degrade the battery and damage sensitive electronics over time.
To stress-test the system, switch on the headlights, rear defroster, and air conditioning simultaneously while monitoring voltage. A healthy charging system should sustain above 13.0 volts under this combined accessory load. Having a second person observe the instrument cluster while you monitor the meter allows you to directly correlate voltage behavior with visible flickering, confirming the root cause before any component is replaced.
Pro tip: If dashboard lights flickering begins precisely when you activate a specific accessory — such as the rear defroster — that circuit may be drawing excess current due to its own fault, rather than the battery or alternator being the underlying problem. Isolate accessories one at a time to identify the trigger.
Replacing the battery at or before the end of its rated service life is the single most effective measure against voltage-related dashboard lights flickering. Most manufacturers recommend testing battery health annually after the three-year mark, using a load tester rather than a multimeter alone. Ensure the battery is secured firmly in its tray — a battery that vibrates sustains internal plate damage that shortens its service life. In climates with cold winters, a battery that tests marginally acceptable in mild weather may fail entirely when temperatures drop, since cold significantly reduces cranking capacity. Proactive replacement based on test results, rather than waiting for a failure event, eliminates most charging-related electrical symptoms before they develop.
Inspect battery terminals and the ground cable chassis attachment point at least once per year, and always when the battery is disconnected for any reason. Applying a thin coat of dielectric grease or anti-corrosion terminal spray after cleaning slows the return of oxidation deposits that degrade contact quality. Ensure the ground cable is routed away from exhaust heat sources and sharp metal edges that could gradually wear through the insulation. These steps require fewer than fifteen minutes per year and can prevent significantly more time-consuming diagnostic work later.
When dashboard lights begin to flicker during a drive, reduce your electrical load immediately. Turn off the rear defroster, lower the blower fan speed, and avoid activating additional accessories. This reduces the demand on a potentially compromised charging system and may delay a complete electrical failure long enough to reach a service location safely. If the flickering is accompanied by a battery warning light or the engine begins running roughly, pull over at the earliest safe opportunity. Continuing to drive under those conditions risks a sudden loss of power that affects steering assist, braking systems, and vehicle lighting simultaneously.
Avoid cycling the ignition off and on repeatedly. If the alternator is underperforming, the battery depletes further with each restart cycle, reducing the window of available electrical capacity. Drive directly to a repair facility or arrange a tow if the voltage appears critically low or if warning indicators suggest imminent system failure.
Intermittent wiring harness faults, BCM malfunctions, and internal cluster failures are not reliably diagnosable with basic tools. If the battery and alternator both test within normal parameters and all connections are clean and secure, the problem requires professional-grade diagnostic equipment. A shop with an oscilloscope can capture intermittent voltage anomalies that a standard multimeter cannot record. Do not defer this diagnosis indefinitely; an unresolved electrical fault can progressively damage other components and may compromise the reliability of safety-critical warning indicators over time.
Driving a short distance to reach a repair facility is generally acceptable, but extended driving is not advisable. Flickering indicates electrical instability that could lead to a complete charging system failure. Reduce your accessory use, monitor the battery warning indicator closely, and arrange service as promptly as possible.
Yes. An alternator producing inconsistent output voltage affects the entire instrument cluster simultaneously, causing all illuminated indicators to flicker or dim together. That simultaneous behavior is one of the clearest indicators of a charging system fault, distinguishing it from a single-circuit problem affecting only one warning light.
Measure battery voltage with the engine off using a multimeter. A reading below 12.4 volts suggests a discharged or weakened battery. For a definitive result, use a dedicated load tester, which evaluates the battery’s ability to deliver current under demand — the precise condition that produces voltage sags and resulting flickering.
A loose or corroded ground cable is one of the most commonly overlooked causes of dashboard lights flickering. Because the ground cable completes the return path for all electrical circuits, resistance at that connection affects every system simultaneously, producing erratic flickering, unstable gauge readings, and seemingly unrelated faults throughout the vehicle.
This pattern indicates that the battery or alternator cannot sustain stable voltage when a high-draw accessory is activated. Headlights impose a significant current demand; when the charging system cannot meet that demand without a voltage drop, the instrument cluster responds with a visible flicker. Test battery capacity under load and alternator output voltage as the first diagnostic steps.
Cold weather reduces battery capacity substantially. A battery that performs adequately in mild conditions may struggle to maintain stable voltage during freezing temperatures, particularly at startup. If flickering occurs primarily in cold weather and subsides as the engine warms and the alternator compensates, battery replacement or a full charge-and-load test is the appropriate first response.
Repair costs depend entirely on the root cause. Cleaning corroded battery terminals costs little or nothing beyond your time. Battery replacement generally ranges from $100 to $250. Alternator replacement typically costs $300 to $700 including labor. BCM replacement or wiring harness repair can range from $500 to $1,500 or more, depending on vehicle complexity. Accurate diagnosis before committing to any repair prevents unnecessary expense.
Checking the fuse box is a reasonable early step. A partially blown fuse or one that fits loosely in its socket can cause intermittent circuit interruptions. However, dashboard lights flickering simultaneously across the entire cluster is rarely caused by a single fuse, since multiple independent circuits would all need to be affected at once. A blown fuse is a more likely explanation when only specific, isolated indicators flicker rather than the whole cluster.
 |
 |
 |
 |
About Joshua Thomas
Joshua Thomas just simply loves cars and willing to work on them whenever there's chance... sometimes for free.
He started CarCareTotal back in 2017 from the advices of total strangers who witnessed his amazing skills in car repairs here and there.
His goal with this creation is to help car owners better learn how to maintain and repair their cars; as such, the site would cover alot of areas: troubleshooting, product recommendations, tips & tricks.
Joshua received Bachelor of Science in Mechanical Engineering at San Diego State University.
Get some FREE car parts & gear.. Or check out the latest free automotive manuals and build guides here.
Disable your ad blocker to unlock all the hidden deals. Hit the button below 🚗
| | | |