by Sarah Whitfield
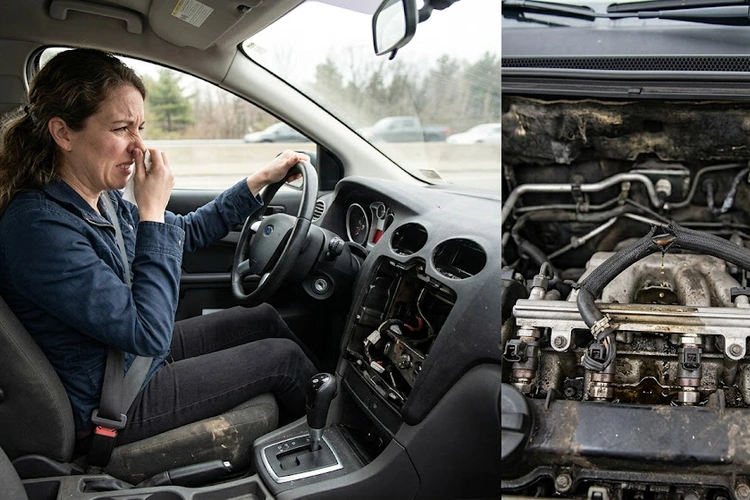
You pull into the driveway after a forty-minute commute, cut the ignition, and the moment you open the door a sharp petroleum odor rolls out of the cabin. That experience is not residual vapor from the gas station — it is your vehicle signaling a failure somewhere in its fuel delivery system that demands immediate attention. A persistent fuel smell inside car is both a fire hazard and a toxic-exposure risk, and it requires systematic diagnosis before your next drive.
The source can range from a carelessly tightened fuel-filler cap to a deteriorated injector O-ring, a saturated evaporative emission (EVAP) charcoal canister, or a weeping rubber fuel line. According to Wikipedia's entry on gasoline, petrol vapor ignites at concentrations between 1.4 and 7.6 percent by volume, making even minor fuel-system leaks a genuine fire risk. Knowing which component is responsible — and the correct repair path — separates a ten-dollar fix from a four-hundred-dollar shop bill.
Contents
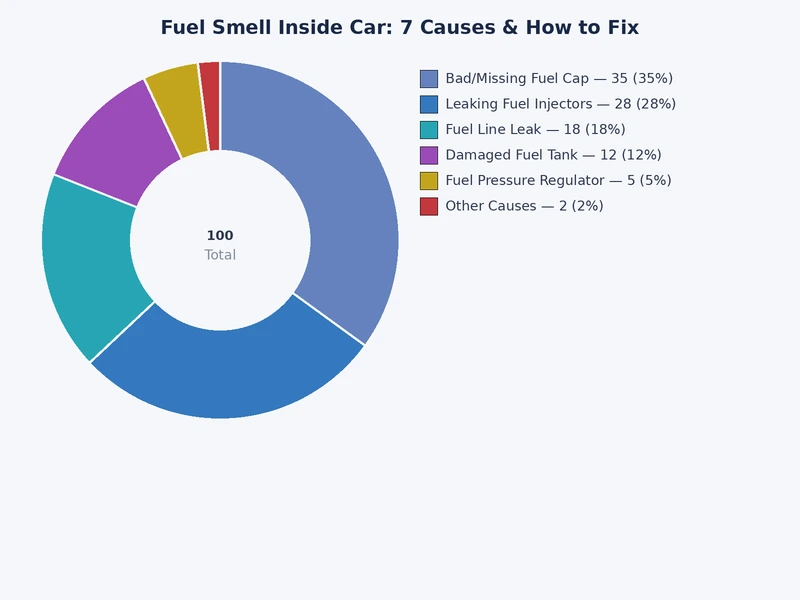
Each cause below produces a distinct odor pattern, failure location, and severity level. Use the comparison table following this section to triage the most likely culprit before opening the hood.
A missing, cross-threaded, or cracked fuel-filler cap is the single most common source of fuel odor in the cabin, and it is also the least expensive to resolve. The cap seals the filler neck against the atmosphere and prevents raw vapor from escaping the tank through the fill tube directly into the passenger compartment. When it fails, vapor migrates through the body seam and HVAC fresh-air intake — particularly on vehicles with rear-quarter fuel doors positioned close to the cowl. If you have recently filled the tank and a warning light appeared, review the detailed breakdown of check engine light causes after a gas fill-up before purchasing any parts.
The evaporative emission control (EVAP) system captures fuel vapors from the tank and routes them to the intake manifold for combustion, preventing their release into the atmosphere. The charcoal canister is the primary vapor storage vessel, and when it cracks, saturates from liquid fuel ingestion caused by habitual overfilling, or loses its purge-valve function, raw hydrocarbon vapor accumulates under the hood and infiltrates the cabin through firewall gaps. EVAP failure almost always triggers a P0440-series diagnostic trouble code, making an OBD-II scan a mandatory first step in confirming the diagnosis.
Fuel injectors are sealed to the fuel rail and intake manifold by two rubber O-rings each, and heat cycling degrades these O-rings progressively until they harden, crack, and allow raw fuel to seep onto the manifold surface. Because the leak sits directly atop a hot engine assembly, the fuel atomizes almost instantly and enters the cabin through firewall HVAC ducting with a concentrated, unmistakable petroleum odor. This failure is especially prevalent on high-mileage direct-injection engines where injectors operate at rail pressures exceeding 2,000 psi and thermal stress on sealing surfaces is correspondingly greater.
Most vehicles use a combination of hard steel or aluminum lines and short rubber flex sections at the engine and fuel tank connections, and the rubber sections have a finite service life of roughly 10 to 15 years before micro-cracks, pinhole leaks, and hose-clamp-area seepage develop. A weeping rubber fuel line near a hot exhaust manifold is a direct ignition hazard, and the vapors it produces readily penetrate any unsealed firewall penetration into the passenger cabin. If you notice smoke rising from under the hood alongside the fuel odor, a fuel-line contact with a hot exhaust component is the immediate suspect and the vehicle must not be driven.
On older port-injection engines with vacuum-referenced fuel pressure regulators, the internal rubber diaphragm can rupture and allow liquid fuel to flow directly into the intake manifold vacuum line rather than returning to the tank through the regulated return circuit. The fuel then combusts at an uncontrolled air-fuel ratio, producing a noticeably rich exhaust odor and often pushing raw hydrocarbons through the PCV system into the cabin. You can confirm this failure definitively by pulling the vacuum line from the regulator with the engine off — the presence of liquid fuel in the line requires no further diagnosis. For related fuel-circuit components, consult the fuel pump relay location guide to understand how the pump relay interacts with regulated system pressure.
Road debris impact, severe underbody corrosion on steel tanks, or thermal fatigue on plastic tank seams can produce a slow fuel leak at the tank body itself, typically presenting as a fuel puddle beneath the vehicle at the rear axle area combined with a persistent in-cabin odor that worsens after filling to capacity. Plastic tank repairs using epoxy or weld-through patches are structurally unreliable under continuous fuel pressure and vibration cycles — tank replacement is the correct and only durable repair on any vehicle driven regularly.
When the air-fuel mixture is excessively rich — caused by a stuck-open injector, a failed mass airflow sensor, or a saturated oxygen sensor — unburned fuel passes through the combustion chamber and into the exhaust system in quantity. The catalytic converter cannot fully oxidize the excess fuel at cold-start temperatures, and the resulting exhaust vapor carries a raw-fuel odor that re-enters the cabin through the HVAC system on vehicles with cowl-mounted fresh-air inlets. If the vehicle also refuses to start after repeated crank cycles, review the comprehensive guide on diagnosing a car that cranks but will not start alongside the fuel-odor investigation.
| Cause | Primary Odor Location | Severity | Typical Repair Cost | DIY Feasibility |
|---|---|---|---|---|
| Loose or damaged filler cap | Rear cabin, filler area | Low | $10–$30 | Yes |
| EVAP canister failure | Under hood, cabin | Moderate | $150–$350 | Intermediate |
| Injector O-ring leak | Engine bay, cabin | High | $100–$300 | Intermediate |
| Degraded rubber fuel line | Under hood or under car | High | $80–$400 | Intermediate |
| Pressure regulator diaphragm | Engine bay, exhaust | High | $200–$450 | Intermediate |
| Fuel tank crack or seam | Under vehicle, rear | Critical | $400–$1,200 | No |
| Rich-running or flooded engine | Exhaust, cabin | Moderate | $50–$600 | Intermediate |
Fuel vapor management is not optional — it is the first discipline to apply before any diagnostic work begins on your vehicle.
Never diagnose a fuel smell inside car near an arc welder, grinding wheel, or open pilot flame — a single spark is sufficient to ignite a vapor trail from a weeping fuel line in milliseconds.
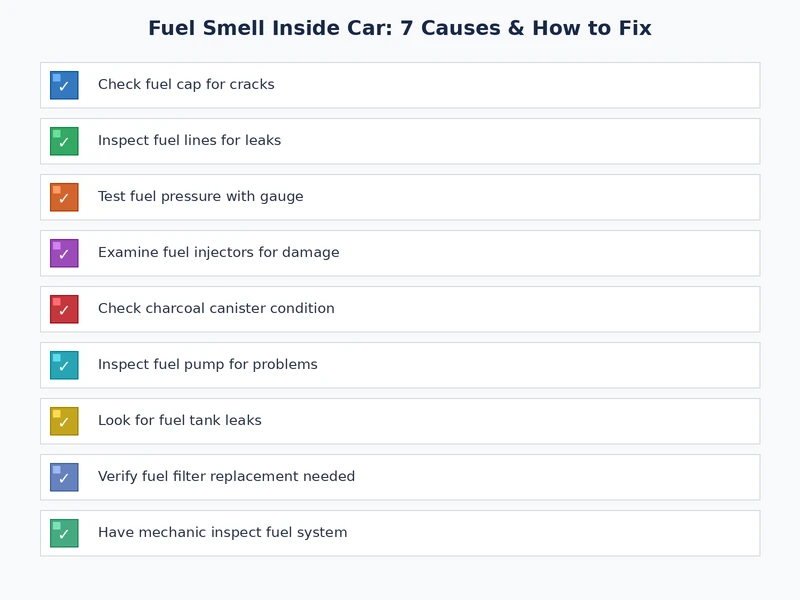
Apply this sequence before purchasing any replacement parts. Each step narrows the field of possible causes and prevents unnecessary expenditure on components that are not at fault.
The following repairs resolve the majority of fuel-smell complaints without a shop visit and require only basic hand tools:
A proactive maintenance schedule eliminates the conditions that generate fuel odor before they escalate into fire hazards or costly repairs:
It depends entirely on the severity and source. A faint odor that appears only at cold start and clears within two minutes is low-risk. A persistent or strengthening fuel smell inside car — particularly one accompanied by a visible puddle, rough idle, or engine warning light — means you must stop driving immediately and arrange a tow to a qualified shop rather than risk ignition.
A brief, mild odor immediately after fueling is normal as residual vapor clears the filler neck during the first few minutes of driving. If the smell persists beyond five minutes or the check engine light illuminates, you are most likely dealing with a damaged filler cap gasket, a cracked filler neck, or a saturated EVAP canister that cannot absorb additional vapor load after a full tank fill.
Yes, and the risk is immediate rather than theoretical. A leaking injector O-ring allows liquid fuel to drip onto the intake manifold surface, which operates at temperatures capable of vaporizing fuel on contact. If that vapor cloud migrates toward a spark plug wire, a hot exhaust manifold, or an electrical arc source, ignition is possible. Confirm the leak and replace the O-rings before the next drive without exception.
Use a UV fluorescent leak detection dye kit — add the dye to the fuel tank, run the engine to operating temperature under normal load, then sweep the entire engine bay, fuel rail, injector seats, fuel lines, and tank perimeter with a black light. Fluorescent dye reveals even micro-seeps that are invisible under ambient light. For EVAP circuits, you can also perform a static pressure test by monitoring fuel rail pressure drop with a mechanical gauge across a thirty-minute soak period.
Repair cost spans from $10 for a filler cap replacement to over $1,200 for a fuel tank replacement on a late-model vehicle with a complex underbody assembly. The majority of cases — involving an EVAP purge valve, injector O-rings, or a short rubber fuel-line section — fall in the $80 to $350 range, making early and accurate diagnosis the single most financially sound strategy you can apply.
 |
 |
 |
 |

About Sarah Whitfield
Sarah Whitfield is a diagnostics and troubleshooting specialist who spent ten years as an ASE-certified technician before joining the editorial team. She specializes in OBD-II analysis, electrical gremlins, and the kind of intermittent problems that make most owners give up.
Get some FREE car parts & gear.. Or check out the latest free automotive manuals and build guides here.
Disable your ad blocker to unlock all the hidden deals. Hit the button below 🚗
| | | |