Nearly 22% of nighttime collisions involve compromised forward lighting, according to NHTSA pre-crash inspection data — and headlights flickering ranks among the most frequently cited lighting faults in those vehicles. When your headlights pulse, dim, or cut out without warning, the entire low-voltage circuit from the battery post to the bulb socket becomes suspect. You are dealing with a diagnostic chain that spans six distinct subsystems, each capable of mimicking the others, and the correct repair sequence separates a $12 ground strap fix from an unnecessary $600 alternator replacement. Every cause detailed in this headlights flickering causes guide follows a structured diagnostic path, starting with the cheapest and most accessible fault and ending with the module-level repair that requires dealer tooling.
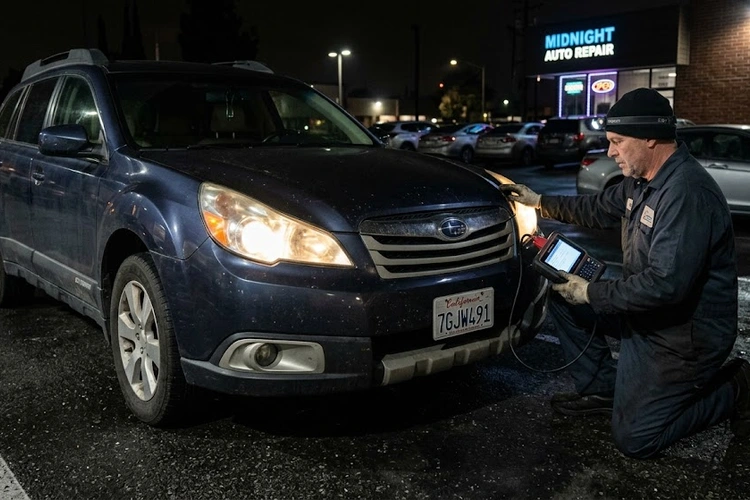
Figure 1 — Headlights flickering can trace back to a corroded ground strap, a failing alternator, a degraded battery, or a body control module fault — each demanding a different repair approach.
The chassis ground circuit completes every electrical path in the vehicle, and a single corroded ground strap — typically the bolt on the firewall, strut tower, or battery negative terminal — introduces resistance that causes headlights to flicker as current demand rises and falls with accessory switching. Corrosion builds silently over years of thermal cycling and moisture exposure, and the resistance climbs steadily until the symptom becomes undeniable. You will notice the flickering intensifies the moment you engage the HVAC blower, rear defroster, or heated seats, because those combined loads expose the marginal ground's inability to pass the full circuit current without generating a measurable voltage drop across the connection.
Clean every ground bolt location with a wire brush or abrasive pad until bare metal is visible on both the lug and the chassis surface.
Apply dielectric grease to the cleaned contact area before reinstalling the hardware to prevent future oxidation.
Re-torque to OEM specification — typically 8–12 Nm for body grounds and 15–20 Nm for engine-to-chassis ground straps.
Measure voltage drop across each ground with a multimeter on the millivolt setting while the headlights are on; any reading above 200 mV confirms a resistive fault at that point.
2. Failing Alternator
The alternator maintains system voltage between 13.5 V and 14.8 V at idle; when output drops below 13.0 V, headlights begin to flicker because the lighting circuit draws directly from battery reserve rather than from regulated rectified power. A worn rotor brush pack, a failing rectifier diode, or a slipping drive belt — the full symptom checklist for the latter appears at Serpentine Belt Symptoms — can all reduce alternator output without triggering a battery warning light immediately. If you also notice the vehicle hesitates when accelerating alongside the flickering, the combination points strongly to a charging system deficit rather than an isolated lighting fault. Confirm the alternator with a multimeter at the battery terminals while the engine holds 2,000 RPM; a reading below 13.4 V with headlights and the blower running simultaneously demands further alternator testing before any other component is replaced.
3. Weak or Dying Battery
A sulfated or partially failed battery cannot sustain stable terminal voltage when the headlight circuit draws current during a load transition, producing a visible flicker that synchronizes with each switched electrical event. Battery voltage below 12.2 V at rest or below 9.6 V under a 100-amp carbon pile load test confirms internal cell degradation that no charging cycle can reverse. When a car battery keeps dying repeatedly alongside intermittent headlight flickering, that combination of symptoms establishes battery failure as the primary fault rather than alternator deficiency — the alternator cannot compensate for a battery that collapses under load. Replace any battery that tests below 70% of its rated cold cranking amp capacity regardless of its age, because CCA degradation correlates directly with flickering severity under cold-start conditions.
4. Faulty Headlight Switch or Relay
The headlight relay cycles thousands of times across its service life, and pitted or oxidized internal contacts create intermittent resistance that manifests as rapid flickering rather than a clean on-off fault. Most OEM headlight switches incorporate a self-resetting thermal circuit breaker; when an overloaded downstream circuit trips the breaker, the lights flash briefly before power restores, closely mimicking a wiring harness fault. The relay swap test eliminates this cause in under three minutes and costs nothing if an identical relay already occupies another fuse box slot.
Locate the headlight relay in the underhood or cabin fuse block using the diagram printed on the cover.
Pull the relay and substitute an identical part from another slot as a zero-cost preliminary test before ordering replacement parts.
If the swap eliminates the flickering, replace only the confirmed faulty relay with an OEM-equivalent unit rated to the same amperage.
5. Damaged Wiring Harness
Chafed insulation against a sharp chassis stamping, a corroded multi-pin connector pin, or a heat-damaged wire section routed near the exhaust manifold creates a high-resistance path that produces flickering under road vibration or thermal cycling — conditions that a static bench test never replicates. You isolate the fault location by wiggle-testing: flexing the headlight harness in 6-inch sections while an assistant observes the headlights with the engine running, which transforms an otherwise invisible intermittent fault into a repeatable, location-specific symptom. Pay particular attention to the harness routed along the inner fender, behind the battery tray, and through the firewall grommet, where road grime, moisture, and vibration cause cumulative insulation breakdown over years of service.
6. Bad Bulb or Socket Contact
Tungsten-halogen and HID bulb bases oxidize progressively as the socket absorbs repeated heat cycles, and the resulting contact resistance generates localized heat that accelerates the oxidation in a self-reinforcing loop. A loose retention spring or clip allows road vibration to interrupt the circuit thousands of times per mile at highway speed, producing the rapid flutter that drivers frequently misattribute to alternator instability. Inspect every socket immediately for brown or black heat discoloration — visible melting of the connector plastic means the entire socket pigtail assembly requires replacement, not cleaning, because the thermoplastic has already lost its structural and dielectric integrity.
7. BCM or Lighting Module Fault
In late-model vehicles, the body control module or a dedicated headlight control module governs activation, dimming ramps, and DRL sequencing, and a failed MOSFET output driver or a corrupted configuration table causes the module to pulse the headlight circuit erratically without storing a powertrain fault code. This cause is the most expensive to confirm and repair but also the least common — you should exhaust the six preceding diagnoses before directing any effort toward the BCM. Similar to how an oil pressure light appearing alongside flickering headlights may indicate a broader low-voltage event rather than two independent faults, BCM-driven flickering often coincides with other comfort electronics behaving abnormally. Standard OBD-II code readers do not access BCM modules; you require a professional-grade bidirectional scan tool to read BCM fault codes and confirm this diagnosis before authorizing a module replacement.
How to Diagnose Flickering Headlights: Step-by-Step
Measure resting battery voltage. With the engine off and all accessories switched off for at least two minutes, connect a multimeter across the battery terminals. A healthy fully charged battery reads 12.6–12.8 V; anything below 12.2 V confirms a battery problem that must be resolved before any other electrical diagnosis produces reliable results.
Check alternator output under combined load. Start the engine and hold RPM at 2,000 while reading battery terminal voltage with the multimeter. Activate the headlights, HVAC blower on high, and rear defroster simultaneously — system voltage must hold above 13.0 V under this combined draw; a drop below that threshold points to alternator output deficiency as the primary cause.
Resistance-test every ground connection. Switch to the millivolt range on your multimeter and measure voltage drop across each ground strap while the headlights are on and the engine is running; any reading above 200 mV identifies a resistive ground that requires cleaning and re-torquing before any further diagnostics proceed.
Swap the headlight relay. Pull the relay from its fuse box slot and replace it with an identical relay already installed elsewhere in the box. Drive for at least 10 minutes across varied road conditions — if the flickering stops entirely, the relay is confirmed as the fault source and requires replacement.
Wiggle-test the wiring harness. With the engine running and headlights on, flex every section of the headlight harness from the fuse block to the bulb connector while an assistant watches for any flickering change; any movement-triggered response pinpoints the fault to a specific 6-inch harness segment that can then be repaired or replaced in isolation.
Inspect bulb sockets and retention hardware. Remove each bulb, examine the socket contacts for oxidation deposits or heat discoloration, clean with electrical contact cleaner on a cotton swab, and verify the retention clip secures the bulb firmly without any lateral play before reinstalling and repeating the road test.
Tools and Parts You Need Before You Start
Digital multimeter — minimum 10 MΩ input impedance; required for voltage measurement and voltage drop testing across ground connections and the charging circuit.
Carbon pile load tester or battery conductance tester — the only instrument that reliably detects a sulfated battery with a normal resting voltage but collapsed capacity under load.
OBD-II scan tool with BCM access — required only if you reach the module diagnosis stage; standard code readers return nothing for a BCM lighting fault.
Wire brush set and dielectric grease — for ground connection cleaning and long-term corrosion prevention at every cleaned contact surface.
Electrical contact cleaner — residue-free aerosol for bulb socket and multi-pin connector cleaning without leaving behind any conductive deposit.
Relay puller or small flathead screwdriver — for safe extraction from fuse block slots without damaging the slot walls or adjacent relays.
Nitrile gloves — mandatory when handling halogen and HID bulbs; skin oil deposited on the glass envelope creates a thermal stress point that causes premature bulb failure from localized overheating.
Repair Cost Breakdown by Cause
Cause
DIY Parts Cost
Shop Labor
Total at Shop
Difficulty
Corroded ground strap
$6–$18
$60–$90
$66–$108
Beginner
Headlight relay
$8–$25
$30–$60
$38–$85
Beginner
Bulb socket replacement
$15–$50
$60–$120
$75–$170
Intermediate
Battery replacement
$120–$220
$30–$60
$150–$280
Beginner
Wiring harness repair
$20–$80
$150–$400
$170–$480
Advanced
Alternator replacement
$180–$380
$120–$300
$300–$680
Intermediate
BCM replacement and programming
$200–$600
$300–$600
$500–$1,200
Professional only
Ground connections and the headlight relay represent the lowest-cost repairs and require only basic tools — confirm or eliminate both before authorizing any component replacement at a shop. Accurate sequencing through this list saves the average vehicle owner between $200 and $500 in unnecessary diagnostic fees and parts replacements.
When to Fix Flickering Headlights Yourself — and When Not To
Repairs You Can Handle in Your Driveway
Ground strap cleaning and re-torquing — requires only a wire brush, a torque wrench, and a multimeter; the entire process takes under 30 minutes per connection.
Relay swap — a tool-free operation completed in under three minutes at the fuse box; no disassembly required beyond pulling the fuse cover.
Battery replacement — straightforward on most vehicles, though connecting a 9 V memory saver to the OBD-II port before disconnecting the old battery preserves radio presets and transmission adaptation data on modern vehicles.
Bulb and socket replacement — accessible on most non-projector headlight assemblies without removing the entire headlight unit; confirm the correct bulb part number from the owner's manual before purchasing, as wrong-fitment bulbs damage sockets immediately through misaligned retention forces.
Repairs That Require Professional Equipment
Wiring harness fault tracing — an intermittent harness fault that only appears under vibration or heat requires an oscilloscope or graphing multimeter to capture the millisecond-duration voltage interruptions that a static voltmeter reading misses entirely.
Alternator replacement — straightforward to swap but demands a post-installation charging system load test at multiple RPM points to confirm the new unit charges correctly across the operating range; a test drive alone does not verify full-load output.
BCM replacement and programming — the replacement module requires VIN-specific calibration data written via dealer-level or professional J2534 programming tools; an unprogrammed BCM disables the entire comfort electronics network, including power windows, locks, and the immobilizer system.
Never treat flickering headlights as a cosmetic nuisance — a pulsing low beam on an unlit road reduces your effective stopping distance visibility by up to 40%, making this a safety-critical fault that demands same-session diagnosis.
Expert Diagnostic Tips to Speed Up the Process
Read the flicker frequency before touching a tool. Slow, rhythmic flickering at 1–3 Hz points to the alternator or battery struggling to sustain voltage under load; rapid, high-frequency flutter above 10 Hz points to a relay, socket, or harness interruption — the frequency itself narrows the suspect list before you remove a single fastener.
Log exactly when the symptom appears. Cold-start-only flickering that clears within two minutes of driving implicates the battery; flickering that emerges exclusively after 20 minutes of highway operation implicates thermal expansion in a marginal wire splice — the temperature correlation carries as much diagnostic weight as any voltage reading.
Replace both sockets when one shows heat damage. The second socket operates under identical thermal stress conditions and fails within months of the first; addressing both simultaneously eliminates a return visit and a second labor charge.
Check the alternator belt tension before condemning the alternator. A slipping belt reduces alternator shaft speed by 30–40% at idle, cutting charging output below the minimum threshold and producing all the voltage symptoms of an internally failed alternator at a fraction of the repair cost.
Verify every repair with a post-fix night drive over rough pavement. A daytime static voltage test that passes does not confirm an intermittent vibration-triggered fault is resolved; a 20-minute drive at night over varied surface conditions is the only reliable pass/fail criterion for headlights flickering diagnosis.
Watch for companion symptoms. If your temperature gauge is also rising alongside flickering headlights, a failing alternator may be losing output while a coolant system fault runs independently — address both fault trees in parallel rather than assuming a single root cause for two simultaneous warning signs.
Halogen, LED, and HID: Flicker Risk Compared
The headlight technology installed on your vehicle directly determines which failure modes produce flickering and how those faults present during diagnosis. A full technical breakdown of HID system architecture and reliability trade-offs appears in the pros and cons of xenon lighting guide, which covers ballast design, igniter voltage requirements, and the component hierarchy responsible for most HID flicker events.
Halogen Bulbs
Simple resistive load — tolerant of moderate voltage fluctuations and generally remain stable down to approximately 11.5 V before visible flickering begins.
Most common flicker cause: socket contact oxidation and loose retention clips, both of which are accessible and inexpensive to correct at home.
Highest socket operating temperature of the three technologies — the heat output accelerates plastic connector degradation and creates the oxidation cycle that produces intermittent contact resistance over time.
HID / Xenon Bulbs
Require a ballast that converts 12 V DC to 23,000 V AC at ignition strike, making them acutely sensitive to any system voltage instability below 13.0 V during operation or at startup.
A color shift from pure white toward blue-green during warmup signals a deteriorating ballast or igniter before full flicker develops — treat the color shift as an early warning that demands ballast testing.
HID flickering in 85% of cases originates in the ballast or igniter module rather than the arc tube itself; replace the ballast assembly first before the bulb, because a failed ballast that remains in service destroys replacement bulbs through voltage spike damage.
LED Headlights
OEM LED headlight drivers regulate current internally with active feedback loops, making factory-installed LED systems largely resistant to the minor alternator output fluctuations that trigger halogen flickering under the same electrical conditions.
Aftermarket LED conversion kits with poorly filtered constant-current drivers produce a canbus-triggered error flicker at 50–120 Hz — invisible to the naked eye in motion but detectable with a slow-motion smartphone camera — that requires an inline load resistor or dedicated canbus decoder module to suppress without replacing the kit.
When OEM LED headlights flicker, the fault traces almost exclusively to a BCM software issue or a failed LED driver module integrated into the headlight assembly — both diagnoses requiring dealer-level scan tool access to confirm before any parts are ordered.
Your headlights are the only safety system that fails visibly in real time at highway speed — fix flickering headlights before the next night drive, not after it.
Sarah Whitfield is a diagnostics and troubleshooting specialist who spent ten years as an ASE-certified technician before joining the editorial team. She specializes in OBD-II analysis, electrical gremlins, and the kind of intermittent problems that make most owners give up.