by Joshua Thomas
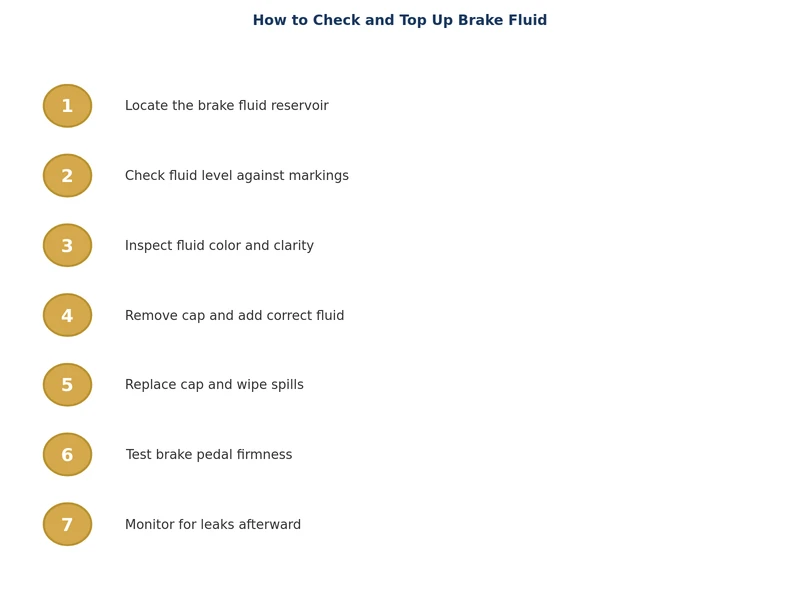
Knowing how to check brake fluid is one of the simplest maintenance tasks you can do at home, yet it's easy to overlook. Brake fluid is hygroscopic — it absorbs moisture over time, which lowers its boiling point and reduces braking performance. A quick visual check takes under two minutes and can alert you to a leak or degraded fluid before it becomes a safety hazard. This guide covers checking, topping up, and knowing when a full flush is needed. For a broader look at routine upkeep, see our vehicle maintenance pointers guide.
Contents
Your braking system relies on hydraulic pressure. When you press the pedal, brake fluid transmits that force through steel lines and rubber hoses to the calipers or wheel cylinders, pressing the pads against the rotors. Without adequate, clean fluid, that pressure transfer fails.
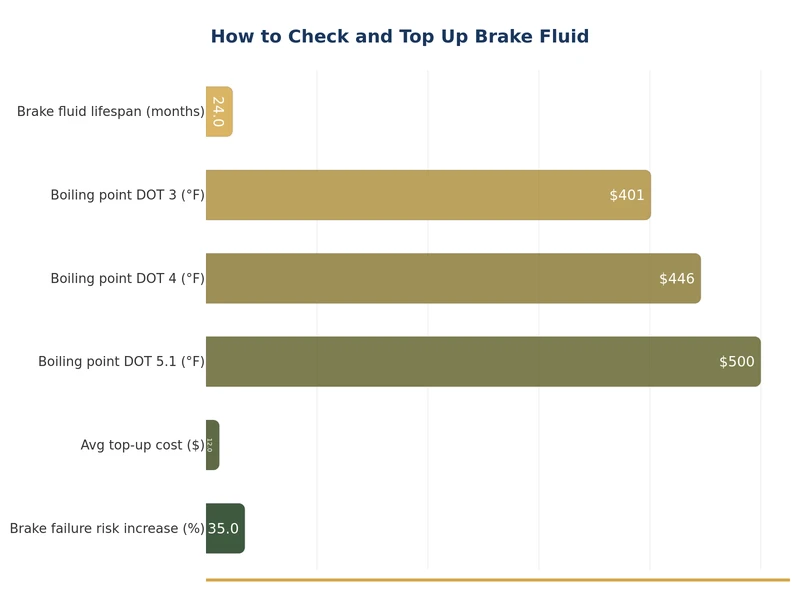
The main enemy of brake fluid is moisture. Most fluids absorb water from the air through brake hoses and seals. As water content rises, the fluid's boiling point drops. Under heavy braking — on a long downhill, for example — overheated fluid can vaporize, creating gas bubbles that compress instead of transmitting force. This is called brake fade, and it's dangerous. According to Wikipedia, DOT 3 fluid fresh from the bottle boils at 205 °C (401 °F), but that figure can fall below 140 °C (284 °F) once water content reaches just 3.7%.
Low fluid level is a separate issue. A gradual drop usually means worn brake pads — as pads wear, the calipers extend further and hold more fluid. A sudden drop points to a leak, which needs immediate attention. If you've ever experienced a soft pedal, check our article on brake pedal goes to the floor causes and fixes for further diagnosis.
Color alone isn't a perfect guide, but it's a fast first indicator. Here's a simple reference:
For context, most manufacturers recommend a brake fluid flush every two years or 30,000 miles regardless of appearance, because moisture absorption happens invisibly. Test strips give a more objective reading than visual inspection alone.
Using the wrong fluid can damage rubber seals and compromise braking. Always match what's printed on your reservoir cap or in your owner's manual. The table below summarizes the most common types:
| Type | Base | Dry Boiling Point | Wet Boiling Point | Common Use |
|---|---|---|---|---|
| DOT 3 | Glycol ether | 205 °C (401 °F) | 140 °C (284 °F) | Most older and everyday passenger cars |
| DOT 4 | Glycol ether + borate ester | 230 °C (446 °F) | 155 °C (311 °F) | Modern cars, ABS/ESP equipped vehicles |
| DOT 5.1 | Glycol ether (low viscosity) | 260 °C (500 °F) | 180 °C (356 °F) | Performance cars, cold climates |
| DOT 5 | Silicone | 260 °C (500 °F) | 180 °C (356 °F) | Classic/show cars, not ABS-compatible |
Important: DOT 5 is silicone-based and cannot be mixed with DOT 3, 4, or 5.1, which are all glycol-based. DOT 3, 4, and 5.1 are backward compatible — you can top DOT 4 with DOT 3 in a pinch — but it will lower the overall performance of the fluid. Always use the specified grade when possible.
While you have the hood open, it's a good time to check other fluids too. Our guide on how to add transmission fluid covers the process for that reservoir, which is often nearby.
Press the brake pedal a few times with the engine off to help redistribute the fluid, then recheck the level. If it drops again quickly, you likely have a leak somewhere in the system — inspect the brake lines, calipers, wheel cylinders, and the master cylinder itself. A leak is not a top-up situation; it needs repair before you drive.
Also note: if you've been doing other work under the hood, such as cleaning the engine bay, be careful to keep water and degreaser away from the brake reservoir and lines.
Topping up corrects a low level. It does nothing for degraded fluid. You need a full flush when:
A brake flush involves bleeding old fluid out through each wheel's bleed nipple while adding fresh fluid at the reservoir. This requires a helper or a one-man bleeding kit. It's a DIY-friendly job for confident home mechanics, but if you're unsure, a shop can do it quickly during a pad replacement.
Keeping on top of small maintenance items like this — along with checks like wiper replacement (see our windshield wiper blade replacement guide) — keeps your car in safe, reliable condition between major services.
Check your brake fluid level every month as part of a quick under-hood inspection, and test its condition with test strips at every oil change or at least once a year. A full flush is typically recommended every two years or 30,000 miles, but follow your vehicle manufacturer's schedule.
DOT 3, DOT 4, and DOT 5.1 are all glycol-based and can be mixed in a pinch, though mixing lowers the overall boiling point to the lesser fluid's spec. DOT 5 is silicone-based and must never be mixed with any glycol-based fluid — doing so can cause brake failure. Always use the type specified on your reservoir cap.
Fresh brake fluid is clear to light amber. Slightly golden fluid is still serviceable. Dark brown fluid indicates significant moisture and contamination — plan a flush. Black or sludgy fluid means the system needs immediate attention and may have degraded internal seals.
A slightly low level may be normal wear as brake pads thin out, but you should top it up promptly and monitor it. If the level is significantly low, has dropped quickly, or your brake warning light is on, do not drive the vehicle until you've identified the cause. A leak in the brake system is a serious safety risk.
An opened bottle of brake fluid should be used within 12 months. Glycol-based fluids absorb moisture from the air, so an opened bottle left on a shelf starts degrading even before it goes into the car. Buy a fresh bottle for each top-up and discard any leftover fluid after a year.
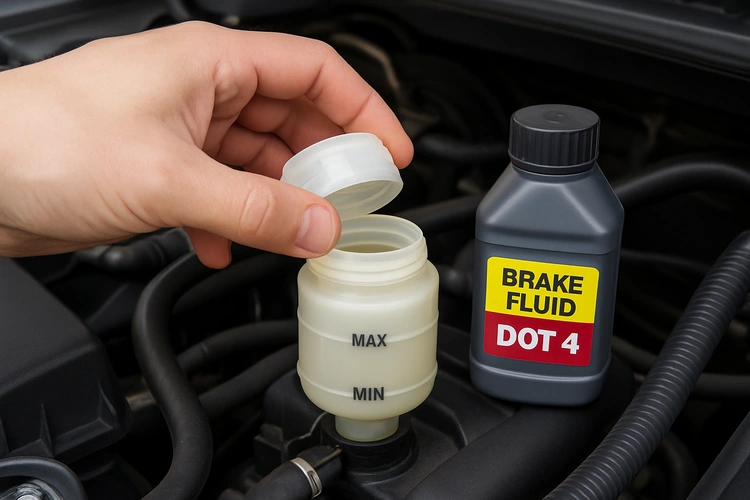
Yes — on most modern vehicles the reservoir is translucent plastic with MIN and MAX markings on the outside. You can check the level visually without removing the cap. However, you cannot assess fluid color or use test strips without opening it, so a full condition check still requires removing the cap carefully.
 |
 |
 |
 |
About Joshua Thomas
Joshua Thomas just simply loves cars and willing to work on them whenever there's chance... sometimes for free.
He started CarCareTotal back in 2017 from the advices of total strangers who witnessed his amazing skills in car repairs here and there.
His goal with this creation is to help car owners better learn how to maintain and repair their cars; as such, the site would cover alot of areas: troubleshooting, product recommendations, tips & tricks.
Joshua received Bachelor of Science in Mechanical Engineering at San Diego State University.
Get some FREE car parts & gear.. Or check out the latest free automotive manuals and build guides here.
Disable your ad blocker to unlock all the hidden deals. Hit the button below 🚗
| | | |