by Joshua Thomas
Knowing how to check transmission fluid is one of the simplest maintenance tasks you can perform — and one of the most neglected. The transmission transfers engine power to the wheels, and without clean, properly filled fluid, it will wear out far ahead of schedule. Catching a low level or degraded fluid early can prevent a repair bill that runs into the thousands. This guide covers everything from pulling the dipstick to draining and refilling the fluid yourself. If you also want to stay on top of engine lubrication, see our guide on how much oil your car needs.
Contents
Transmission fluid does several jobs at once. It lubricates gears and bearings, acts as a hydraulic fluid for automatic transmissions, cools internal components, and prevents oxidation and corrosion. Unlike engine oil, which burns off over time, transmission fluid is a closed system — meaning it should not disappear. If the level drops, there is a leak somewhere that needs attention.
Automatic transmissions are especially sensitive to fluid quality. Degraded fluid loses its viscosity and detergent properties, allowing varnish and sludge to build up on valve bodies and clutch packs. Manual transmissions are more forgiving but still require fresh gear oil to protect synchronizers and bearings. According to Wikipedia's overview of transmission fluid, modern automatic transmission fluids (ATF) are complex formulations containing friction modifiers, anti-wear additives, and detergents — all of which break down over time.
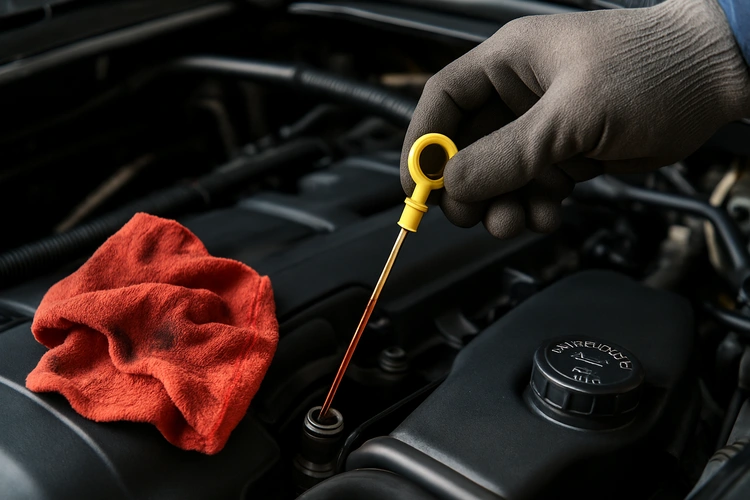
Most automatic transmissions have a dipstick under the hood — though a growing number of modern vehicles use a sealed system that requires a lift and a drain plug. Consult your owner's manual before you start. Manual transmissions almost never have a dipstick; you check the level through a fill plug on the side of the gearbox.
If the level is low, top it up slowly using the correct fluid specification. Adding the wrong fluid can damage clutch packs and seals. Even a small amount of the wrong ATF type can cause shifting problems.
The color and smell of transmission fluid tell you a great deal about the health of your transmission. Fresh ATF is typically bright red and nearly transparent. As it ages and degrades, it darkens. Here is a quick reference:
| Fluid Appearance | What It Means | Action |
|---|---|---|
| Bright red, clear | New or like-new fluid | None — fluid is good |
| Light brown, still transparent | Normal aging | Monitor; change soon |
| Dark brown or red-brown | Oxidized, detergents depleted | Change fluid promptly |
| Black, opaque | Severely degraded or overheated | Change immediately; inspect for damage |
| Pink or milky | Water or coolant contamination | Stop driving; diagnose leak source |
| Normal color but gritty | Metal particles — internal wear | Professional inspection required |
A burnt smell — similar to singed paper — is a strong indicator the fluid has been overheated. This often happens when towing beyond the vehicle's rated capacity or frequent stop-and-go driving with degraded fluid.
A complete fluid change involves draining the old fluid, replacing the filter (on automatics with a pan), and refilling with fresh ATF. This is a moderate DIY job. You do not need a lift for most vehicles, though jack stands and wheel chocks make it safer and easier. If you end up with fluid on your driveway, read our guide on how to remove oil stains from concrete before they set.

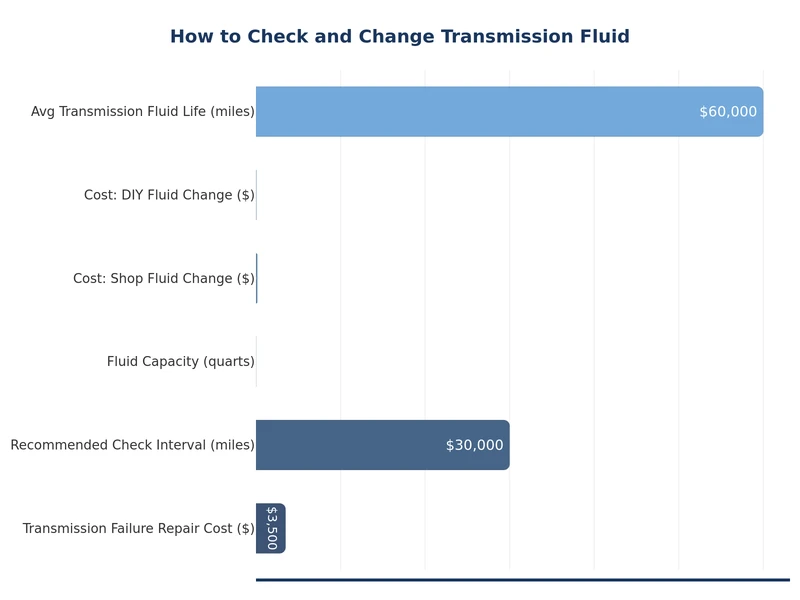
There is no universal answer — intervals vary widely by transmission type, driving conditions, and manufacturer. "Lifetime fluid" claims by some manufacturers refer to the life of the transmission under ideal conditions, not the life of the vehicle. Most independent mechanics recommend changing it regardless.
| Transmission Type | Normal Driving | Severe Driving * |
|---|---|---|
| Automatic (conventional) | Every 30,000–60,000 miles | Every 15,000–30,000 miles |
| Automatic (CVT) | Every 30,000–60,000 miles | Every 25,000 miles |
| Manual (gear oil) | Every 30,000–50,000 miles | Every 20,000–30,000 miles |
| Dual-Clutch (DCT) | Every 40,000 miles | Every 20,000–25,000 miles |
* Severe driving: frequent towing, trailer hauling, mountain driving, extreme heat, or lots of stop-and-go traffic.
Keeping a maintenance log helps you stay on schedule. If you are not sure whether your tires are wearing evenly — another key maintenance indicator — check out our tire wear patterns guide to catch alignment or pressure issues early.
Between scheduled checks, your car will usually signal when the transmission fluid needs attention. Catching these symptoms early prevents expensive damage.
Hard, jerky, or delayed shifts are the most common complaint. Low or degraded fluid starves the hydraulic circuits that control gear changes. A slipping transmission — where the engine revs but acceleration lags — is a serious symptom that should not be ignored.
Whining, humming, or clunking during shifts often points to low fluid or worn internal components lubricated by the fluid. A grinding noise in a manual transmission usually means gear oil is low or contaminated.
Red or brown fluid pooling under the vehicle is a transmission leak until proven otherwise. Common leak points include the pan gasket, cooler lines, front pump seal, and shift shaft seal. A leak that is left unattended will eventually drain the system and destroy the transmission. Fixing a gasket or seal is cheap; rebuilding a transmission is not.
Some vehicles have a dedicated transmission temperature warning light. Others will trigger a check-engine light with a stored code related to transmission slip or pressure. Do not dismiss a check-engine light — have it scanned before the next service.
Check the dipstick with the engine warm and the vehicle on level ground. If the fluid sits below the MIN mark, the level is low. Also watch for delayed engagement when shifting into Drive or Reverse, as that is often the first drivability sign of low fluid.
If your vehicle has a sealed transmission with no dipstick, you need to raise the vehicle and locate the fill plug on the side of the transmission housing. Fluid should be level with the bottom of that hole. This check is best done on a lift and is often left to a shop.
Low fluid causes overheating, increased wear on clutch packs and bearings, and erratic shifting. Continued driving on low fluid can destroy the transmission entirely. Top it up as soon as you discover it is low, and find the source of the leak.
A pan-drop service with a filter replacement typically takes 60 to 90 minutes for a DIYer. A drain-plug-only change (no pan removal) can be done in 30 minutes. The majority of the time is waiting for fluid to drain and properly refilling to the correct level.
No. A fluid change drains the pan and refills — typically replacing 40–60% of the total fluid. A flush uses a machine to push all the old fluid out and replace it entirely. A flush is more thorough but should not be done on a high-mileage transmission that has never been serviced, as it can dislodge sludge and cause immediate problems.
Check your owner's manual — it will specify the exact fluid type, such as Dexron VI, Mercon LV, Toyota WS, or Honda ATF-DW1. Using the wrong fluid is a common and costly mistake. Do not rely solely on the bottle label claiming "universal compatibility" — always verify against your manual or a dealer spec sheet.
 |
 |
 |
 |
About Joshua Thomas
Joshua Thomas just simply loves cars and willing to work on them whenever there's chance... sometimes for free.
He started CarCareTotal back in 2017 from the advices of total strangers who witnessed his amazing skills in car repairs here and there.
His goal with this creation is to help car owners better learn how to maintain and repair their cars; as such, the site would cover alot of areas: troubleshooting, product recommendations, tips & tricks.
Joshua received Bachelor of Science in Mechanical Engineering at San Diego State University.
Get some FREE car parts & gear.. Or check out the latest free automotive manuals and build guides here.
Disable your ad blocker to unlock all the hidden deals. Hit the button below 🚗
| | | |