by Diego Ramirez
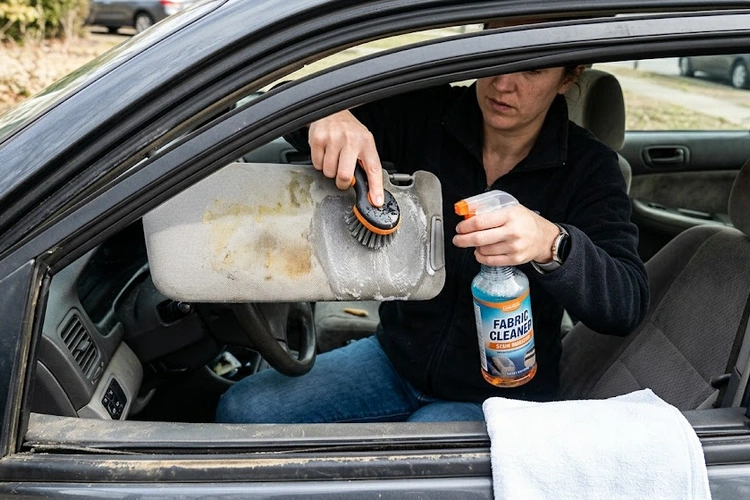
Wipe fabric visors with a microfiber cloth dampened with upholstery cleaner, and treat vinyl or hard plastic versions with a diluted all-purpose interior cleaner — that's how to clean car sun visors in under fifteen minutes without risking damage to the material. Sun visors get touched every time you enter the car on a bright day, which means they accumulate skin oils, hairspray overspray, and airborne dust at a rate most drivers never account for.
If you already have a routine for cleaning your car's seats, adding visors to that workflow completes the interior detail. This guide covers every material type, every common stain scenario, and the right products for each — no guesswork, no wasted effort.
Contents
Sun visors live in a high-contact, high-exposure zone of the cabin. Every flip transfers finger oils, hand lotions, and whatever else you've touched since your last wash directly onto the surface. Over weeks, those layers build into a tacky film that traps fine particulates from the cabin air and locks them into the material.
The main offenders you'll encounter:
Warning: Never use bleach, ammonia-based cleaners, or undiluted degreasers on any visor fabric — they attack the foam backing and cause irreversible delamination that no amount of cleaning will fix.
Your visor absorbs direct solar radiation every time it's deployed, and the windshield zone routinely runs 20–30°F hotter than the rest of the cabin on a sunny day. Heat accelerates oxidation in vinyl, fades fabric dyes, and bakes oils into the substrate at a molecular level. A stain that lifts cleanly in week one becomes a permanent shadow by month six.
The photodegradation process that yellows dashboard plastics attacks visor surfaces by the same mechanism. Applying a UV-blocking interior protectant after each deep clean slows this cycle substantially — it's a five-second step that extends the life of the material by years.
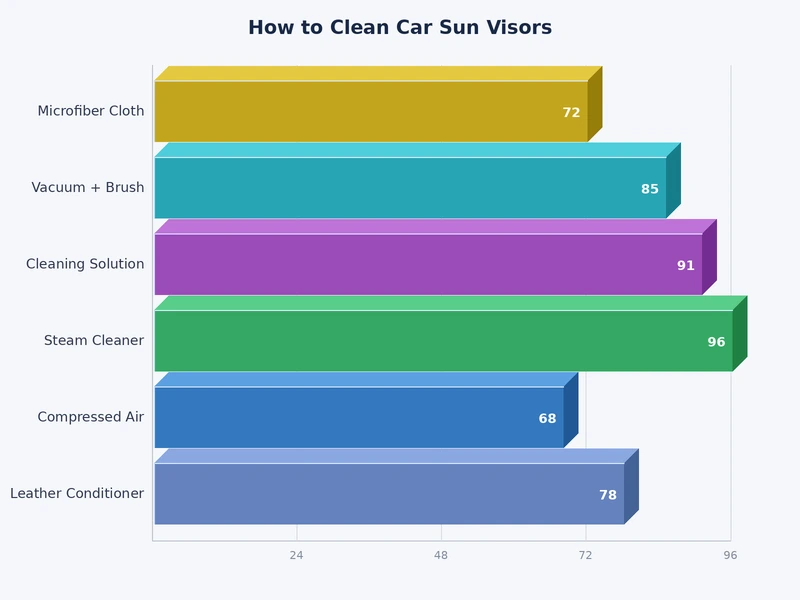
Using the wrong chemistry is the fastest way to ruin a visor. Match the product to the substrate:
| Visor Material | Recommended Cleaner | Avoid | Protectant |
|---|---|---|---|
| Fabric / Woven | Upholstery foam cleaner, diluted APC (1:10) | Bleach, solvent-based degreasers | Fabric guard spray |
| Suede / Alcantara | Dedicated alcantara cleaner, diluted isopropyl alcohol (50/50) | Water-heavy cleaners, steam | Suede protector spray |
| Vinyl / Leatherette | All-purpose interior cleaner (APC), pH-neutral soap solution | Petroleum-based solvents, acetone | Vinyl conditioner or protectant |
| Hard Plastic | 70% isopropyl alcohol, diluted APC (1:6) | Abrasive pads, nail polish remover | Interior plastic dressing |
The tools matter as much as the chemistry. You need:
Run a quality car vacuum with a brush attachment over fabric visors before any wet cleaning. Dry-lifting loose dust means less muddy smearing when you introduce liquid. If you're doing a complete interior job, the guide on detailing a truck interior uses the same systematic surface-by-surface approach and is worth reading alongside this one.
Pro tip: Always test your cleaner on the back edge of the visor, not the face, before working the full surface — thirty seconds of testing prevents a permanent discoloration you can't reverse.
Fabric is the most common visor material in mainstream vehicles and the most forgiving to clean when you work methodically:
Suede and Alcantara follow the same sequence, but finish by brushing the nap back into alignment using a clean, dry soft-bristle brush once the surface is fully dry. Alcantara is more sensitive to moisture than it looks — never let it stay wet for more than a few minutes.
The same product logic you'd use for cleaning exterior car plastic trim applies here — pH-neutral cleaners, no abrasives, protectant as the final step — minus the heavy-duty UV-formulated dressings designed for outdoor exposure.
Standard wipe-downs handle fresh contamination. Set stains require targeted chemistry:
Hairspray polymer buildup on fabric:
Makeup foundation near vanity mirror areas:
Dried coffee or drink splash:
Grease transfer from hands:
The vanity mirror is one of the most overlooked surfaces in any interior detail, and it collects its own unique contamination from close-range facial proximity:
The same precision approach used for removing hard water stains from car windows applies here — small glass surface, stubborn mineral deposits, and the need for chemical specificity over scrubbing force.
Cleaning your sun visors yourself costs almost nothing if you're already maintaining the rest of the interior. The products required are the same ones in your general interior kit:
Total startup cost: $35–75 if you're buying everything new. Per-clean cost after initial purchase: effectively nothing. A complete DIY kit pays for itself after two professional detailing visits.
Professional services price visor cleaning as part of a broader interior package:
If you're prepping the car for sale, clean visors contribute to the overall impression more than buyers consciously realize. A full car sale preparation checklist covers every surface buyers assess. And while you're at it, tackle the car trunk — buyers open it every single time, and a clean interior impression breaks at the first grimy surface they encounter.
The best way to know how to clean car sun visors is to maintain them well enough that deep cleaning is rarely necessary. A simple cadence keeps them in permanent good condition:
The same principle — regular light maintenance over infrequent deep cleaning — applies across the entire interior. The guide on cleaning car cup holders and the center console covers the identical approach for the most heavily contaminated zone in the cabin.
Not every visor is worth restoring. Know when cleaning has hit its ceiling:
Replacement visors for most vehicles run $30–120 at dealerships or OEM-equivalent suppliers. A visor that droops is a genuine safety issue — it obstructs your line of sight during driving and qualifies as a distraction hazard under most traffic safety codes. Clean what's cleanable; replace what isn't.
Plain water removes fresh, light contamination but does nothing for set oils, hairspray residue, or makeup transfer. Use a diluted upholstery cleaner or all-purpose interior cleaner at a minimum. Water alone also risks over-wetting the foam core, which leads to slow drying and potential mildew if the visor stays folded.
Blot — don't rub — with a cloth dampened in 50/50 isopropyl alcohol and water. The alcohol dissolves the polymer binders in hairspray. Follow immediately with diluted upholstery cleaner to condition the fibers and remove any alcohol residue. Expect two to three passes on heavy buildup.
Drooping is a mechanical issue with the pivot rod friction mechanism, not a cleaning problem. The friction washer wears over time and loses its grip. Try applying a single drop of silicone-based lubricant to the pivot point — this sometimes restores enough friction to hold the visor. If that fails, the pivot hardware needs replacement; it's not fixable with cleaning alone.
The visor is the last thing most people clean and the first thing a detail-trained eye notices — take care of it, and the whole interior reads as cared for.
 |
 |
 |
 |

About Diego Ramirez
Diego Ramirez is a maintenance and care specialist who has been wrenching on cars since he was sixteen. He focuses on fluid changes, preventive care routines, paint protection, and the small habits that turn a five-year-old car into a fifteen-year-old car.
Get some FREE car parts & gear.. Or check out the latest free automotive manuals and build guides here.
Disable your ad blocker to unlock all the hidden deals. Hit the button below 🚗
| | | |