by Joshua Thomas
Vinyl car seats are among the most durable upholstery options available, but they still accumulate dirt, grime, and stains over time. Knowing how to clean vinyl car seats properly keeps them looking sharp and extends their lifespan significantly. Whether you're dealing with everyday dust or stubborn food spills, the right technique makes all the difference. This guide walks you through everything — from gathering supplies to protecting the material after cleaning. For a broader overview of seat care, visit our car seat cleaning service page.
Contents
Before you start, assemble the right tools. Using the wrong materials — especially abrasive scrubbers or harsh solvents — can permanently damage vinyl's surface coating.
Avoid bleach, ammonia-based cleaners, and stiff wire brushes. These strip the protective layer from vinyl and cause cracking over time. EPA Safer Choice labels are a good indicator that a product is gentle enough for interior surfaces.
Always vacuum before applying any liquid. Loose dirt and crumbs turn into abrasive mud the moment moisture is introduced, scratching the surface as you scrub. Use a brush attachment and work in slow, overlapping strokes. Pay special attention to the seat-back junction and the crease at the bottom of the backrest — that's where most debris collects.
Even products labeled "vinyl safe" can cause discoloration on certain finishes. Apply a small amount of your chosen cleaner to the underside of a seat or another hidden area. Wait two minutes, then wipe off. If the color doesn't change and the surface feels the same, you're good to proceed across the full seat.
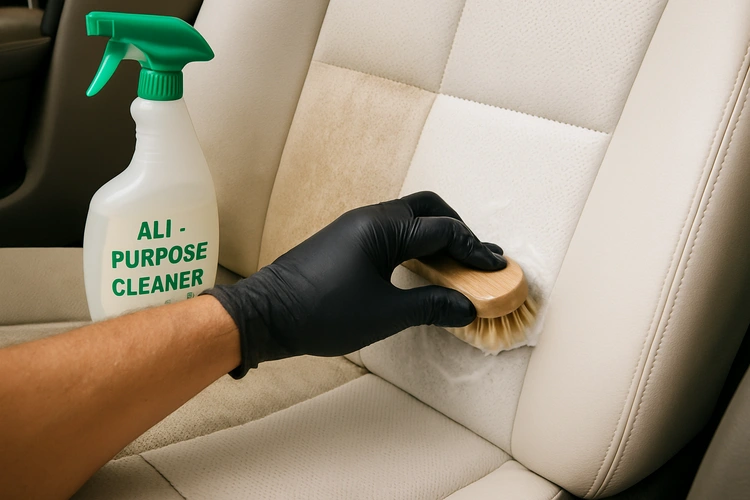
Seams are vinyl's dirtiest spots and the hardest to clean with a flat cloth. Use a soft-bristle brush or an old toothbrush dipped in your cleaning solution. Scrub along the seam direction, not across it, to avoid stressing the stitching. Wipe away loosened debris with a damp cloth, then dry the seam thoroughly.
If you also have a leather steering wheel to clean, the toothbrush technique works equally well on its stitching.
Ink is one of the most stubborn stains on vinyl. Dampen a cotton ball with isopropyl rubbing alcohol (70% or 90%) and dab — don't rub — directly on the stain. Rubbing spreads the ink. Keep dabbing with a fresh part of the cotton ball until the ink lifts. Follow with a damp cloth to remove alcohol residue, then dry.
Grease from fast food bags, sunscreen, and oily hands bonds to vinyl quickly. Sprinkle a small amount of baking soda directly on the stain and let it sit for five minutes to absorb the oil. Brush it off, then clean the area with your vinyl cleaner. For deep-set grease, a dedicated degreaser formulated for automotive interiors works best. You can also review our guide on how to get grease out of car upholstery for more detailed techniques.
Not all vinyl cleaners are equal. Some are formulated for marine vinyl, others for automotive. The table below compares the most common options across key factors.
| Cleaner Type | Best For | Safe on Vinyl | Removes Grease | Cost |
|---|---|---|---|---|
| Mild dish soap + water | Light everyday dirt | Yes | Partially | Very low |
| Dedicated vinyl cleaner | General cleaning + conditioning | Yes | Yes | Moderate |
| All-purpose interior cleaner | Mixed interior surfaces | Check label | Yes | Moderate |
| Rubbing alcohol | Ink, marker, adhesive | Spot use only | No | Low |
| Bleach-based cleaner | Mold/mildew (use with caution) | No — avoid | Yes | Low |
| Ammonia-based cleaner | Hard surfaces only | No — avoid | Yes | Low |
If your vehicle doubles as a work truck or you frequently transport kids, a dedicated vinyl cleaner with built-in UV protection is worth the extra cost. It cleans and adds a layer of defense in a single step.
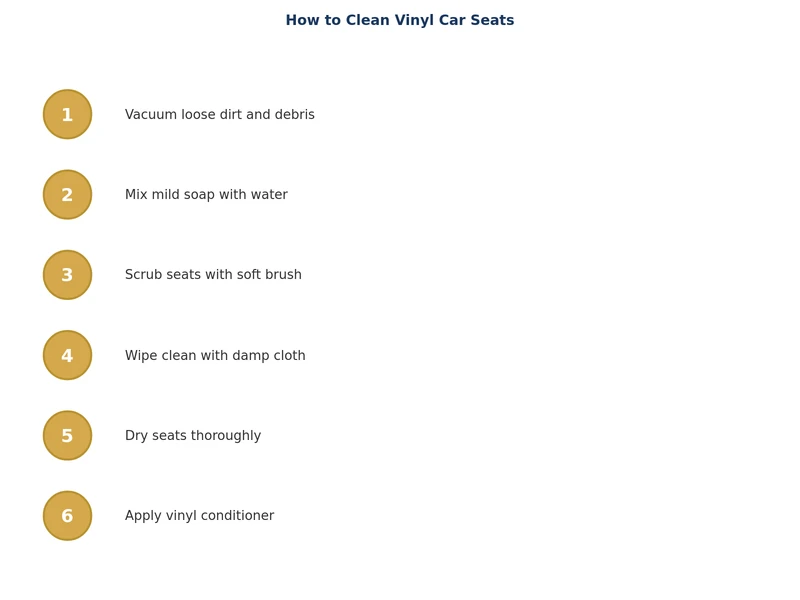
Cleaning removes dirt, but conditioning is what keeps vinyl supple and prevents cracking. Once your seats are fully dry, apply a thin, even coat of vinyl conditioner or protectant using a clean microfiber cloth. Work it into the surface with gentle circular motions, then buff off any excess.
Look for a conditioner that includes UV inhibitors. Sun exposure is the primary cause of vinyl cracking and fading — the same UV damage that affects car paint also degrades interior surfaces. If you want to understand more about UV protection strategies, our article on how to protect your car paint from sun damage covers relevant principles that apply to interior surfaces as well.
For ongoing maintenance, a light cleaning every two to four weeks prevents buildup from setting in. Deep clean with conditioning every three months, or more frequently if the vehicle gets heavy use.
Yes. A few drops of mild dish soap mixed with warm water is one of the safest and most effective solutions for routine vinyl cleaning. Avoid heavy-duty degreasers or soaps with added moisturizers, as these can leave a residue that attracts more dirt.
A light wipe-down every two to four weeks keeps everyday grime from building up. Do a thorough deep clean with conditioning every three months. Increase frequency if the vehicle carries pets, children, or work equipment regularly.
Rubbing alcohol is safe for targeted spot treatment on stains like ink or marker. However, using it over large areas repeatedly can dry out the vinyl and cause it to crack over time. Always follow any alcohol treatment with a vinyl conditioner.
The two main causes are UV exposure and lack of conditioning. Sunlight breaks down the plasticizers in vinyl, making it brittle. Infrequent conditioning accelerates this process. Parking in shade and applying UV-protective conditioner regularly are the best preventive measures.
Steam can be used carefully on vinyl seats, but keep the nozzle moving and maintain a safe distance — typically six to eight inches. Excessive heat concentrated in one spot can soften and warp vinyl. Always dry thoroughly and condition after steam cleaning.
Mix one part white vinegar with two parts water and apply with a soft cloth. Scrub gently, then wipe clean with a damp cloth and dry completely. For heavy mold growth, a diluted automotive mold remover is more effective. Ensure the car interior is fully aired out and dry to prevent mold from returning.
 |
 |
 |
 |
About Joshua Thomas
Joshua Thomas just simply loves cars and willing to work on them whenever there's chance... sometimes for free.
He started CarCareTotal back in 2017 from the advices of total strangers who witnessed his amazing skills in car repairs here and there.
His goal with this creation is to help car owners better learn how to maintain and repair their cars; as such, the site would cover alot of areas: troubleshooting, product recommendations, tips & tricks.
Joshua received Bachelor of Science in Mechanical Engineering at San Diego State University.
Get some FREE car parts & gear.. Or check out the latest free automotive manuals and build guides here.
Disable your ad blocker to unlock all the hidden deals. Hit the button below 🚗
| | | |