Studies from the automotive aftermarket industry estimate that a properly maintained paint finish retains up to 15% more resale value compared to neglected exteriors — a figure that makes mastering how to detail car exterior surfaces one of the most financially defensible skills in any vehicle owner's arsenal. Our team has refined exterior detailing protocols across sedans, crossovers, trucks, and high-mileage daily drivers over many years, and the difference between a showroom-quality result and a mediocre hand wash comes down entirely to sequence, product chemistry, and disciplined surface preparation. Understanding the time investment required for a proper exterior detail prepares most people for what a genuine multi-stage workflow actually demands before the first polish pad touches the paint.
Most people treat exterior detailing as an extended car wash, and that misunderstanding generates swirl marks, contamination streaks, and prematurely oxidized clear coats. Our experience shows that a true exterior detail is a structured three-stage workflow — decontamination, paint correction, and protection — where each stage must be completed in sequence before the next begins, and skipping stages produces results that look acceptable for two weeks before deteriorating rapidly.
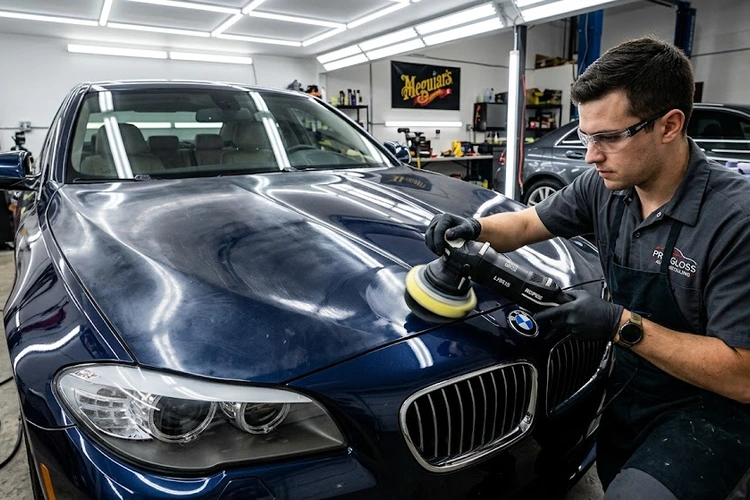
Figure 1 — A complete exterior detailing kit laid out before beginning the decontamination stage, including iron remover, clay bar, wash mitts, and protection products.
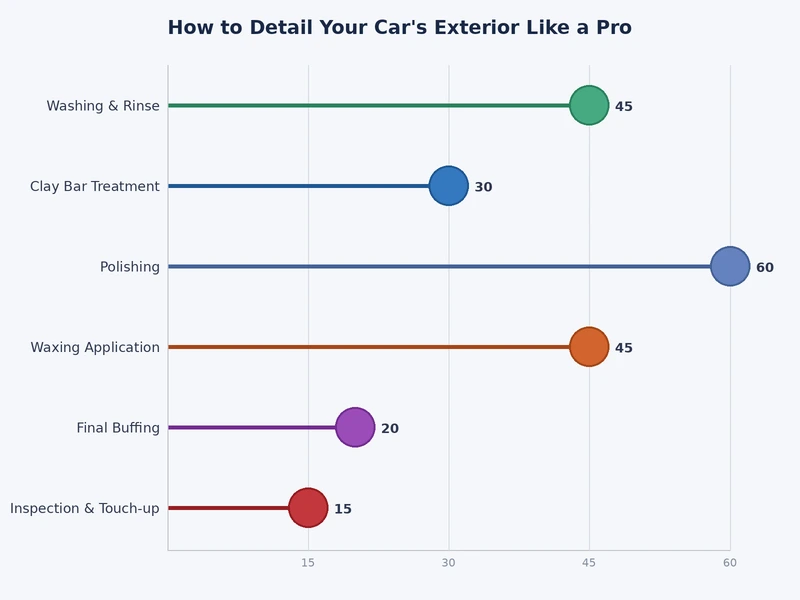
Figure 2 — Durability versus cost comparison across the three primary exterior protection chemistries: carnauba wax, paint sealant, and consumer-grade ceramic coating.
The Detailing Arsenal: Tools and Products That Actually Matter
Wash Phase Equipment
Two-bucket wash system: one bucket with pH-neutral shampoo, one with clean rinse water — the single most effective swirl-prevention measure available at any price point.
Microfiber wash mitts: knit or chenille pile construction at minimum 1,200 GSM; synthetic sponges trap abrasive grit directly against the paint surface and should never enter a proper detailing workflow.
Grit guards: plastic inserts positioned at the bucket base that trap displaced contamination below the active wash level between each rinse cycle.
Foam cannon or foam gun: pre-soak stage that lubricates surface contaminants before contact washing begins, reducing micro-abrasion on the clear coat dramatically during the wash phase.
Iron decontamination spray: chemical chelation agent dissolving ferrous particles embedded in clear coat — non-negotiable on vehicles parked near rail corridors or in brake-dust-heavy urban environments.
Clay bar or clay mitt: mechanical decontamination removing bonded surface contamination that chemical decontamination alone cannot address.
Paint Correction Tools
Dual-action (DA) orbital polisher: 15mm or 21mm throw; our team consistently uses the 21mm platform for faster coverage on large flat panels like hoods and roofs.
Rotary polisher: generates significantly more heat and correction speed than a DA, suitable for experienced operators working on heavily oxidized or single-stage paint systems.
Polishing pad set: foam cutting, foam finishing, and microfiber correction pads — each category paired to a specific compound or polish grade for correct abrasive action.
Three-stage abrasive system: heavy compound, polish, and finishing polish for removing deep scratches, mid-level swirls, and post-polish haze respectively.
Paint depth gauge: digital ultrasonic tool measuring clear coat thickness in microns, essential for establishing how much correction headroom remains before reaching the base coat on any given panel.
Protection Application Tools
Applicator pads: foam or microfiber depending on whether the protection layer is a wax paste, liquid sealant, or SiO2-based coating product.
High-pile microfiber towels: 400–600 GSM, used exclusively for buffing wax and sealant residue — never repurposed for decontamination or correction tasks to avoid cross-contamination.
Paint protection film kit: for high-impact zones like the leading hood edge and A-pillars, though professional installation delivers superior fit and longevity compared to DIY application.
What a Professional-Grade Detail Actually Costs
DIY Investment Breakdown
Building a complete DIY detailing kit from scratch involves a meaningful one-time investment that varies considerably based on whether machine polishing capability is included in the initial setup:
Decontamination products (iron remover, clay bar, tar remover): $45–$90
DA polisher and starter pad set: $150–$350 depending on brand and throw size
Three-step abrasive set (compound, polish, finishing polish): $60–$120 for a quality professional-grade selection
Protection layer (quality sealant or entry-level consumer ceramic coating): $30–$200
Microfiber towels and applicators: $50–$100 for a properly stocked set across all task categories
The total initial outlay runs $415–$1,000 for a complete kit, with subsequent details costing only consumables — typically $30–$60 per full detail after the initial equipment investment is amortized over three to five uses.
Professional Service Pricing
Basic exterior detail (wash, clay, wax): $150–$300 depending on vehicle size and regional labor rates
Single-stage paint correction plus sealant: $350–$600
Full two-stage correction plus ceramic coating: $800–$2,500 depending on vehicle size, paint condition, and coating tier
Paint protection film (full front end): $1,500–$3,500 for professional installation on a full front-end package
Detailing Myths That Quietly Ruin Paint
The Dish Soap and Household Cleaner Fallacy
The persistent belief that dish soap creates a cleaner surface than dedicated car shampoo costs more in wax and sealant stripping than any perceived savings in product cost. Dish detergents contain alkaline surfactants engineered to strip grease from cookware, and they perform that function equally well on automotive wax, paint sealant, and ceramic coating maintenance layers. Our team has documented this degradation consistently — a vehicle washed three consecutive times with dish soap loses its protection layer entirely, regardless of how recently it was applied or what product category was used.
Other Persistent Misconceptions
"Circular motions are fine for washing": Circular patterns concentrate abrasive grit through the same arc repeatedly, creating the classic swirl halo visible under direct sunlight; straight, overlapping strokes parallel to panel edges are the correct contact wash technique.
"More polish removes scratches faster": Excess product gums up the pad, reduces abrasive efficiency, and extends working time without improving cut depth; pea-sized amounts per 18-inch section are the correct working quantity.
"Ceramic coating makes a car self-cleaning": Ceramic coatings dramatically reduce surface adhesion for road contaminants and accelerate maintenance washing, but they do not eliminate the need for regular pH-neutral wash cycles.
"Machine polishing always removes dangerous amounts of paint": A properly configured DA polisher on a finishing pad removes negligible clear coat — measurably less than aggressive hand rubbing with a clay mitt under incorrect technique.
For vehicles that have already sustained surface damage from incorrect washing technique, our detailed guide on removing scratches from plastic bumpers covers the correct correction approach for exterior trim components, which respond differently than painted body panels under machine correction.
How to Detail Car Exterior Surfaces: The Complete Pro Sequence
Stage 1 — Pre-Wash and Decontamination
Rinse the entire vehicle from roof to rocker panels using high-pressure water, dislodging loose contamination before any contact surface touches the paint.
Apply foam cannon pre-soak and allow 3–5 minutes of dwell time; the concentrated surfactant load loosens bonded road film and bio-contamination significantly before the contact wash phase begins.
Two-bucket contact wash using straight panel strokes — roof, glass, upper painted panels, lower panels, and wheels processed in that sequence to prevent cross-contamination from the dirtiest surfaces to the cleanest.
Rinse and dry using a silicone water blade followed by a clean drying towel pass, eliminating water spot formation before iron decontamination begins.
Iron decontamination spray: saturate all painted panels, observe the purple chelation reaction as ferrous particles dissolve (2–5 minutes dwell), and rinse thoroughly before the reaction redeposits.
Clay bar decontamination: lubricate with quick detailer spray and work clay in straight overlapping strokes across each panel until the surface passes the back-of-hand smoothness test across the entire vehicle.
Stage 2 — Paint Correction
Inspect under an LED paint inspection light at a 45-degree angle to map swirl severity across panels and determine the appropriate pad-and-compound combination required for correction.
Mask trim, emblems, and rubber seals with painter's tape to prevent compound staining on porous materials that cannot be polished clean.
Machine polish in 18" × 18" sections with 50% overlapping passes, working each section until the compound fully hazes and breaks down, indicating the abrasive cycle is complete.
Wipe residue and inspect under the inspection light before advancing to the next section — this verification step prevents doubling back across already-corrected panels.
Step down through abrasive grades as required by panel condition — heavy compound for deep scratches and oxidation, polish for mid-level swirls, finishing polish to eliminate any haze or micro-marring from the correction stage.
Stage 3 — Protection Application
IPA wipe-down at 50% dilution across all corrected panels, removing all polish oils, silicone contamination, and surface residue that would prevent protection products from bonding to the clear coat.
Apply the chosen protection layer in thin, even passes — following product-specific dwell time instructions precisely, as under-cured or over-cured sealant and coating products streak and resist clean buffing.
Buff off residue with a dedicated high-pile microfiber towel using light pressure and straight overlapping strokes, rotating to a clean panel surface every 12–18 inches.
Apply glass sealant to all exterior glass surfaces and buff to clarity; the water-beading performance improvement is immediately apparent at highway speeds.
Dress exterior trim and tires with appropriate dressing products — matte-finish water-based dressing for modern textured black trim, moderate-sheen tire dressing applied by brush rather than aerosol spray to prevent overspray on clean paint.
High-Impact Steps That Deliver Immediate Visual Payoff
The 15-Minute Exterior Refresh
When the complete how to detail car exterior workflow is not practical between full details, these targeted steps deliver the most visible return on time invested:
Iron decontamination spray on lower panels and wheels: removes the orange-brown contamination haze that makes otherwise clean paint appear dull and neglected at close range.
Quick detailer spray on all painted surfaces: lifts light dust and fresh fingerprints without water contact and adds a temporary gloss enhancement layer over the existing protection.
Glass cleaner on all exterior glass: clean glass changes the perceived overall cleanliness and care level of the entire vehicle dramatically, even when the paint itself needs more attention.
Tire dressing on sidewalls: evenly dressed tires elevate the entire exterior presentation in under three minutes and are among the highest-return quick-win steps available in any detailing context.
Trim and Glass Priority Areas
Unpainted black exterior trim fades to a chalky gray that reads as outright neglect from ten feet away — a dedicated trim restorer applied by hand in two minutes reverses months of UV degradation at minimal product cost.
Windshield contamination from silicone overspray, wax residue, and atmospheric oils creates a prismatic haze in direct low-angle sunlight; a dedicated glass polish removes it completely in a single pass and dramatically improves outward visibility.
Wheel barrels and brake calipers respond immediately to iron decontamination spray and a stiff-bristle wheel brush — the contrast improvement against freshly dressed tires and clean bodywork is visible from curb distance.
Hand Polishing vs. Machine Polishing: Honest Trade-offs
Hand Application
Advantages:
No equipment investment beyond foam applicator pads and polishing cloths
No risk of burning paint through localized heat buildup or excessive dwell pressure on soft European clear coats
Practical for small spot-correction tasks, emblems, tight panel transitions, and final protection application steps
Completely portable and viable in environments without power access
Limitations:
Cannot generate sufficient abrasive force to remove medium or deep swirl marks from any paint system, regardless of compound grade or application pressure
Inconsistent pressure and pad saturation levels across large panels produce uneven correction and gloss depth when compared to machine-leveled results
Significantly more physically demanding across a full-vehicle correction session on larger vehicles
Machine Polishing (DA Orbital)
Advantages:
Consistent oscillation speed, downforce, and abrasive action across every pass on every panel, producing objectively more even correction results than hand application
Capable of removing Level 1 and Level 2 paint defects — defined as scratches within the clear coat layer — that hand application cannot address regardless of product selection
Dramatically faster on large flat panels: hood, roof, and door surfaces completed in a fraction of the time required by hand correction
Paired with a finishing pad and light finishing polish, poses negligible paint removal risk on factory clear coat with standard paint depth readings
Limitations:
Access limitations on complex body lines, door jambs, mirror housings, and tight panel-to-panel transitions that require hand correction supplementation
Initial equipment cost of $150–$350 for a quality DA unit before pad and product investment
Requires correct pad-and-compound pairing knowledge — mismatched combinations reduce correction efficiency or introduce new defects on sensitive paint systems
Wax, Sealant, or Ceramic Coating: A Direct Comparison
Selecting the correct protection chemistry is central to any exterior detailing workflow — the choice determines maintenance interval frequency, long-term durability expectations, and the gloss character of the finished result. Our team has applied all three categories across hundreds of exterior details on vehicles ranging from daily commuters to weekend show cars, and the performance differences are consistent and measurable.
Enthusiasts wanting long-term protection without pro cost
Ceramic Coating (professional)
3–7 years
Maximum depth and clarity
High — professional application only
$800–$2,500
New or freshly corrected paint with long-term ownership plans
Paint Protection Film (PPF)
7–10 years
Clear or matte finish options available
Very high — professional installation required
$1,500–$3,500
High-impact zones, track-day vehicles, front-end rock chip preservation
According to Wikipedia's overview of automotive detailing, the professional detailing industry has grown substantially as ceramic coating technology transitioned from professional-exclusive to consumer-accessible, raising the standard expectation for protection durability across the entire market segment.
When a Full Detail Makes Sense — and When It Doesn't
Situations That Warrant a Full Exterior Detail
Pre-sale or pre-trade preparation: a full correction-plus-coating detail consistently returns $200–$800 in negotiated private-party value based on our team's experience across dozens of vehicle transactions, making it one of the highest-ROI detailing applications.
Post-winter decontamination: road salt, calcium chloride, and ferrous brake dust particles accumulate across the paint surface through winter months, and spring is the correct time for a full decontamination-plus-protection cycle before summer UV exposure begins.
Post-paint repair work: body shop overspray, tape edge lines, and compound haze from panel repairs require correction-level attention and a full IPA prep before any new protection product application.
High-UV climate preparation: vehicles parked outdoors in intense-sun environments benefit significantly from a full detail before peak exposure months — our team recommends pairing the detailing workflow with our guide on maintaining a car in hot weather for a complete summer protection approach that addresses both the exterior finish and the mechanical systems underneath.
Annual protection refresh cycle: even professionally ceramic-coated vehicles benefit from a full decontamination cycle and dedicated coating maintenance spray once annually to restore hydrophobic performance and clear surface-level marring.
Situations Where a Full Detail Is Overkill
Vehicles scheduled for paint work or panel replacement within 30 days — investing $400+ in correction work before a body repair reverses it entirely is not an economically rational allocation of time or product.
Vehicles stored indoors full-time with minimal UV exposure and negligible road contamination buildup — a maintenance wash and sealant refresh every six months is the correct protocol for these low-exposure use cases.
Fleet vehicles with high-cycle daily use where cosmetic appearance is secondary to mechanical reliability — the time investment of a full exterior detail does not deliver proportional operational return in fleet management contexts.
Vehicles with paint damage exceeding correction-level work — deep keying, significant base coat oxidation, or hail damage with clear coat fracturing — where professional panel respray is the correct next step rather than aggressive machine polishing.
Diagnosing and Correcting Common Detailing Errors
Swirl Marks and Buffer Trails
Buffer trails — the distinct arcing scratches left by incorrect rotary polisher technique or contaminated pad surfaces — are the most common error our team encounters on vehicles that have been previously "detailed" incorrectly by untrained operators:
Primary cause: contaminated pad surface from insufficient cleaning between sections, excessive machine speed on a rotary platform, or circular arm movement leaving closed arc patterns instead of straight overlapping passes.
Correction approach: a fresh cutting pad loaded with light compound on a DA polisher, worked in straight overlapping passes — the same platform and technique that prevents buffer trails also corrects them when the speed and movement are adjusted.
Prevention protocol: inspect and condition pads every 18" × 18" section using a pad cleaning brush during the correction session, and never allow a visibly loaded pad to continue across adjacent panel areas.
Water Spots and Chemical Staining
Type 1 water spots (mineral deposits resting on the surface): addressed with a dedicated water spot remover or diluted white vinegar solution before the clay bar stage, followed by protection reapplication over the treated area.
Type 2 water spots (etched into the clear coat surface): require machine polishing with a light cutting compound to level the clear coat around the etch crater and restore surface optical clarity.
Type 3 water spots (etched entirely through clear coat into base): beyond correction-level work — professional panel respray is the only technically sound remedy for full clear coat penetration.
Iron staining from atmospheric contamination: appears as orange-brown speckling across horizontal panels under direct light, addressed completely by iron decontamination spray in the pre-correction decon stage before any abrasive work begins.
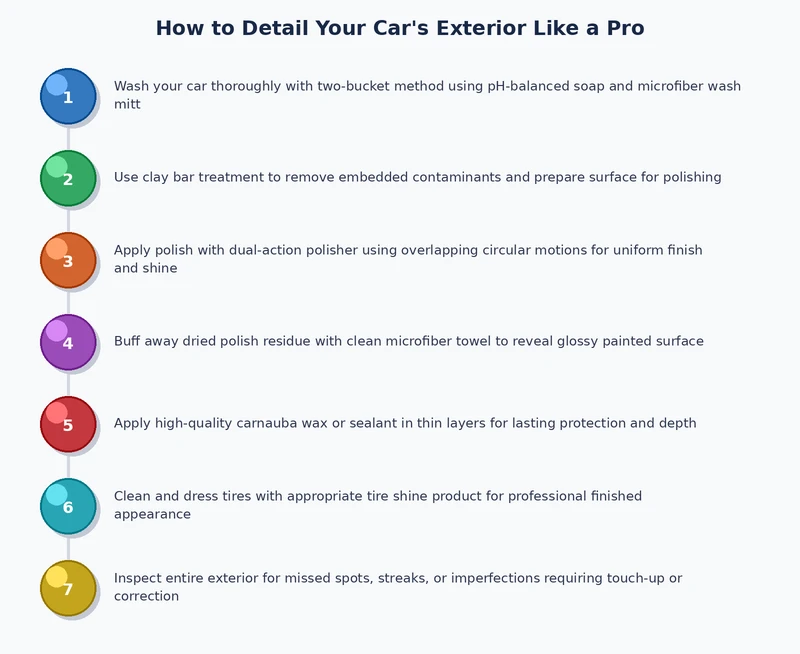
Figure 3 — The three-stage exterior detailing sequence: pre-wash and decontamination, paint correction, and protection application — each stage building on the previous for repeatable professional results.
Frequently Asked Questions
How often should a full exterior detail be performed?
Our team recommends a complete decontamination-plus-protection cycle twice annually for daily drivers — once in spring after winter salt exposure and once in autumn before cold weather returns. Vehicles with ceramic coatings require only an annual maintenance decontamination wash and coating booster spray between full detail cycles, provided regular pH-neutral maintenance washes occur every two to three weeks.
What is the correct order for the how to detail car exterior process?
The correct sequence is always decontamination first, paint correction second, and protection application third — in that strict order. Applying protection before correction seals contamination and swirls beneath the protection layer. Attempting correction after protection wastes correction product cutting through the protection layer before reaching the paint defects beneath.
Can machine polishing damage factory paint if performed incorrectly?
A DA orbital polisher on a finishing pad with a finishing polish removes negligible clear coat on factory paint with standard depth readings — typically less than 0.5 microns per full correction pass. The risk of burning or cutting through paint is associated with rotary polishers operated at high speed with aggressive compounds by inexperienced operators, not with properly configured DA equipment in trained hands.
What distinguishes a full exterior detail from a standard car wash?
A standard car wash removes surface-level loose dirt and offers no paint decontamination, correction, or protection capability. A full exterior detail involves chemical and mechanical decontamination removing bonded contamination, machine polishing to eliminate paint defects, and a durability-grade protection application that shields the clear coat for months or years depending on the product category used.
Is clay bar decontamination necessary if the paint looks visually clean?
Paint that appears visually clean frequently fails the back-of-hand surface test, revealing embedded ferrous particles, industrial fallout, and bonded contamination that soap and water do not remove. Applying wax, sealant, or coating over contaminated paint traps that contamination beneath the protection layer, reducing bonding and accelerating premature product failure. Clay decontamination is a non-negotiable step before protection application regardless of apparent visual paint condition.
Why do water spots return quickly after a fresh detail?
Water spots that return within days of a detail indicate either that the vehicle is being air-dried rather than towel-dried after washing, or that it is consistently exposed to hard water with high mineral content from an irrigation system or outdoor hose. The mineral deposits return with every water contact — preventing formation through quick-dry habits and using filtered water for final rinse stages is the correct long-term solution rather than repeated spot removal.
Does exterior detailing provide meaningful protection against rust formation?
A properly maintained paint and protection system is one of the most effective rust prevention measures available for exterior body panels. Intact clear coat and a fresh sealant or ceramic coating layer prevent moisture and road salt from contacting bare metal at micro-surface imperfections and stone chips. Our team prioritizes chip touch-up alongside annual decontamination details specifically because unprotected bare metal at chip sites is the primary initiation point for exterior rust on maintained vehicles.
Final Thoughts
Mastering the how to detail car exterior process is a systematic discipline built on correct product selection, strict stage sequencing, and the kind of surface preparation that most people skip — and the results consistently reflect the difference between those who follow the process and those who improvise. Our team recommends starting with a complete decontamination detail on whatever vehicle is in the driveway right now: clay the paint, apply a quality sealant, and experience firsthand how much of what passes for a clean car is actually a contaminated one. From that baseline, every subsequent detail builds toward a paint condition that holds its value, reflects light correctly, and requires progressively less correction work over time.
Diego Ramirez is a maintenance and care specialist who has been wrenching on cars since he was sixteen. He focuses on fluid changes, preventive care routines, paint protection, and the small habits that turn a five-year-old car into a fifteen-year-old car.