by Diego Ramirez
A friend of mine picked up a pearl-white coupe a couple of years back. He washed it every two weeks like clockwork — proper soap, proper technique, the whole routine. Within six months, that gorgeous finish looked flat and chalky, and he had no idea why.
Knowing how to maintain car paint gloss between washes is the real skill most car owners skip. Your clear coat is under attack every single day — UV radiation, bird droppings, tree sap, and airborne fallout don't take breaks. Washing removes grime, but it doesn't preserve gloss. That's what you build between wash days. For the full foundation, start with our guide on how to protect car paint — this post focuses on what you do between wash days to keep that depth and reflectivity alive.
Contents
Traditional carnauba wax has earned its reputation, but it's not the complete solution most people assume. Standard paste and spray waxes last four to eight weeks under normal driving conditions — often less if your car lives outside in summer heat or high UV exposure. Between applications, you have zero active protection on the clear coat. UV rays degrade unprotected clear coat faster than most people realize, and that degradation is cumulative and largely irreversible without polishing.
Automotive paint systems are multi-layer — electrocoat primer, color base coat, and a clear coat on top. That clear layer is only about 50–70 microns thick. It's what gives your paint gloss, and it's the layer you're fighting to protect. Wax protects it temporarily. Wax wears off. If you're not actively refreshing that protection layer between washes, you're losing gloss with every UV cycle and every hot afternoon in a parking lot.
Wax is a solid foundation. It's not a maintenance strategy on its own. You need to be doing something active between applications — and this post tells you exactly what that looks like in practice.
Washing removes contamination. Full stop. A clean surface has zero protection unless you've layered a sealant, wax, or coating on top of it. Plenty of people wash religiously using the two-bucket car wash method — which is the right technique — but skip every post-wash protection step. Your result is a spotless car that's completely exposed to everything the environment throws at it between now and your next wash day.
Gloss isn't only about cleanliness. It's about the optical smoothness and depth of the clear coat surface. Oxidation, micro-marring from improper wiping, and water spot etching all degrade gloss while the car still looks acceptably clean to a casual eye. Don't confuse clean with protected. They're different conditions, and only one of them actually preserves long-term gloss depth.
This is where most people lose gloss without realizing it. Reaching for a random spray bottle and wiping down the car sounds harmless. It isn't. Using a household cleaner, an all-purpose degreaser, or even an old detailing spray on a dusty surface introduces micro-scratches and swirl marks into your clear coat every single time. The abrasion is small per incident, but it accumulates fast.
The product you reach for has to match the actual surface condition. Light dust and fingerprints call for a dedicated quick detailer with lubrication. Heavier contamination — road film, dried water spots, light grime — needs a waterless or rinseless wash, not a wipe-down. Dragging a quick detailer across gritty paint is exactly how swirl marks happen. The table below clarifies which product to use and when.
| Product Type | Best Used For | Required Surface Condition | Adds Lasting Protection? |
|---|---|---|---|
| Quick Detailer | Dust, pollen, light fingerprints, smudges | Near-clean paint only | Minimal — temporary shine boost |
| Spray Wax / Sealant | Post-wash gloss enhancement and protection top-up | Clean, dry paint | Yes — typically 4–8 weeks |
| Waterless Wash | Light to moderate dust and road film | Lightly soiled — no heavy mud or grit | Some, depending on formulation |
| Rinseless Wash | Full panel cleaning without a garden hose | Moderately dirty — not caked mud | Yes, if spray sealant added after |
| Dedicated Spot Remover | Bird droppings, tar spots, tree sap, bug splatter | Spot treatment on any condition | No — clean first, protect after |
Bird droppings are acidic enough to etch clear coat within hours on a hot day. Tree sap hardens into a resin bond that requires chemical or mechanical intervention once it cures fully — gentle wiping won't do it. Road tar bonds to paint and becomes nearly impossible to shift without a dedicated tar solvent after 24–48 hours. Every hour you leave these on your paint, the damage compounds. This isn't exaggeration — it's chemistry.
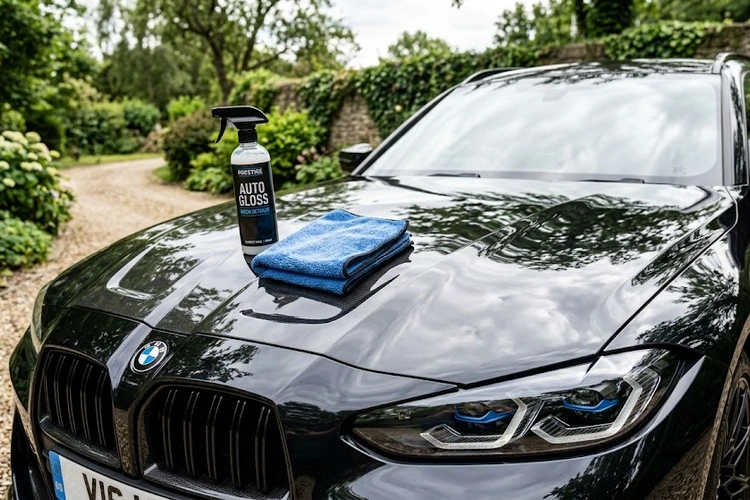
The practical fix is simple: keep a quality spray detailer and a few clean microfiber cloths in your car at all times. Deal with contamination when you see it, not on your scheduled wash day. Speed is everything with bird droppings especially. If you already have surface damage or scuff marks from delayed removal, our guide on how to remove old wax buildup from car paint will help you reset the surface before you start rebuilding protection layers properly.
Quick detailers and spray waxes work best on cool paint in the shade. If your panel surface temperature is above 100°F — which is easy to hit on a parked car in summer sun — your product will flash and dry before you can spread it evenly. You'll get streaks, high spots, and uneven coverage that actually scatters light rather than reflects it. Work in the early morning or evening. Work in a garage or under shade. This isn't optional.
The single best time to apply a spray wax or sealant top-up is immediately after your regular wash, while the paint is still slightly damp. Product bonding is better, application is faster, and you're actively building your protection stack rather than just delaying its depletion. This adds five minutes to your wash routine and meaningfully extends the life of your gloss between full wax applications.
If you're parking outside daily, a quick wipe-down with a spray detailer every two to three days removes pollen, dust, and light fallout before it bonds. Five minutes three times a week beats a two-hour correction session once a quarter every time.
If your paint has visible grit, heavy road film, or dried insect matter, skip the quick detailer entirely. Wiping a contaminated surface drives particles into the clear coat and creates scratches that kill the gloss you're trying to maintain. Do a proper wash instead. Similarly, if you haven't decontaminated with a clay bar or iron remover in several months, no spray wax will restore depth — bonded ferrous fallout and embedded contamination are actively scattering light at the micro level, and only decontamination fixes that.
Hard-water areas present a specific challenge. Mineral deposits left behind after rain or irrigation evaporation can start etching within days in direct sun. If your paint dries with visible water spots, a quick detailer won't dissolve those mineral bonds. Proper drying technique is the first line of defense — our guide on how to dry a car without leaving water spots walks you through preventing them from forming at all, which is far easier than removing them after the fact.
A sustainable gloss maintenance routine looks like this: wash every one to two weeks with correct technique, apply a spray sealant or spray wax immediately after every wash, do a full wax or liquid sealant application once a month, and decontaminate with a clay bar or iron remover every three months. That's the complete framework. No exotic equipment. No weekend-long sessions. Just consistent, repeatable steps executed on a schedule.
Between wash days, a quick-detailer wipe every two to three days handles dust, pollen, and light surface fallout before any of it has time to bond or etch. Five minutes per session. If you're stacking wax layers without periodically stripping back to clean paint, you risk trapping contamination underneath and reducing gloss rather than building it — counterintuitive but common. Our guide on how to remove old wax buildup covers how to reset the surface properly so each new layer is actually doing its job.
Think of your paint protection as a deliberate stack. The base is your clear coat. Above that, a synthetic polymer sealant handles UV blocking and chemical resistance — typically lasting four to six months. On top of that, a carnauba wax layer adds optical warmth and wet-look depth. Then a spray wax or graphene spray on maintenance days refreshes the outermost layer without disturbing anything beneath it.
Each product in the stack has a specific role. The sealant does the heavy lifting on durability and protection. The wax contributes gloss character and hydrophobicity. The spray booster keeps water beading sharp and the surface slick in the weeks between full applications. When the outermost layer wears, the layer beneath it is still working. This is the actual mechanism behind how to maintain car paint gloss consistently across seasons and changing weather — not one product doing everything, but each layer doing its part.
Start with three things: a quality spray detailer, a set of proper microfiber towels in different GSM weights, and a spray sealant for post-wash application. Don't buy a machine polisher yet. Don't attempt a ceramic coating kit yet. Master contamination removal, correct wiping technique, and consistent post-wash protection first. Get those habits locked in and your paint will be in better shape than most cars whose owners have spent three times more on products.
The single biggest beginner error is wiping paint with the wrong material. Shop rags, old cotton T-shirts, and paper towels are all abrasive to clear coat. A 400–500 GSM waffle-weave panel cloth is correct for quick detailer application. A 350–400 GSM twist-pile or plush is correct for buffing spray wax. These aren't arbitrary marketing distinctions — they determine whether you're building gloss or gradually scratching it away with every maintenance session.
Learn to read water behavior as a diagnostic tool. Healthy protection produces tight, high-contact-angle water beading — droplets that roll and fall freely. When water starts sheeting and clinging rather than beading, your protection layer is depleted and gloss loss is right behind it. That's your trigger to top up.
Ceramic coatings are the most significant upgrade you can make to a gloss maintenance routine. A professional-grade SiO2 ceramic at 50%+ concentration cures to a 9H surface that resists UV degradation, chemical etching, and light abrasion at a level no wax or sealant can match. The gloss depth on a properly coated and maintained car is objectively different — the coating fills micro-imperfections in the clear coat surface, creating a flatter optical plane that reflects light with far more uniformity and depth.
The non-negotiable requirement is paint prep. You must fully decontaminate, correct paint defects with a dual-action polisher, and IPA-wipe every panel before ceramic application. Apply a ceramic over uncorrected paint and you're permanently sealing in every swirl mark and scratch. Get the surface right first, or you're wasting a premium product.
Paint protection film gives you physical protection that ceramics alone can't provide — self-healing TPU that absorbs rock chips, door edge strikes, and abrasion on your highest-impact zones. For daily drivers, a hybrid approach is the professional-grade answer: PPF on the front fascia, hood leading edge, and rocker panels; ceramic coating on everything else. Graphene coatings are worth tracking as a newer category — higher water contact angles than SiO2, lower static charge, and improved thermal resistance. Long-term field durability data is still accumulating, but what's out there is genuinely impressive.
Two to three times per week is the right cadence for cars parked outdoors. Use it whenever you notice dust, pollen, or light smudges building up. The critical rule is that the paint must be nearly clean before you wipe — if there's any visible grit or road film, do a rinse or waterless wash first. Dragging a quick detailer across contaminated paint causes the micro-scratches that accumulate into swirl marks over time.
Use a ceramic-compatible SiO2 spray booster rather than a traditional carnauba-based spray wax. Carnauba can leave oily residue on ceramic coatings and actually reduce hydrophobic performance rather than enhance it. SiO2 spray boosters are specifically formulated to bond with the existing ceramic layer, refreshing both water-beading behavior and gloss without compromising the coating's long-term durability.
Keep a dedicated bird dropping remover — or a clean microfiber dampened with water and folded thick — in your car at all times. Lay it over the dropping for 30 to 60 seconds to soften the deposit, then lift and gently wipe outward. Never rub dry. On hot paint in direct sun, bird acid can begin etching clear coat in under an hour, so speed is genuinely important here.
Yes, significantly. UV radiation is the primary long-term enemy of clear coat gloss — it triggers oxidation and chalking that no wax or detailer can fully reverse once it's progressed. A quality polymer sealant or ceramic coating dramatically slows this process. But for maximum long-term gloss, covered or shaded parking is irreplaceable. Product maintenance buys you time — it doesn't fully substitute for shade.
Watch how water behaves on the paint. Healthy protection produces tight, high-contact-angle beading — discrete droplets that roll off freely when the car moves or is rinsed. When water starts sheeting across the surface and clinging rather than beading into droplets, your outermost protection layer has worn down. That's your signal to top up with a spray sealant or apply a fresh wax coat before gloss starts to follow.
Waterless washing is safe on lightly soiled paint when you use a high-quality product with strong lubrication and work with plenty of clean microfiber towels. The risk is using it on paint with visible grit or heavy road contamination — that's the same as a dry wipe and will scratch your clear coat. Always use a single fold of microfiber per panel pass, rotating to a fresh surface with each wipe, and never reuse a soiled towel on a different panel.
 |
 |
 |
 |

About Diego Ramirez
Diego Ramirez is a maintenance and care specialist who has been wrenching on cars since he was sixteen. He focuses on fluid changes, preventive care routines, paint protection, and the small habits that turn a five-year-old car into a fifteen-year-old car.
Get some FREE car parts & gear.. Or check out the latest free automotive manuals and build guides here.
Disable your ad blocker to unlock all the hidden deals. Hit the button below 🚗
| | | |