by Joshua Thomas
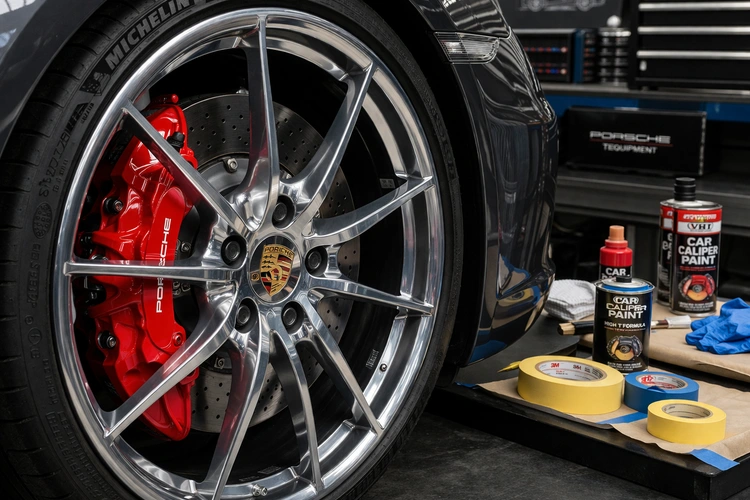
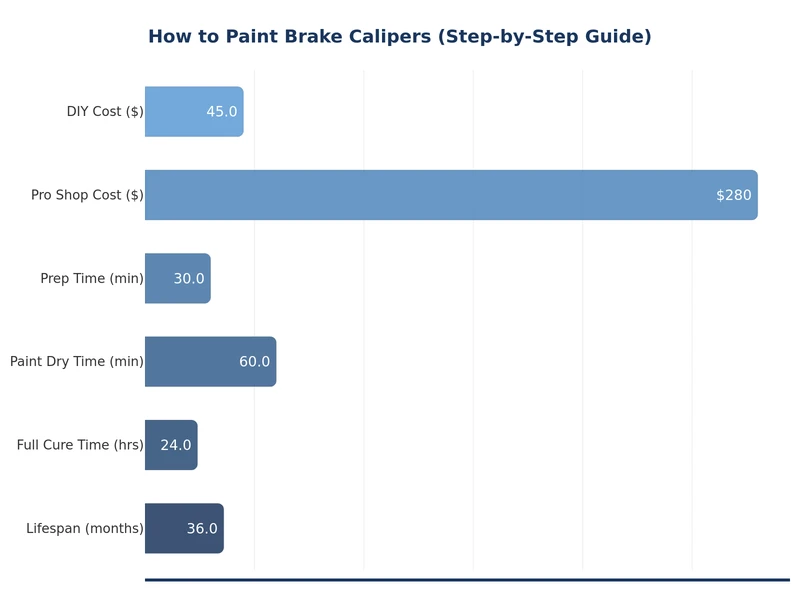
Painting your brake calipers is one of the most satisfying weekend upgrades a car owner can do. Learning how to paint brake calipers takes only a few hours, costs under $50, and delivers a dramatic visual payoff every time someone glances through your wheels. Brightly colored calipers add a custom, performance-car look without touching your suspension or engine. Before starting any caliper work, make sure your wheels are spotless — see our guide on how to clean alloy wheels so no grease or brake dust contaminates your prep work.
This guide walks you through every stage: gathering supplies, cleaning and masking, applying heat-resistant paint, and curing for a finish that holds up to road heat and brake dust for years.
Contents
Having everything ready before you jack up the car saves frustration mid-job. You do not need special tools, but a few items are non-negotiable for a durable result.
Park on a flat, solid surface. Loosen the lug nuts slightly before lifting the car. Use a floor jack on a reinforced jack point, then lower onto jack stands — never work under a car supported by a jack alone. Remove the wheel and set it aside. According to NHTSA brake safety guidelines, the brake system should always be fully functional before driving, so inspect pads and rotors while you have the wheel off. If your rotors show heavy surface rust, read our article on how to remove surface rust from brake rotors before continuing.
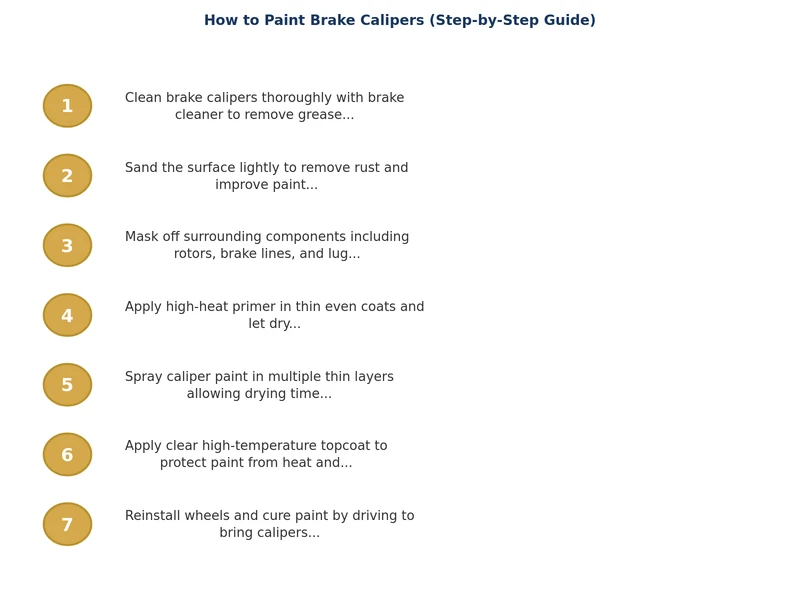
Spray brake cleaner generously over the entire caliper body. Let it soak for 30 seconds, then scrub with a wire brush. Wipe away all residue with a clean lint-free cloth. Repeat until the cloth stays clean. Next, lightly sand the caliper surface with 120-grit sandpaper to give the paint mechanical adhesion — this is the step most beginners skip, and it is why their paint flakes off. A second wipe with brake cleaner after sanding removes all dust.
Paint on brake hoses, rubber seals, or rotor faces causes serious problems. Use masking tape to cover all rubber hoses and hydraulic lines. Slide a piece of cardboard or plastic sheet behind the caliper to shield the rotor. Tuck tape carefully into any gap between the caliper and the mounting bracket. Take your time here — sloppy masking is the number one cause of a messy outcome.
Whether using a brush-on kit or aerosol, the technique is the same: thin, even coats. Apply the first coat lightly — this is a sealer layer, not coverage. Wait the time specified on your paint's label (usually 10–15 minutes) before the next coat. Apply two to three full coats, building up uniform color. Avoid heavy single coats; they sag and bubble under heat. For aerosols, hold the can 8–10 inches from the surface and use smooth side-to-side passes.
Allow the final coat to dry to the touch — typically 30 minutes for aerosol, up to an hour for brush-on. Remove all masking carefully while the paint is still slightly tacky for clean edges. Reinstall the wheel and torque the lug nuts to spec. To fully cure the paint, drive gently for a few miles, then make three or four moderate stops from around 30 mph. The heat generated during braking bakes the paint hard. Avoid aggressive braking for the first 24 hours.
Not all paints handle brake heat. Calipers routinely reach 200–400°F under normal driving conditions and can spike much higher during track use. Standard spray paint will blister and peel within weeks. Use only paint rated for high-temperature or caliper-specific applications.
| Paint Type | Heat Rating | Finish Options | Approx. Cost | Best For |
|---|---|---|---|---|
| Brush-On Caliper Kit | Up to 900°F | Gloss | $20–$35 | Street driving, lasting finish |
| High-Temp Aerosol Spray | Up to 500°F | Gloss, matte, satin | $10–$20 | Quick DIY jobs |
| Powder Coat (professional) | Up to 1,200°F | Any | $150–$400 | Track use, permanent finish |
| Brake Caliper Cover | Passive (no paint) | Multiple colors | $30–$80 | No-prep cosmetic upgrade |
For most daily drivers, a brush-on caliper paint kit from a reputable brand offers the best balance of durability, color selection, and DIY accessibility. If you enjoy detailing your car and have tackled jobs like paint correction, the brush-on kit will feel familiar and satisfying.
Any oil or brake fluid residue left on the caliper acts as a release agent. Your paint will look fine until the first heat cycle, then lift cleanly off the surface. Brake cleaner is inexpensive — use it generously.
Light surface rust must be wire-brushed off before painting. Painting over rust traps moisture underneath, accelerating corrosion. Sand down to bare metal where rust is visible, then apply a rust-inhibiting primer before your color coats.
Standard rattle-can spray paint will fail. Even products labeled "high heat" for exhaust systems may not be formulated for the specific thermal cycling that calipers experience. Use paint specifically marketed for brake calipers.
Driving hard immediately after painting is the fastest way to ruin your work. The paint needs heat to cure, but aggressive stops before it has set will cause blistering. Build up heat gradually over the first few drives.
A properly applied brush-on caliper paint job typically lasts three to five years on a daily driver. Key factors affecting longevity include paint quality, surface prep, driving conditions, and local climate. If you drive on salted winter roads, expect more frequent touch-ups. Pairing your caliper refresh with other brake maintenance — such as knowing how to bleed your car brakes — ensures the entire system is in peak condition at the same time.
Touch up small chips as soon as they appear. Once moisture gets under a chipped spot, peeling spreads rapidly. Keep a small amount of leftover paint for this purpose.
It is possible but not recommended. Removing the wheel gives you proper access to clean, sand, and mask every surface. Working through the wheel opening makes it nearly impossible to prep the back side of the caliper and greatly increases the chance of getting paint on the rotor or brake pads.
No. For a DIY job, you can paint calipers in place after removing the wheel. Simply mask off all rubber components, brake lines, and the rotor face. Professional powder coating does require caliper removal, but brush-on or aerosol paint does not.
Choose paint rated to at least 500°F for street driving. Track or performance use requires ratings of 900°F or higher. Standard spray paint has no meaningful heat resistance and will peel within weeks of exposure to normal braking temperatures.
Apply two to three thin coats, allowing each coat to tack up before adding the next. A single thick coat looks uneven, sags, and does not bond as durably as multiple thin layers. Follow the drying time listed on your specific product.
No. Paint is applied only to the outer housing of the caliper, not to any friction or hydraulic surfaces. Braking performance is entirely unaffected. The only concern is getting paint on brake pads or the rotor face, which is why careful masking is essential.
Rinse your wheels regularly to remove brake dust before it builds up, as brake dust is mildly acidic and can dull the finish over time. Avoid harsh wheel cleaners that are not pH-neutral. Touch up any chips promptly with leftover paint to prevent moisture from getting under the coating.
 |
 |
 |
 |
About Joshua Thomas
Joshua Thomas just simply loves cars and willing to work on them whenever there's chance... sometimes for free.
He started CarCareTotal back in 2017 from the advices of total strangers who witnessed his amazing skills in car repairs here and there.
His goal with this creation is to help car owners better learn how to maintain and repair their cars; as such, the site would cover alot of areas: troubleshooting, product recommendations, tips & tricks.
Joshua received Bachelor of Science in Mechanical Engineering at San Diego State University.
Get some FREE car parts & gear.. Or check out the latest free automotive manuals and build guides here.
Disable your ad blocker to unlock all the hidden deals. Hit the button below 🚗
| | | |