by Diego Ramirez
If you want a faster sale at a stronger price, knowing how to prepare car for sale is the single most effective step you can take before a listing goes live. A properly detailed vehicle projects meticulous ownership and consistently attracts more serious buyers at higher opening bids, while a car that hasn't been touched up triggers immediate price anchoring in the buyer's mind before they've even opened the door. The difference between a vehicle that moves in a week and one that sits for a month is presentation far more often than it is mechanical condition.
Pre-sale detailing covers a broader scope than most sellers anticipate — it encompasses paint decontamination, surface correction, odor remediation, mechanical tidiness, and strategic presentation aligned to your specific sale channel. Understanding the full pipeline, from assembling the right product arsenal to calibrating your effort level to the scenario, gives you control over how buyers frame your asking price. This guide covers every layer of that process with the depth that the investment deserves.
Contents
Buyers form a tentative price anchor before they open the door, before they turn the key, and before they ask a single mechanical question. The exterior paint clarity, tire dressing uniformity, and glass cleanliness establish an emotional baseline that colors every subsequent inspection detail. A vehicle with freshly applied wax and dressed trim communicates a story of consistent ownership that a dull, oxidized example with sun-hazed headlights simply cannot tell, regardless of how clean the service records are or how recently the oil was changed.
Consumer behavior research consistently demonstrates that presentation quality influences perceived value more dramatically than most sellers expect. The FTC's guidance on used car purchases notes that buyers rely heavily on visible condition cues when assessing vehicle trustworthiness, which means the psychological weight of appearance extends beyond aesthetics into credibility. Understanding this dynamic lets you direct your prep investment toward the surfaces and details that move the needle most, rather than spreading effort evenly across everything.
The return on detailing investment varies considerably across vehicle types, but it rarely approaches zero regardless of age or mileage bracket. Daily commuters in the sub-$15,000 range benefit most from interior deep-cleaning and odor neutralization, because cabin condition is the first sensory impression during any in-person viewing. Late-model trucks, performance vehicles, and anything with a documented enthusiast following reward more aggressive exterior paint correction, since buyers in those segments arrive with an above-average eye for surface defects and will negotiate hard against any visible swirl or oxidation they find.
Before committing to a prep approach, it helps to understand how your car detailing cost maps to realistic recovery at your vehicle's price point. A $300 full-detail on a $25,000 listing has a very different math than the same spend on a $6,000 beater, and calibrating that ratio early prevents over-investment on one end and under-presentation on the other.
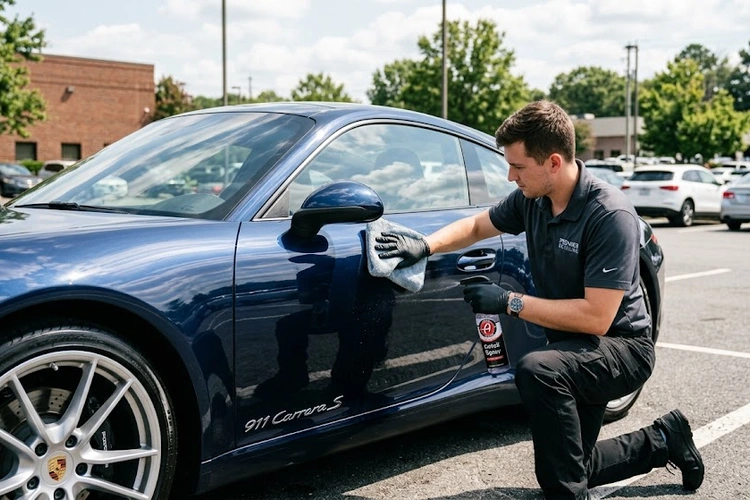
Your exterior kit needs to address four distinct phases in sequence: wash, decontamination, paint correction, and protection. The wash phase alone carries more variables than most sellers recognize — a disciplined two-bucket car wash method prevents the cross-contamination that deposits grit back onto panels during every subsequent pass, which is how swirl marks appear on cars that were "just washed." Skipping straight to a pressure rinse after lathering is the single fastest way to mar the finish you're about to invest time improving.
Pro tip: After washing, run your clean hand flat across a dried panel — if the surface feels like coarse sandpaper rather than glass, you need an iron decontamination spray followed by a full clay bar pass before any polishing compound touches the clearcoat.
Deciding whether to finish with liquid car wax or paste wax depends on the paint's current condition and how much working time you have available. Liquid formulas spread faster and buff off more easily on older or thermally stressed clearcoats, while paste products generally build a warmer visual depth on well-maintained surfaces that are simply being refreshed rather than rescued.
Interior prep for a sale-ready listing demands considerably more than a vacuum pass and a dashboard wipe-down. Persistent odors — pet dander, embedded cigarette smoke, mildew from a slow leak — can eliminate an otherwise strong showing before the buyer has sat down for more than thirty seconds. An enzyme-based odor eliminator addresses source contamination at the molecular level rather than masking it with fragrance, which is the approach that actually survives the buyer's skeptical sniff test during a showing. For a detailed layered protocol, removing pet odor from car interiors covers the full sequence from enzyme treatment through ozone finishing.
Begin with a thorough two-stage wash, then apply iron decontamination spray to all painted panels, letting the product dwell until you observe the characteristic purple or red bleed that indicates ferrous particle release. Follow immediately with a clay bar or clay mitt pass using generous lubrication, working one panel section at a time and folding the clay frequently to expose a clean surface. This decontamination sequence is not optional if you plan any paint correction — polishing over embedded contamination guarantees micro-marring that is often more visible than the original defects you were trying to remove.
Address any rubber transfer or scuff marks before your polishing step, since discovering them mid-correction forces you to re-compound the entire panel. The process for removing rubber scuff marks from car paint integrates cleanly into the decontamination phase and prevents those interruptions. Light swirling and single-stage oxidation respond well to a dual-action polisher with a light-cut compound followed by a finishing polish pass; deeper scratches that breach the clearcoat entirely are better disclosed than cosmetically hidden, because buyers who discover concealed damage during their own inspection tend to walk away entirely rather than simply adjusting their offer.
After correction, apply a paint sealant or wax layer to lock in the work. Sealants cure harder and withstand multiple showings and wash cycles better than traditional waxes, while waxes offer a warmer, more dimensional visual depth that photographs well. For keeping that surface alive throughout the listing period, the practices outlined in maintaining car paint gloss between washes will protect your investment until the car transfers ownership.
Work top-to-bottom and front-to-back to avoid re-contaminating surfaces you've already cleaned. Start with the headliner using a low-moisture foam cleaner and a soft-bristle brush — aggressive scrubbing saturates the backing material and causes delamination that is expensive to repair and immediately visible during an inspection. Move to the instrument panel and door cards using an all-purpose cleaner diluted to roughly 10:1, applied via brush into all the switch surrounds and vent blades before wiping clean with a folded microfiber. Avoid silicone-heavy dressings on the dashboard surface, as they create a reflective glare in the windshield that buyers notice consciously even if they can't identify the source.
Seat extraction — either steam or hot-water extraction — addresses embedded soiling in fabric that surface wiping cannot reach and that vacuuming merely redistributes. A clean trunk is a step many sellers overlook entirely, but buyers open it during every serious walk-around, and a musty, cluttered cargo area degrades perceived value in a way that is difficult to quantify but very easy to feel. The full process for cleaning and organizing your car trunk includes liner treatment and spare tire compartment inspection, which matters because a missing jack or flat spare creates a negotiating point at the worst possible moment.
Dress your tires with a water-based satin-finish product, avoiding gel formulas that sling onto quarter panels during the test drive and leave buyer-visible streaks during the most consequential moment of the showing. Clean all rubber door seals and weatherstripping — cracked or white-hazed seals communicate neglect in a way buyers absorb subconsciously without being able to articulate it. Address clouded headlight lenses with a compound-and-seal kit, since yellowed or hazy plastic degrades perceived vehicle age and quality disproportionately relative to the twenty minutes of work it takes to restore. Finish all glass with a dedicated glass cleaner inside and out, and apply a water-beading agent to exterior glass before any outdoor showing or photography session.
Most sellers with basic supplies and a few hours can achieve roughly 80 to 85 percent of what a professional shop delivers, and for vehicles in lower price brackets, that level of effort is entirely sufficient to maximize their sale outcome. The processes that translate cleanly to DIY execution are the wash and decontamination sequence, the interior vacuum and wipe-down, single-step paint enhancement with an applicator pad, and basic engine bay cosmetic cleaning.
Where skill gaps create real risk: paint correction with a dual-action polisher on dark paint colors, odor remediation that goes beyond surface-level cleaning, and leather reconditioning that restores suppleness without over-softening the grain structure. If you have never operated a polisher on a vehicle you're about to sell, the pre-sale window is not the time to learn — holograms left by an incorrectly used DA on black or midnight blue paint are more immediately visible to a prospective buyer than the original swirl pattern you were trying to address.
Professional detailing makes financial sense when the vehicle's asking price is high enough that the service cost-to-recovery ratio supports it clearly, when the paint condition involves defects that require rotary correction beyond DA capability, or when the interior has mold, deep extraction-grade staining, or persistent odor from a biological source. A full-service professional detail on a well-positioned late-model vehicle can return two to four times its cost in the final negotiated price, especially in private-party transactions where buyers have no trade-in equity cushion and negotiate based entirely on what they see and smell.
| Prep Task | DIY Suitability | Pro Advantage | Approximate Cost Range |
|---|---|---|---|
| Wash & iron decontamination | High | Minimal | $20–$40 DIY / $80–$120 pro |
| Clay bar decontamination | High | Speed on large vehicles | $15–$30 DIY / $50–$90 pro |
| DA paint correction (light swirls) | Moderate | Consistency on dark colors | $50–$100 DIY / $150–$300 pro |
| Rotary paint correction (deep scratches) | Low | High — avoids holograms | $100–$180 DIY / $300–$600 pro |
| Interior vacuum & surface wipe | High | Minimal | $10–$25 DIY / $60–$100 pro |
| Hot-water seat & carpet extraction | Moderate (if you own extractor) | Commercial machines extract deeper | $30–$70 DIY / $100–$200 pro |
| Ozone odor elimination | Low (rental required) | High — source-level treatment | $50–$80 rental / $75–$150 pro |
Private-party transactions justify the highest level of prep effort because the buyer arrives without any dealership buffer and evaluates the vehicle entirely on its own merits, with no certified pre-owned program softening their perception of any visible flaw. When you're learning how to prepare car for sale for a private listing, the strategic goal is to remove every visible cue that triggers an automatic low-ball offer or a request for a pre-purchase inspection discount. Buyers who arrive emotionally attached to a vehicle negotiate less aggressively and accept asking prices more readily, and a clean, thoroughly detailed car is the fastest and most cost-effective path to that emotional connection.
Pay close attention to your drying technique after the final pre-showing wash — water spots on freshly polished paint are immediately conspicuous under outdoor conditions and suggest that the detailing was hurried or careless. The techniques outlined in drying a car without leaving water spots use a forced-air blower or a high-GSM drying towel to lift water from the panel rather than drag it across the surface, which protects the correction work you've invested in and keeps the finish reading clean through multiple buyer viewings.
Trade-in prep operates under a meaningfully different logic than private-party preparation. Franchise dealerships have their own reconditioning departments and apply a standardized refurbishment cost to every vehicle they take in, regardless of how clean it arrives from the seller. Your prep objective at a dealership is to avoid triggering a condition grade downgrade on their appraisal checklist — not to achieve concours-level presentation. This means addressing obvious issues like rubber transfer scuffs and cracked weatherstripping, cleaning the engine bay to a presentable standard without over-detailing it, and ensuring the interior reads neutral in terms of odor and visible staining.
Consignment arrangements at specialty dealers, enthusiast-market shops, or auction houses occupy a legitimate middle ground. These environments attract buyers who are discerning enough to reward presentation quality, but the consignment shop typically offers its own reconditioning package and will factor any remaining work into their fee structure. Arriving with a clean, well-detailed vehicle gives you negotiating leverage on that fee and positions the listing more favorably in their inventory rotation, since consignment dealers prioritize vehicles that require minimal additional effort before going to market.
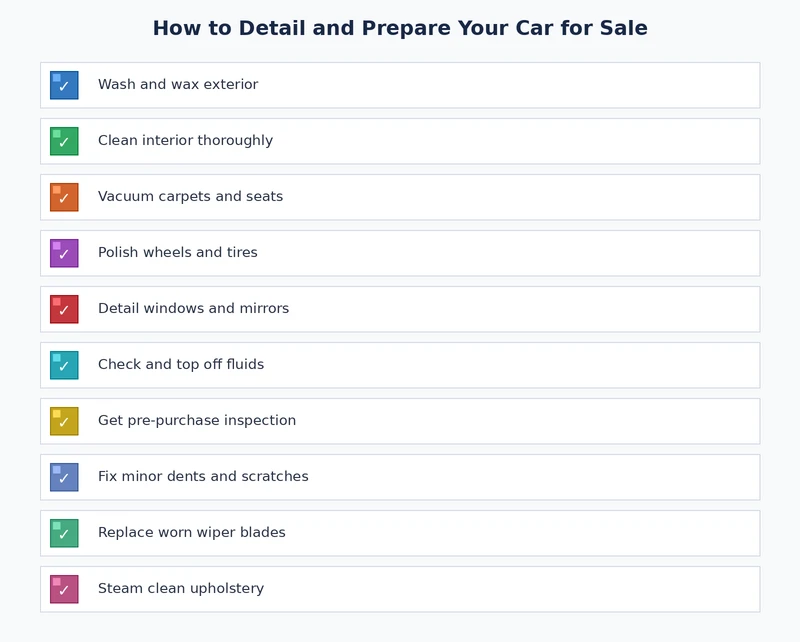
Knowing how to prepare car for sale the right way is what separates sellers who get their asking price from those who negotiate against themselves before a single offer arrives. Start with a honest condition assessment, build your kit around the specific defects you're addressing, and calibrate your effort to the sale channel and the vehicle's price point. Your next step is straightforward: walk around the car with fresh eyes today, make a task list organized by phase, and begin with the decontamination wash — everything else follows from that foundation.
 |
 |
 |
 |

About Diego Ramirez
Diego Ramirez is a maintenance and care specialist who has been wrenching on cars since he was sixteen. He focuses on fluid changes, preventive care routines, paint protection, and the small habits that turn a five-year-old car into a fifteen-year-old car.
Get some FREE car parts & gear.. Or check out the latest free automotive manuals and build guides here.
Disable your ad blocker to unlock all the hidden deals. Hit the button below 🚗
| | | |