by Joshua Thomas
Knowing how to replace brake pads is one of the most valuable skills a car owner can develop. Brake pads are a safety-critical component — worn pads mean longer stopping distances and potential rotor damage. The good news: replacing them yourself is straightforward, saves significant money, and takes under two hours for most vehicles. Before you begin, it's also worth checking your brake fluid level, since a pad replacement often requires pushing the caliper piston back, which raises fluid level in the reservoir.
This guide walks you through inspecting your current pads, selecting replacements, and completing the swap safely. Whether you drive a sedan, SUV, or truck, the process is largely the same across vehicles.
Contents
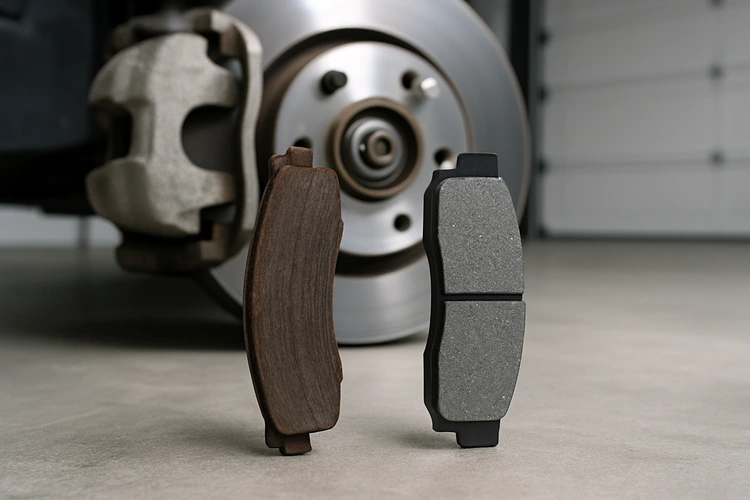
Catching worn pads early prevents rotor damage, which turns a $80 pad swap into a $300+ rotor replacement. Most pads include a built-in wear indicator — a small metal tab that contacts the rotor and produces a high-pitched squeal when the pad wears down to roughly 2–3mm.
You can often check pad thickness without removing the wheel. Look through the spokes at the caliper — the pad material should be visible pressed against the rotor. If the friction material looks thinner than a pencil eraser (roughly 3mm or less), it's time to replace. This is also a good moment to check for brake dust buildup on your wheels, which can be a secondary indicator of brake wear patterns.
According to the National Highway Traffic Safety Administration (NHTSA), brake failure is a contributing factor in thousands of crashes annually — most of which are preventable with proper maintenance.
Gather everything before you start. Having to stop mid-job to find a tool wastes time and creates safety risks.
Brake pads come in three main material types. Each has trade-offs in performance, noise, dust, and price. The table below summarizes the key differences:
| Pad Type | Material | Noise Level | Dust | Lifespan | Best For |
|---|---|---|---|---|---|
| Organic (NAO) | Rubber, glass, resin | Low | Moderate | 25,000–40,000 mi | Daily city driving, light vehicles |
| Semi-Metallic | 30–65% metal fibers | Moderate | High | 40,000–70,000 mi | Most vehicles, all conditions |
| Ceramic | Ceramic fibers, filler | Very low | Low | 50,000–70,000 mi | Daily commuting, quiet performance |
| Full Metallic | 100% metal | High | Very high | Varies | Racing, track use only |
For most daily drivers, ceramic pads offer the best balance of performance, low noise, and clean wheels. Semi-metallic pads are a solid budget choice and perform well in a wider temperature range.
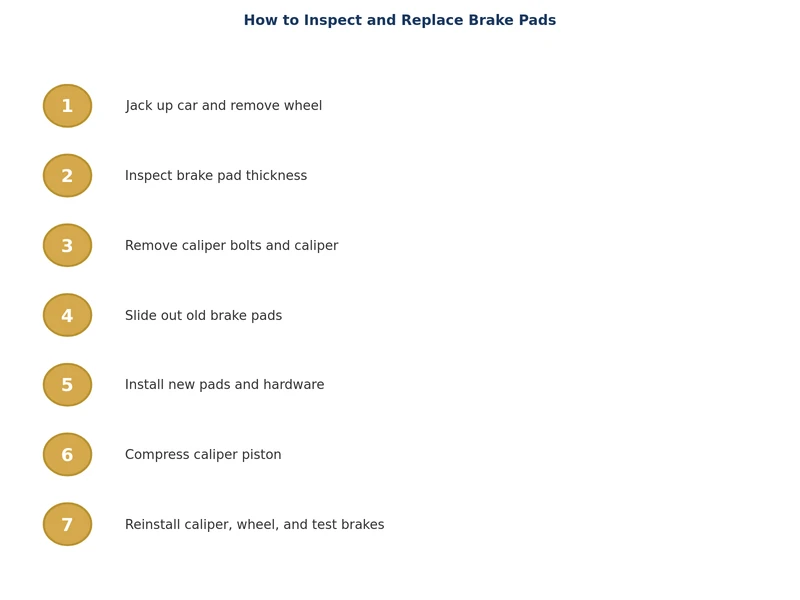
Work on one axle at a time. This way you always have an intact side to reference if something looks unfamiliar during reassembly.
Repeat on the opposite side of the same axle before moving your vehicle.
While the caliper is off, always inspect the rotor. Installing new pads on a severely worn rotor defeats the purpose — you'll get poor braking performance and premature pad wear.
Run a fingernail across the rotor face. A pronounced lip or groove at the outer edge indicates significant wear. Deep scoring (grooves you can feel with a finger), heavy rust pitting, or visible heat cracks are grounds for replacement. Use a micrometer to measure rotor thickness and compare it to the minimum thickness stamped on the rotor hat or listed in your service manual.
General minimum thickness guidelines:
Surface rust on rotors is normal after sitting overnight or in wet weather. It clears away after a few brake applications. Deep pitting or scoring that remains after a few stops indicates the rotor needs replacement.
If you're still deciding which pads to buy, consider your driving conditions. Highway commuters who rarely make aggressive stops do well with organic or ceramic pads. Those who frequently tow, drive in mountainous terrain, or live in wet climates should lean toward semi-metallic. Track drivers need full metallic or high-performance compounds — standard street pads overheat and fade under sustained high-speed braking.
Just as tire wear patterns reveal underlying alignment and suspension problems, uneven brake pad wear tells a story. If the inner pad is significantly more worn than the outer, a sticking caliper piston is likely. If pads wear unevenly across the two sides of the axle, check slide pin function and caliper bracket condition.
New brake pads require a bed-in procedure. This transfers a thin, uniform layer of pad material onto the rotor surface and ensures consistent braking performance. Skipping this step can cause glazing, uneven deposits, and vibration under braking.
Basic bed-in procedure:
After bedding in, pump the brake pedal several times before moving the vehicle to ensure the pads are seated against the rotors and pedal feel is firm. If the pedal feels soft or travels to the floor, bleed the brakes and inspect for fluid leaks.
Brake jobs pair naturally with other under-vehicle maintenance. While you're already working underneath, it's a good time to check your transmission fluid level and condition — both services share the same jack stands setup. If your vehicle is due for a coolant service, the same logic applies to scheduling a cooling system flush at the same visit to save time and effort.
With fresh pads bedded in, firm pedal feel, and rotors within spec, your braking system is back to full effectiveness. Inspect pad thickness at every oil change — catching wear early makes how to replace brake pads a simple afternoon job rather than an emergency repair.
Most brake pads last between 25,000 and 70,000 miles depending on material type, driving style, and conditions. City driving with frequent stops wears pads faster than highway driving. Inspect pad thickness at every oil change and replace when friction material measures 3mm or less.
Yes — it's normal to replace front and rear pads separately since front brakes handle 70% of stopping force and typically wear faster. Always replace both pads on the same axle together (both left and right) to maintain even braking balance.
Not necessarily. If rotors are above minimum thickness, show no deep scoring, and have no cracks or hard spots, they can be reused with new pads. However, heavily grooved or warped rotors should be replaced at the same time as the pads for best results.
A squealing wear indicator means pads are low but not gone — you typically have days to a few weeks depending on driving frequency. Drive cautiously and replace pads promptly. Grinding metal-on-metal sounds mean the pad is fully worn and rotor damage is occurring; pull over and arrange a tow if possible.
A soft pedal after a pad replacement usually means air entered the brake lines when you opened the system, or the caliper pistons weren't fully seated. Pump the pedal firmly several times to seat the pads. If pedal feel doesn't return to normal, bleed the brake lines at the affected caliper.
Yes — a thin layer of high-temperature caliper grease on the metal contact points between the pad backing plate and caliper bracket reduces noise and allows pads to slide freely. Never apply grease to the friction surface of the pad or to the rotor face, as contamination will significantly reduce braking performance.
 |
 |
 |
 |
About Joshua Thomas
Joshua Thomas just simply loves cars and willing to work on them whenever there's chance... sometimes for free.
He started CarCareTotal back in 2017 from the advices of total strangers who witnessed his amazing skills in car repairs here and there.
His goal with this creation is to help car owners better learn how to maintain and repair their cars; as such, the site would cover alot of areas: troubleshooting, product recommendations, tips & tricks.
Joshua received Bachelor of Science in Mechanical Engineering at San Diego State University.
Get some FREE car parts & gear.. Or check out the latest free automotive manuals and build guides here.
Disable your ad blocker to unlock all the hidden deals. Hit the button below 🚗
| | | |