by Joshua Thomas
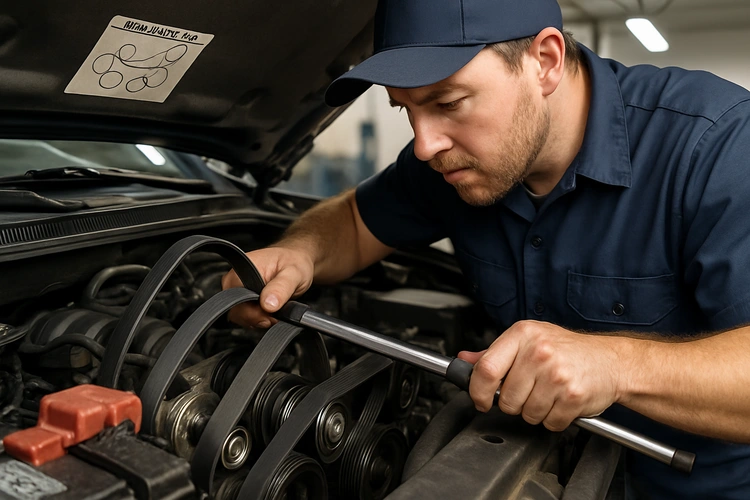
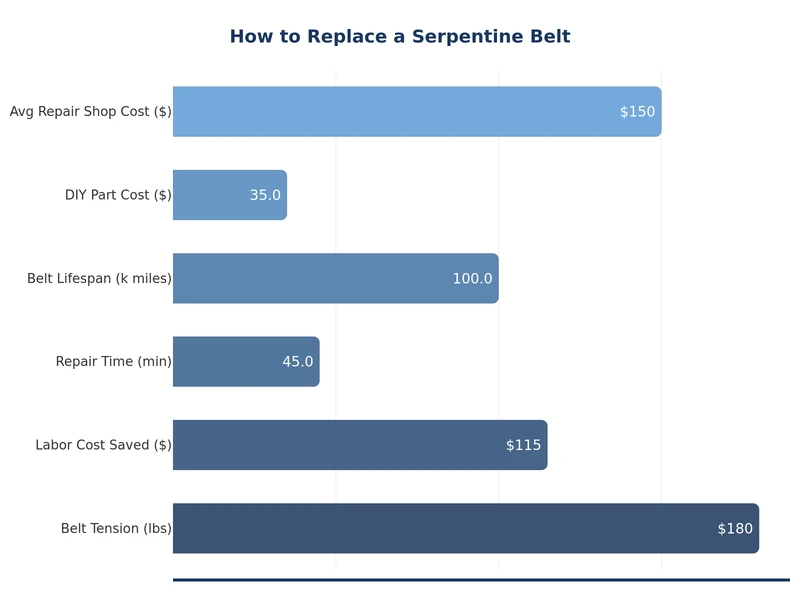
The serpentine belt is a single continuous loop that drives critical engine accessories — the alternator, power steering pump, air conditioning compressor, and water pump. Knowing how to replace a serpentine belt yourself can save $80–$150 in labor and prevent a roadside breakdown. A worn or snapped belt leaves you without power steering, charging, or cooling in minutes. Before you start, bookmark our complete car maintenance schedule so you know every interval that keeps your engine healthy. This guide covers everything from diagnosis to final installation.
Serpentine belts are made from reinforced rubber and typically last 60,000–100,000 miles. Unlike older multi-belt systems, one belt does all the work — which means one failure affects multiple systems at once. The good news: replacement is a straightforward DIY job requiring basic hand tools and about 45 minutes.
Contents
The serpentine belt (also called a drive belt or accessory belt) winds in a snake-like path around a series of pulleys on the front of the engine. It transfers rotational energy from the crankshaft pulley to every engine accessory simultaneously. Without it, your battery will drain because the alternator stops charging, your power steering will stiffen, your AC will cut out, and in many vehicles the water pump will stop cooling the engine.
Don't confuse it with the timing belt, which synchronizes the crankshaft and camshaft inside the engine. If you're unsure of the difference, our guide on timing belt vs timing chain explains both components in detail. The serpentine belt lives outside the engine and is far easier to replace.
Inspect the belt with the engine off. Look along the full length of the belt under good lighting:
If you notice any of these alongside other underhood work — such as when you inspect and replace brake pads during a service — go ahead and check the belt at the same time.
Gather everything before you start. Having the right tools makes the job take under an hour.
Some vehicles require a special offset tensioner tool. Check a repair manual or parts-store lookup for your specific model before buying parts.
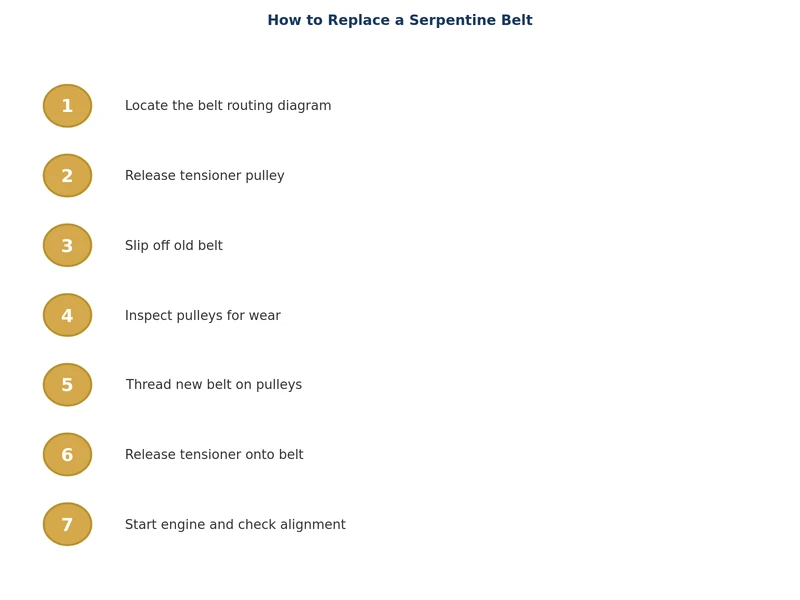
This is the core of how to replace a serpentine belt — follow each step in order and take your time.
Most vehicles have a sticker on the fan shroud or radiator support showing the exact belt routing path. Photograph it with your phone. If the sticker is missing, search your vehicle's repair manual or look up the diagram online using your year, make, and model. Routing varies significantly between engines — getting this wrong means the belt will slip off or damage a pulley.
The tensioner pulley keeps the belt tight automatically. To remove the belt you must rotate the tensioner arm against its spring to create slack:
Never release the tensioner suddenly — it can snap back and pinch fingers or damage nearby components.
With tension released, guide the belt off the remaining pulleys in sequence. Work from the easiest accessible pulley toward the tightest. Note any pulleys the belt wraps behind versus in front of — this matters during installation. Inspect each pulley as you go: spin them by hand to check for roughness or wobble, which signals a bearing failure that should be fixed now.
Route the new belt following your routing diagram exactly. The ribbed side must seat against all the grooved pulleys; the smooth back side contacts any idler or tensioner pulleys. Leave the tensioner pulley for last. Once the belt is on all other pulleys, rotate the tensioner again to create slack, seat the belt over the final pulley, then slowly release the tensioner to lock the belt in place.
Before starting the engine, visually confirm the belt is centered on every pulley and all ribs are fully seated. Start the engine and let it idle for 60 seconds — listen for squealing and watch that the belt tracks straight without wobbling. Turn the steering wheel lock to lock to load the power steering pump. Switch on the AC. Both should operate normally with no noise.
Understanding cost helps you decide whether to DIY or use a shop. Budget for both the belt and a tensioner replacement at the same interval — tensioners wear out on a similar timeline and add very little cost when done together. Also refer to our vehicle maintenance tips for broader guidance on keeping service costs low.
| Vehicle Type | Belt Cost (Part) | DIY Total | Shop Labor | Typical Interval |
|---|---|---|---|---|
| Economy sedan | $15–$30 | $20–$50 | $75–$130 | 60,000–80,000 mi |
| Mid-size SUV | $25–$45 | $30–$65 | $90–$160 | 60,000–100,000 mi |
| Full-size truck | $30–$55 | $40–$80 | $100–$180 | 60,000–100,000 mi |
| Luxury/European | $40–$90 | $50–$110 | $150–$300 | 50,000–80,000 mi |
Always replace the tensioner pulley and any idler pulleys showing play or noise at the same time. Skipping them on a fresh belt wastes the belt's lifespan and risks a comeback job.
Most DIYers complete the job in 30–60 minutes. Tight engine bays or hard-to-reach tensioners on some European vehicles can push the time to 90 minutes. Having the routing diagram and the right socket size ready beforehand cuts the job in half.
A squealing belt is a warning — not an emergency yet, but don't ignore it. Squealing usually signals slipping caused by glazing, misalignment, or a worn tensioner. If the belt snaps while driving you'll lose power steering, the battery will drain, and the engine may overheat within minutes. Replace it promptly.
It's strongly recommended. Tensioner bearings wear on a similar schedule to the belt. Replacing both at once adds $20–$40 in parts but eliminates the labor cost of doing them separately. If the tensioner arm feels loose or the pulley has any wobble, replacement is mandatory.
Use your vehicle's year, make, model, and engine size when searching at a parts store or online. Most major parts retailers (AutoZone, O'Reilly, RockAuto) have fitment lookups that return the exact part number. You can also read the part number off the old belt once it's removed — it's usually molded into the rubber.
Immediately pull over safely. With the belt gone, the alternator stops charging the battery, power steering goes heavy, the AC stops, and — on vehicles where the serpentine belt drives the water pump — the engine will overheat rapidly. Continuing to drive risks severe engine damage. Have the vehicle towed rather than driving to a shop.
Yes — it's one of the best starter repairs. It requires basic tools, no fluids, no torque specs for most steps, and takes under an hour on most vehicles. If you can follow a routing diagram and operate a ratchet, you can do this job. Pair it with other accessible maintenance like a battery swap — our guide on how to replace a car battery yourself covers that repair in the same spirit.
 |
 |
 |
 |
About Joshua Thomas
Joshua Thomas just simply loves cars and willing to work on them whenever there's chance... sometimes for free.
He started CarCareTotal back in 2017 from the advices of total strangers who witnessed his amazing skills in car repairs here and there.
His goal with this creation is to help car owners better learn how to maintain and repair their cars; as such, the site would cover alot of areas: troubleshooting, product recommendations, tips & tricks.
Joshua received Bachelor of Science in Mechanical Engineering at San Diego State University.
Get some FREE car parts & gear.. Or check out the latest free automotive manuals and build guides here.
Disable your ad blocker to unlock all the hidden deals. Hit the button below 🚗
| | | |