by Joshua Thomas
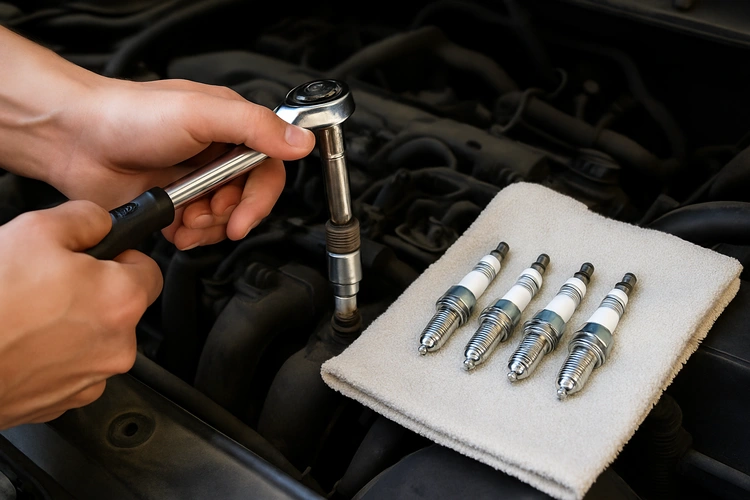
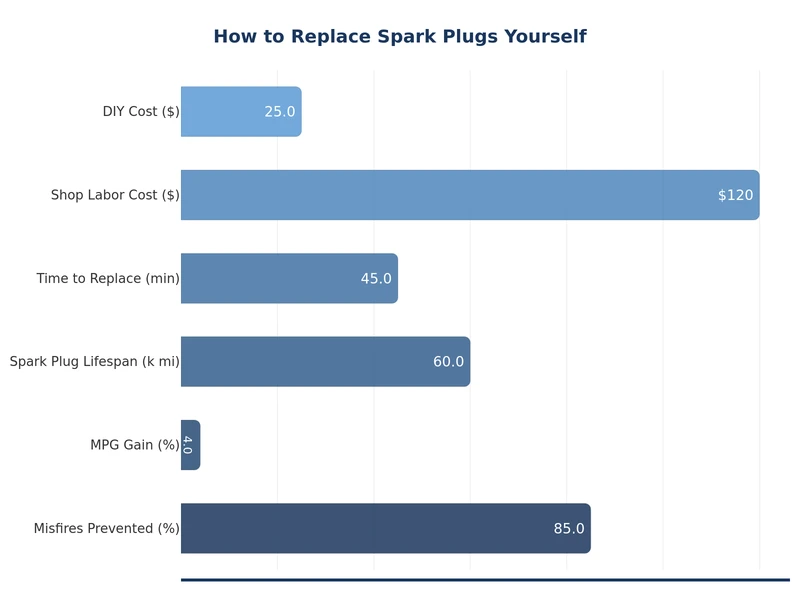
Knowing how to replace spark plugs yourself is one of the most rewarding DIY car maintenance tasks you can tackle. Spark plugs ignite the air-fuel mixture inside your engine's cylinders, and worn plugs cause misfires, poor fuel economy, and rough idling. Replacing them takes about an hour, costs a fraction of a shop visit, and keeps your engine running at peak efficiency. If you're already handling basic upkeep — like learning how to check and change transmission fluid — spark plug replacement is a natural next step.
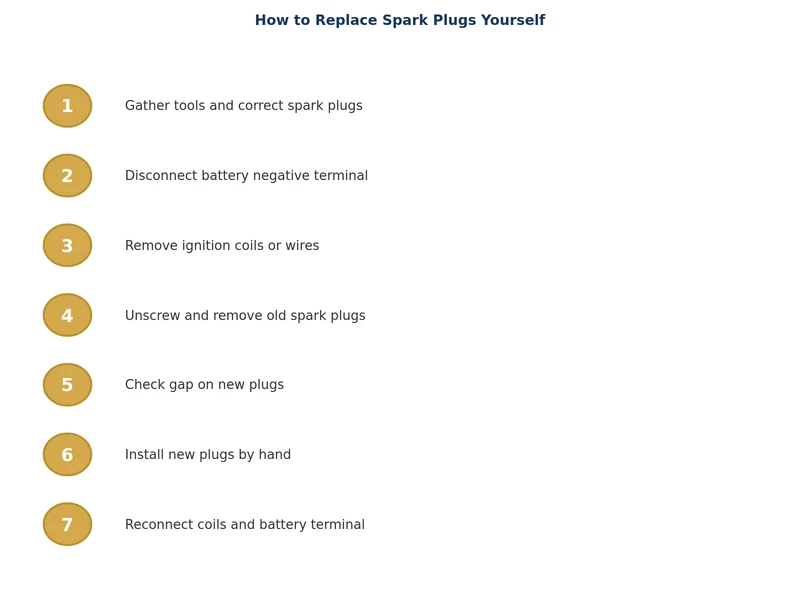
This guide walks you through every stage: gathering tools, pulling old plugs, gapping new ones, and torquing them in correctly. Follow along and you'll finish with a smoother-running engine and the confidence to take on more repairs.
Contents
Before you start, assemble everything on a clean workbench. Hunting for a missing tool mid-job risks dropping parts into the engine bay or losing your place in the firing order.
Your owner's manual lists the OEM plug specification. Match it exactly. Copper plugs are the budget choice and work fine for older engines. Iridium and platinum plugs last significantly longer — often 60,000–100,000 miles — making them worth the premium for modern engines. Never substitute a "hotter" or "colder" heat range without consulting a mechanic; the wrong range causes pre-ignition or fouling.
The electrode gap is the distance the spark must jump. Too wide and the coil can't fire reliably; too narrow and combustion is incomplete. Your manual specifies the gap in thousandths of an inch (e.g., 0.044"). Many pre-gapped plugs still need verification because shipping can shift the electrode slightly. Use a wire feeler gauge for accuracy — a flat gauge gives false readings on worn electrodes.
Most manufacturers recommend replacing copper plugs every 30,000 miles and iridium or platinum plugs every 60,000–100,000 miles. But mileage is only one signal. Watch for these symptoms regardless of interval:
For a broader maintenance perspective, the vehicle maintenance service page outlines a full schedule that pairs spark plug replacement with other interval-based jobs.
| Type | Electrode Material | Typical Lifespan | Relative Cost | Best For |
|---|---|---|---|---|
| Copper | Copper core, nickel tip | 20,000–30,000 mi | $ | Older vehicles, high-performance engines requiring frequent changes |
| Platinum (single) | Platinum center electrode | 40,000–60,000 mi | $$ | Modern engines with distributor ignition |
| Platinum (double) | Platinum center + ground | 60,000–80,000 mi | $$$ | Waste-spark ignition systems |
| Iridium | Iridium fine-wire tip | 60,000–100,000 mi | $$$$ | Coil-on-plug modern engines, best efficiency |
| Ruthenium HX | Ruthenium alloy | Up to 100,000 mi | $$$$ | High-output turbocharged engines |
Even straightforward jobs go wrong when you skip details. These are the errors most likely to cause trouble:
Staying on top of engine maintenance pairs well with other under-hood jobs. If you notice coolant loss while working in the engine bay, our guide on how to flush your car's cooling system is the logical next task to schedule.
Reconnect the battery terminal and start the engine. It may take a few seconds longer to fire the first time as fuel pressure equalizes. Let it idle for two to three minutes and listen carefully. A smooth, steady idle confirms success. If you hear a misfire tick or the check engine light returns, recheck each plug's torque and coil connector seating before assuming a deeper problem.
Some drivers notice a brief rough patch during the first few miles while the new plugs' electrodes seat properly — this is normal and resolves quickly. You should see improved throttle response, smoother acceleration, and often a small gain in fuel economy within the first tank.
Document the mileage in your maintenance log. For vehicles with timing belt or chain service coming up, it's efficient to combine those labor-intensive jobs with a plug change to minimize teardown time. Keeping a consistent maintenance rhythm — including fluid checks like transmission fluid inspections — adds years to an engine's service life.
Replace them at the manufacturer's recommended interval — typically 30,000 miles for copper and 60,000–100,000 miles for iridium or platinum. Also replace them if you experience rough idling, hard starting, engine misfires, or a noticeable drop in fuel economy.
Yes. Spark plug replacement is one of the most beginner-friendly engine jobs. As long as you let the engine cool, work one cylinder at a time, and use a torque wrench, the risk of damage is very low.
Always verify the gap even on pre-gapped plugs. Shipping and handling can shift the electrode slightly. Use a wire feeler gauge to confirm the gap matches your vehicle's specification before installation.
Over-tightening can crack the ceramic insulator, strip the cylinder head threads, or seize the plug in place. Always use a torque wrench set to the manufacturer's specified value — usually between 13 and 26 ft-lbs depending on engine design.
Only if your vehicle manufacturer recommends it and your engine has aluminum cylinder heads. Apply a very thin coat to the threads only. Many modern iridium plugs have a coating applied at the factory, and adding anti-seize can over-lubricate and lead to over-tightening.
Most 4-cylinder engines take 45 minutes to an hour for a careful DIYer. A V6 or V8 can take two to three hours, especially if rear cylinder plugs are hard to access. Having all tools ready before you start cuts the time significantly.
 |
 |
 |
 |
About Joshua Thomas
Joshua Thomas just simply loves cars and willing to work on them whenever there's chance... sometimes for free.
He started CarCareTotal back in 2017 from the advices of total strangers who witnessed his amazing skills in car repairs here and there.
His goal with this creation is to help car owners better learn how to maintain and repair their cars; as such, the site would cover alot of areas: troubleshooting, product recommendations, tips & tricks.
Joshua received Bachelor of Science in Mechanical Engineering at San Diego State University.
Get some FREE car parts & gear.. Or check out the latest free automotive manuals and build guides here.
Disable your ad blocker to unlock all the hidden deals. Hit the button below 🚗
| | | |