by Sarah Whitfield
A failing MAP sensor produces a recognizable set of MAP sensor symptoms: rough idle, poor acceleration, higher fuel consumption, and a triggered Check Engine light. Catching these signs early prevents compounding damage and keeps repair costs manageable. This guide covers every major symptom, its root cause, and a step-by-step testing process that requires only basic tools.
The MAP sensor — Manifold Absolute Pressure sensor — measures pressure inside the intake manifold and sends that data to the engine control unit (ECU) in real time. The ECU uses that reading to calculate the correct air-fuel mixture for each combustion cycle. When the sensor fails, the ECU receives inaccurate data, and the effects ripple through every layer of engine performance.
Contents
MAP sensor symptoms typically appear gradually, then intensify under load or at higher RPMs. Because the sensor delivers real-time pressure data to the ECU, any inaccuracy shifts the air-fuel ratio — either too rich (excess fuel) or too lean (insufficient fuel). Both conditions create distinct, trackable problems.
Performance degradation is the most immediate and obvious category of symptoms:
Beyond performance, a failing MAP sensor directly disrupts fuel delivery and exhaust quality:
Pro tip: A P0106 fault code does not confirm the MAP sensor itself is defective. A cracked or disconnected vacuum hose produces identical codes at a fraction of the replacement cost — inspect vacuum lines before ordering any parts.
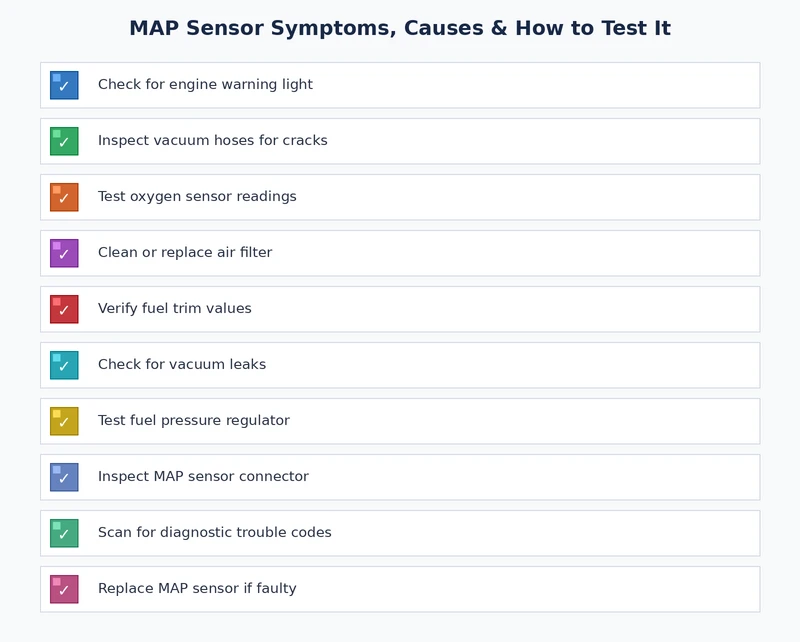
Testing a MAP sensor requires only basic tools available at any auto parts store. The complete process takes under 30 minutes and confirms whether the sensor is the genuine source of symptoms before any money is spent on parts.
Follow these steps in sequence. Skipping ahead produces unreliable results and leads to misdiagnosis.
| Test Condition | Expected Voltage | Interpretation |
|---|---|---|
| Key on, engine off (KOEO) | 4.5V – 5.0V | Normal atmospheric pressure reading |
| Engine at idle | 1.0V – 1.5V | High vacuum at idle — normal |
| Wide-open throttle (WOT) | 4.5V – 5.0V | Low vacuum under load — normal |
| 20 inHg applied vacuum (engine off) | 0.5V – 1.0V | Diaphragm intact and responsive |
| Fixed reading across all conditions | No change | Sensor stuck — replacement required |
An OBD-II scanner with live data capability simplifies testing for those without a multimeter. Navigate to the MAP sensor PID (Parameter ID) in the live data stream. At idle, the reading should fall between 20–40 kPa (kilopascals) on most fuel-injected engines. Under wide-open throttle, pressure should climb close to atmospheric — approximately 100 kPa at sea level. A sensor that reads atmospheric pressure at all times, or shows no change across conditions, is stuck and must be replaced.
According to the Wikipedia article on MAP sensors, some naturally aspirated engines use the MAP sensor only during startup, then rely on a MAF (Mass Air Flow) sensor during operation — a design distinction that directly affects how live scanner data should be interpreted during diagnosis.
Misdiagnosis is the single largest cost driver in MAP sensor repairs. The symptoms overlap with several other common faults, and even experienced technicians make these errors regularly.
The MAP sensor connects to the intake manifold through a rubber vacuum hose. A cracked, collapsed, or disconnected hose produces pressure readings that are electrically indistinguishable from a dead sensor. Before ordering a replacement:
A $4 replacement hose resolves the same fault codes as a $90 MAP sensor. The hose is always the first thing to inspect.
A MAP sensor fault rarely appears in isolation. The ECU logs additional codes that narrow the diagnosis and prevent unnecessary part swaps.
Pull and record every stored code before starting any repair. The full code context tells the complete diagnostic story. A single code read in isolation almost never does.
MAP sensors do not follow a fixed replacement schedule under normal conditions, but they benefit from periodic inspection and, in specific cases, cleaning. Understanding the line between a contaminated sensor and a genuinely failed one prevents premature replacement.
MAP sensors accumulate carbon deposits and oil vapor residue over time, particularly on high-mileage engines with worn valve seals. Contamination causes erratic signal output without complete failure — a pattern that mimics a dying sensor.
Cleaning is the appropriate first response when:
Replacement is required when:
Use electronic contact cleaner — not carburetor cleaner — on the sensor port and tip. Carburetor cleaner's aggressive solvents dissolve the internal components of the sensor, turning a cleaning job into a replacement job.
Choosing the correct replacement sensor determines how long the repair holds. Budget sensors from unverified manufacturers introduce new problems within months. The MAP sensor is not a component to economize on — its calibration accuracy directly affects every other part of the fuel delivery system.
| Sensor Type | Average Cost | Accuracy | Typical Lifespan | Verdict |
|---|---|---|---|---|
| OEM (Original Equipment Manufacturer) | $60–$120 | Highest — factory-calibrated | 100,000+ miles | Best choice for all vehicles |
| OEM-equivalent (Bosch, Delphi, Denso) | $35–$80 | High — same supplier as OEM on many models | 80,000–100,000 miles | Acceptable alternative |
| Generic aftermarket (unknown brand) | $10–$30 | Variable — often poorly calibrated | Unpredictable | Avoid entirely |
Postponing MAP sensor replacement when symptoms are already present compounds repair costs far beyond the sensor price itself:
The arithmetic is clear: a $60–$120 OEM sensor replaced at confirmed symptom onset protects thousands of dollars in downstream components and eliminates weeks of degraded driving performance.
Short, low-speed trips are possible in early-stage failure, but sustained driving with confirmed MAP sensor symptoms is inadvisable. The incorrect air-fuel mixture accelerates wear on the catalytic converter and oxygen sensors simultaneously, converting a straightforward sensor replacement into a multi-component repair bill within weeks.
OEM MAP sensors routinely last 100,000 miles or more under normal operating conditions. Accelerated degradation occurs on vehicles with oil vapor contamination from worn valve seals, coolant intrusion into the intake, or extreme thermal cycling common in performance or towing applications.
In most cases, yes. The ECU continuously monitors MAP sensor output voltage and logs diagnostic fault codes — most commonly P0106, P0107, or P0108 — when readings fall outside programmed thresholds. However, intermittent sensor failures can produce symptoms without triggering a stored code if the fault clears before the ECU completes its monitoring cycle.
No. A MAP (Manifold Absolute Pressure) sensor measures pressure inside the intake manifold. A MAF (Mass Air Flow) sensor measures the volume and density of air entering the engine upstream of the throttle body. Some vehicles use both in combination; others rely on one exclusively. Confusing the two leads to incorrect diagnosis and the wrong part being replaced.
OEM or OEM-equivalent sensor parts cost between $35 and $120. Labor at a professional shop adds $50–$150, as the sensor is accessible on most engine layouts without major disassembly. Total replacement cost generally falls between $100 and $270 — modest compared to the secondary damage that a delayed repair routinely causes.
A $60 sensor replaced at the first confirmed MAP sensor symptom protects thousands of dollars in downstream components — the only expensive mistake here is waiting.
 |
 |
 |
 |

About Sarah Whitfield
Sarah Whitfield is a diagnostics and troubleshooting specialist who spent ten years as an ASE-certified technician before joining the editorial team. She specializes in OBD-II analysis, electrical gremlins, and the kind of intermittent problems that make most owners give up.
Get some FREE car parts & gear.. Or check out the latest free automotive manuals and build guides here.
Disable your ad blocker to unlock all the hidden deals. Hit the button below 🚗
| | | |