by Sarah Whitfield
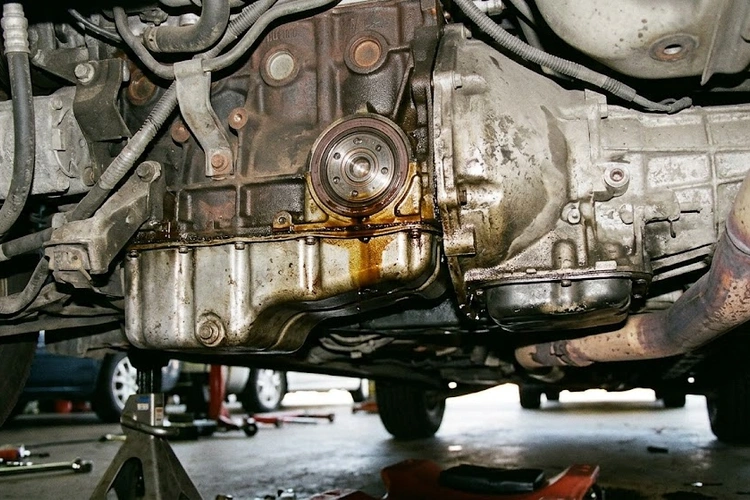
A rear main seal leak is identifiable by an oil trail originating at the crankshaft's rearmost journal, pooling directly beneath the engine-transmission junction. Recognizing rear main seal leak symptoms at the first sign of seepage is the single most effective measure available to prevent escalating drivetrain damage and compounding repair costs.
The rear main seal — formally the crankshaft rear oil seal — occupies one of the most labor-intensive positions in any drivetrain. Seated between the engine block and the transmission bell housing, it prevents engine oil from migrating along the crankshaft into the clutch disc or torque converter. When the seal fails due to age, thermal hardening, or journal wear, the repair demands either a full transmission removal on front-engine vehicles or an engine extraction on mid- and rear-engine configurations. The labor investment alone makes early diagnosis non-negotiable.
For a structured approach to fluid-related diagnostics across multiple systems, the troubleshooting category at CarCareTotal provides a systematic starting point. The sections below address every dimension of this repair: symptom recognition, seal architecture, cost modeling, and replacement timing.
Contents
Rear main seal failure presents through a consistent cluster of signs. Each symptom reflects active oil loss from the lubrication system and demands a diagnostic response, not monitoring.
The most direct symptom is an oil puddle forming beneath the rear of the engine block, near the transmission bell housing. This location distinguishes a rear main seal failure from a front crankshaft seal leak, which deposits oil near the harmonic balancer at the front of the engine.
Engine oil coating the transmission bell housing is a reliable confirmation that the leak originates behind the rear crankshaft journal. This distinguishes it from valve cover gasket failures, which deposit oil at the top of the engine, and oil pan gasket failures, which pool at the base. When inspecting with a flashlight, oil film on the starter motor housing or flywheel ring gear teeth further confirms rear main seal involvement.
Parallel leak-pattern logic applies when diagnosing exhaust pipe dripping — the position and character of the fluid deposit consistently narrows the source to a specific component.
A rear main seal leak does not typically produce blue exhaust smoke on its own, since oil escapes externally rather than entering the combustion chamber. However, when oil contacts hot exhaust components — particularly the catalytic converter shell — it combusts on contact, generating an acrid smell and intermittent gray-blue smoke. Reviewing the signs of a bad catalytic converter helps isolate whether the converter is being contaminated or has failed independently.
Viscosity selection has a direct effect on seal longevity. Running an oil grade outside the manufacturer's specification accelerates elastomer hardening. A technical comparison of synthetic blend vs. full synthetic oil outlines how oil chemistry interacts with seal materials across temperature ranges.
Two distinct seal architectures cover the full production vehicle population. The design determines both the repair approach and the expected service life of the replacement component.
Found primarily on vehicles manufactured before approximately 1990, rope seals — also called braided seals — consist of woven graphite or compressed cork material seated in a groove around the crankshaft. Installation is split between two half-sections: one in the engine block, one in the rear main bearing cap. Replacement requires bearing cap removal and frequently crankshaft lowering, making this design significantly more labor-intensive than its modern successor.
All modern vehicles use a one-piece radial lip seal — a precision elastomeric ring with an integrated garter spring that maintains continuous radial contact with the crankshaft journal. These are press-fit into a retainer plate bolted to the rear of the block. Replacement requires transmission removal but not crankshaft disassembly, making the process substantially more accessible than rope seal service.
| Feature | Rope / Braided Seal | One-Piece Lip Seal |
|---|---|---|
| Production era | Pre-1990 | 1990s – present |
| Material | Graphite, cork, or braided fiber | Nitrile, PTFE, or Viton elastomer |
| Construction | Two-piece, pressed into groove | One-piece, press-fit into retainer |
| Crankshaft removal required? | Frequently yes | No |
| Typical service life | 60,000 – 100,000 miles | 100,000 – 150,000+ miles |
| Typical part cost | $10 – $40 | $15 – $60 |
Seal material degrades faster when oil is left in service beyond its effective life. Adhering to drain intervals documented in how long engine oil lasts directly reduces the rate of elastomer hardening in both seal types.
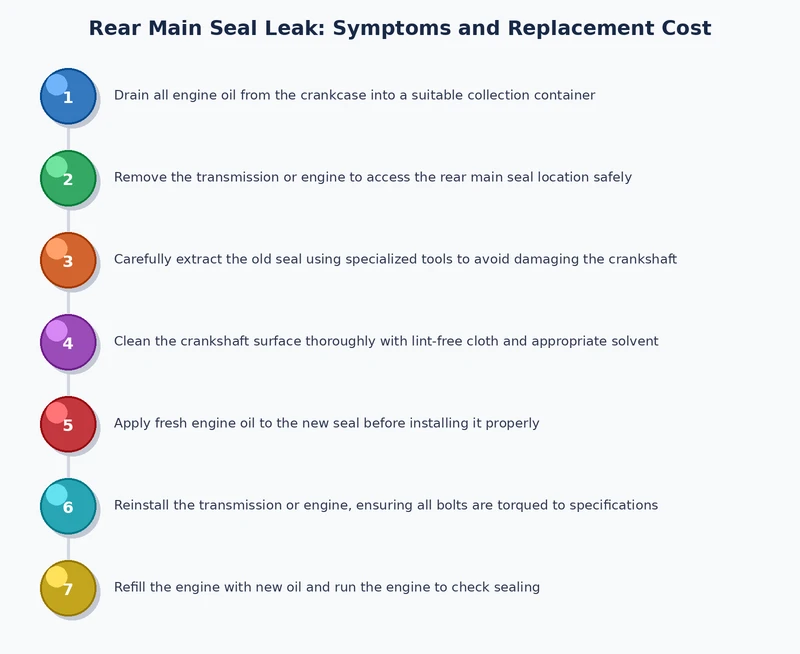
Rear main seal replacement sits at the upper boundary of DIY complexity. The job requires transmission removal — a procedure demanding a transmission jack, heavy-duty safety stands, torque wrench, and documented experience with drivetrain disassembly.
With the drivetrain accessible during this repair, inspecting the CV axles is a high-value concurrent task. A detailed methodology for CV axle inspection identifies the wear patterns worth evaluating before the transmission goes back in.
Compounding engine symptoms occurring alongside the seal leak — such as engine stalling under acceleration — may indicate concurrent mechanical failures best assessed with professional diagnostic equipment before any major disassembly begins.
Total repair cost varies by vehicle type, drivetrain configuration, and regional labor rates. The figures below reflect typical U.S. market pricing for a standard front-engine vehicle.
European luxury vehicles and performance cars with tight engine bay packaging frequently exceed the upper bound of these estimates. A dealership repair carries an additional 20–40% premium above independent shop rates.
Total professional repair cost: $500–$1,500 for most vehicles; up to $2,500 or more on complex AWD platforms. A DIY repair on a straightforward RWD vehicle reduces the total outlay to $50–$200 in parts and consumables.
Seal conditioner additives claim to rejuvenate hardened elastomers and slow or stop minor leaks. These products have a defined role — and equally defined limitations.
Delaying replacement when clutch contamination is present adds a clutch job — typically $600–$1,200 — on top of the seal repair. The power loss under load sometimes reported alongside a rear main seal leak frequently traces to clutch slippage caused by oil saturation of the friction disc.
Seal conditioner products — those containing petroleum sulfonates or seal-swelling agents — cause mildly hardened elastomers to expand slightly, restoring sealing contact. They are appropriate only under narrow conditions:
Additives are not a permanent solution. Engineering documentation on elastomeric oil seals confirms that seals subjected to extended thermal cycling eventually harden beyond the recovery threshold, at which point no additive restores sealing function. Physical replacement is the only remediation. Using additives in a vehicle with an active drip, contaminated clutch, or low oil pressure is not a management strategy — it is a liability.
Modern one-piece lip seals are engineered for 100,000 to 150,000 miles under normal operating conditions. Vehicles running degraded oil, experiencing crankshaft journal scoring, or subjected to chronic overfills frequently see premature failure well before that threshold.
A severe and unaddressed rear main seal leak will eventually deplete the oil supply to the point where bearing surfaces run without adequate lubrication. Spun rod or main bearings — and consequent engine seizure — are the terminal outcome of sustained oil starvation at this scale.
Driving with a minor seep is feasible in the short term if oil level is verified daily. An active drip is not a condition to drive on. Any leak that deposits oil on the clutch disc or causes oil pressure fluctuations must be addressed before further vehicle operation.
Primary causes include elastomer hardening from age and heat cycling, crankshaft journal wear that creates a non-uniform sealing surface, incorrect installation where the seal is cocked in the bore or installed without lubrication, and oil degradation from extended drain intervals that chemically attacks the seal material.
Both seals contain crankshaft oil escape, but at opposite ends of the engine. The front crankshaft seal is accessible after harmonic balancer removal and costs substantially less to replace. The rear seal requires full transmission removal and represents one of the most labor-intensive sealing repairs on any production vehicle platform.
A higher-viscosity oil may temporarily reduce seepage by increasing hydrodynamic pressure at the seal contact lip. This is a short-term palliative — the underlying seal condition does not improve. Manufacturer viscosity specifications must not be exceeded, as over-viscosity oil creates its own set of lubrication failures at cold start and at the upper end of the operating temperature range.
Oil that remains in service beyond its effective life accumulates oxidation byproducts, acids, and contaminants that chemically degrade elastomeric seals from the inside. Adhering strictly to the manufacturer's drain interval — or shortening it under severe-duty conditions — is the single most controllable variable in extending rear main seal life.
Rear main seal leak symptoms are rarely ambiguous once failure is underway — the oil deposit beneath the bell housing, the coating on the starter motor, and the declining dipstick reading collectively constitute a clear directive. Scheduling a professional inspection or sourcing the required tooling for a DIY repair at the first confirmed sign of leakage is the only defensible course of action. Every mile driven with an active seal failure compounds the risk of clutch contamination, oil starvation, and the far costlier engine repairs that follow.
 |
 |
 |
 |

About Sarah Whitfield
Sarah Whitfield is a diagnostics and troubleshooting specialist who spent ten years as an ASE-certified technician before joining the editorial team. She specializes in OBD-II analysis, electrical gremlins, and the kind of intermittent problems that make most owners give up.
Get some FREE car parts & gear.. Or check out the latest free automotive manuals and build guides here.
Disable your ad blocker to unlock all the hidden deals. Hit the button below 🚗
| | | |