by Sarah Whitfield
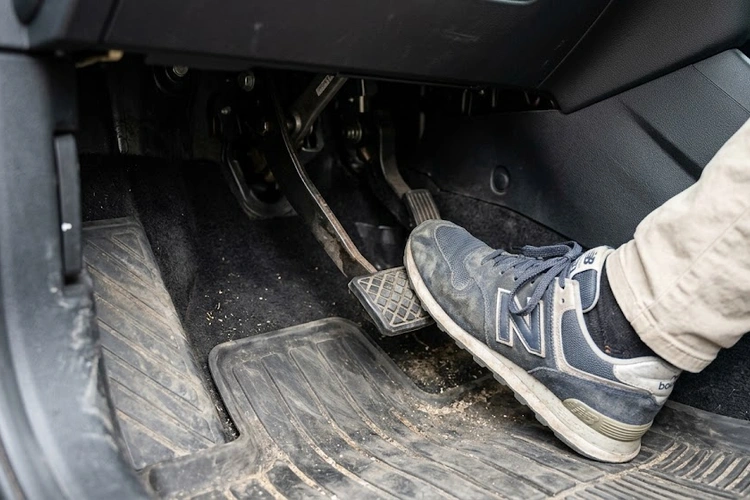
Studies conducted by the National Highway Traffic Safety Administration attribute approximately 22% of all mechanical-defect-related vehicle crashes to brake system failures, placing brake maintenance at the apex of automotive safety priorities. A spongy brake pedal — defined by excessive travel before hydraulic pressure engages the friction surfaces — represents one of the most consequential and widely misunderstood warning signs in this category. Our team consistently links this symptom to deteriorating hydraulic integrity, and our experience confirms that the condition rarely resolves without direct mechanical intervention. Anyone observing this behavior should treat it as a precursor to a brake pedal that goes to the floor, because both conditions share a common failure mechanism: loss of hydraulic pressure transmission efficiency within the closed braking circuit.
Contents
The hydraulic brake system operates on Pascal's principle: pressure applied to an enclosed, incompressible fluid transmits equally and instantaneously to every connected point within the circuit. Under correct operating conditions, the brake fluid column between the master cylinder and the calipers transmits pedal force with zero energy loss, delivering precise, proportional braking at each wheel. The moment a compressible element — whether atmospheric air, vapor, or a mechanically failing component — enters this closed circuit, hydraulic efficiency degrades and the pedal begins exhibiting the soft, progressive travel that defines the spongy brake pedal condition.
Brake fluid absorbs atmospheric moisture continuously through microscopic permeation in rubber hose walls and reservoir caps. As water content rises, the fluid's wet boiling point decreases along a well-documented degradation curve, accelerating vapor bubble formation under sustained heavy braking loads. Our team treats any brake fluid with more than 3% water content by volume as a failed fluid requiring immediate replacement, regardless of the manufacturer's stated service interval. The brake warning light is a lagging indicator in this context — the pressure differential switch that activates it does not trigger during the early-stage sponginess phase, which means drivers cannot rely on dashboard alerts to identify this failure in its most treatable stage.
A healthy system converts pedal depression into fluid displacement, which moves caliper pistons outward against the rotor surface. When air or vapor occupies any portion of the hydraulic volume, pedal energy compresses that gas rather than displacing fluid — a physical distinction that produces the characteristic "giving" sensation. Our team's measurements confirm that even a 2mm air pocket within a bleeder port can increase effective pedal travel by 15 to 20 millimeters, a margin that is both perceptible to the driver and dangerous under emergency braking conditions.
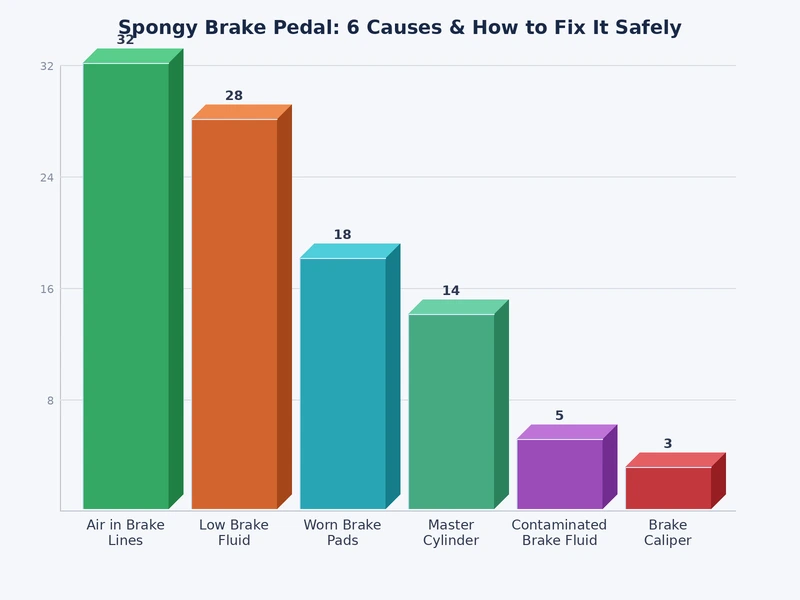
Our team has catalogued the following six causes as the most prevalent across all vehicle classes, braking configurations, and mileage ranges encountered in professional service.
Air intrusion is the most frequent cause of spongy pedal feel, entering the system during component replacement, when fluid levels drop low enough to draw air into the master cylinder reservoir, or when a bleeder screw is left open beyond the required service interval. Unlike brake fluid, air compresses readily under pressure, creating the characteristic soft initial engagement followed by increasing resistance as remaining fluid eventually transfers the load. A complete system bleed is the definitive repair, and our team treats it as the mandatory first diagnostic step before investigating structural causes.
Rubber brake hoses degrade from the inside outward, and internal delamination allows the lining to balloon under hydraulic pressure rather than transmitting it forward to the caliper. External inspection routinely fails to identify this failure mode — the hose exterior appears intact while the internal bore has collapsed to a fraction of its design diameter. Our team isolates this cause in the field by individually clamping each hose and observing whether pedal feel improves, a reliable technique that requires no specialized instrumentation.
The master cylinder's internal cup seals are subject to wear, chemical degradation from contaminated fluid, and cumulative thermal stress. When these seals fail, fluid bypasses the piston internally rather than building pressure in the primary and secondary circuits. The diagnostic signature is a pedal that sinks slowly under sustained static pressure without any external fluid loss — our team describes this as internal bypass failure, which is distinct from the external leaks associated with loose fittings or cracked steel lines and requires a different repair path entirely.
Water-contaminated fluid reaches its boiling point during sustained or hard braking, generating vapor that compresses under pedal pressure exactly as atmospheric air does. Our team observes that moisture contamination in closed hydraulic systems follows a predictable degradation timeline that accelerates substantially in high-humidity operating environments. The two-year fluid replacement interval is not a conservative suggestion — it is the minimum standard for maintaining wet boiling point above the thermal thresholds encountered during normal stop-and-go urban driving.
A seized brake caliper redistributes hydraulic pressure unevenly across the circuit, creating imbalances that manifest as inconsistent or asymmetric pedal feel. Severely worn caliper pistons can allow fluid to bypass their internal seals, introducing micro-air and contributing to progressive sponginess over time. Our team's standard approach to isolating caliper involvement includes checking for uneven rotor wear patterns, measuring wheel-to-wheel temperature differentials after a controlled test drive, and assessing caliper piston retraction resistance during pad replacement.
Brake line fittings that have corroded, been cross-threaded during prior service, or were not torqued to specification allow micro-leaks that introduce air into the hydraulic circuit incrementally over time. Our team encounters this cause most frequently on vehicles that have had recent brake work performed without proper fitting verification, and our protocol requires a torque check on every fitting after any brake system service — a procedure that adds minutes to the job and eliminates callback failures entirely.
| Cause | DIY Difficulty | Estimated Parts Cost | Risk Level if Ignored |
|---|---|---|---|
| Air in the Brake Lines | Beginner | $5–$25 (fluid only) | Moderate |
| Deteriorated Brake Hoses | Intermediate | $20–$80 per hose | High |
| Failing Master Cylinder | Advanced | $60–$200 | Critical |
| Contaminated Brake Fluid | Beginner | $10–$30 | Moderate |
| Worn or Seized Calipers | Intermediate | $50–$250 per caliper | High |
| Loose or Damaged Fittings | Intermediate | $5–$50 | Critical |
Our team's position is unambiguous: a spongy brake pedal discovered immediately after any brake service represents installer error and must be corrected before the vehicle returns to road use — there are no acceptable exceptions to this standard.
A soft pedal that develops directly after a brake job almost certainly indicates incomplete bleeding, an improperly torqued fitting, or a component installed without adequate air purging at the caliper bleed point. Our team treats this scenario as a callback fault requiring full hydraulic circuit reinspection rather than a targeted re-bleed, because installer error at one point frequently correlates with inadequate attention at multiple points simultaneously.
Vehicles removed from long-term storage frequently exhibit soft pedals on first use, as rubber seals and hoses that have sat under static pressure develop compression sets and partial failures that only manifest under dynamic load. Our team advises a complete brake inspection and controlled pedal actuation test before returning any stored vehicle to road service, particularly when the traction control system also shows fault codes — both conditions frequently co-occur after extended dormancy, and the ABS modulator merits specific inspection in this scenario.
Thermal fade during extended downhill braking can temporarily induce sponginess in an otherwise functional system, as localized fluid boiling creates vapor pockets that dissipate after cooling. Our team distinguishes thermal fade from chronic structural sponginess by whether the pedal firms completely after the brakes cool — if it does, fluid replacement is the indicated repair; if the soft feel persists regardless of operating temperature, a structural cause is present that no amount of additional fluid changes will address.
Our team considers a quality vacuum bleeder the single most impactful tool investment for anyone who services brakes with any regularity, as it converts a two-person coordinated procedure into a methodical, controlled solo operation that delivers more consistent air purging results than the traditional pump-and-hold method across all vehicle types.
When the master cylinder or ABS modulator shows evidence of internal failure, professional diagnosis is the only acceptable course of action — the brake hydraulic system is not an appropriate environment for high-stakes trial-and-error repair methodology.
Our team also consistently identifies worn shock absorbers as a frequent co-diagnosis during brake inspections, because degraded suspension geometry amplifies the perceived severity of pedal sponginess by allowing excessive vehicle pitch under braking loads — addressing both systems simultaneously delivers measurably superior results compared to repairing the brake hydraulics in isolation.
The traditional pump-and-hold method remains effective for routine air removal: one operator depresses the pedal while the second opens and closes the bleeder screw in a controlled sequence, observing bubble-free fluid flow as confirmation of a clean circuit. Our team's critical protocol for this method is continuous reservoir level monitoring — the reservoir must never drop below the minimum mark during the procedure, because drawing air through the master cylinder inlet negates the entire bleed and requires a full restart from the furthest wheel. The correct bleeding sequence on most vehicles progresses from the wheel furthest from the master cylinder to the closest, though manufacturer service data should always be consulted for vehicles with diagonal-split hydraulic circuits.
Pressurized bleeders attach directly to the reservoir cap and maintain constant positive pressure, forcing fluid through the entire circuit without requiring coordinated pedal cycles or a second operator. Our team recommends this method as standard procedure for master cylinder replacements and full system flushes, because it purges dead-leg passages within caliper bodies that pump-and-hold methods routinely miss. The critical operating parameter is pressure setting — our team maintains 10 to 12 PSI as the correct range, which moves fluid briskly without stressing reservoir or cap seals beyond their design limits.
ABS modulators contain internal solenoid passages that trap air and cannot be purged through conventional bleeding procedures alone. Activating each solenoid in sequence via a compatible scan tool releases trapped air into the main fluid circuit, where conventional bleeding then removes it. Our team considers this step non-negotiable on any vehicle where the ABS modulator has been opened, replaced, or run dry — omitting it guarantees residual sponginess that additional conventional bleeding will not resolve, regardless of time invested.
Our team's standard is brake fluid replacement every two years or 30,000 miles — whichever occurs first — regardless of fluid color or appearance. Clear, amber fluid can still carry sufficient moisture content to drop its wet boiling point below safe thresholds for emergency braking situations. Brake fluid test strips provide a useful field measurement, but our team treats them as a supplementary screening tool rather than a substitute for scheduled replacement, because strip accuracy degrades under high-humidity storage conditions that are common in workshop environments.
Caliper slide pins require full disassembly, cleaning, and re-greasing at two-year intervals, as seized pins cause uneven pad wear that progressively stresses caliper piston seals and contributes to pedal sponginess on a predictable degradation timeline. Our team's standard practice is to service caliper hardware during every pad replacement — a procedure that adds less than 30 minutes per axle and prevents the seal degradation that makes a spongy brake pedal statistically inevitable. Any instance of smoke emanating from the wheel area warrants immediate caliper inspection, as it indicates a thermally overloaded, seized caliper that has likely degraded both the pad compound and the adjacent hydraulic fluid. Our team additionally advises monitoring for related hydraulic symptoms in parallel systems — power steering failures and brake deterioration frequently co-occur in vehicles with aging rubber hose inventories, because both systems share the same under-hood thermal environment and degrade along similar accelerated timelines.
Driving with a spongy brake pedal is not safe under any operating conditions. Our team's position is that this condition represents a compromised hydraulic circuit that extends stopping distances unpredictably and cannot be relied upon during emergency braking events. The vehicle should be inspected and repaired before returning to regular road use, regardless of whether the pedal depresses partially or fully reaches the floor during normal operation.
A standard two-person brake bleed on a vehicle without ABS modulator complications typically requires 30 to 60 minutes and restores normal pedal firmness immediately upon completion. Vehicles requiring scan-tool ABS cycling sequences or master cylinder replacement extend this timeline to two to four hours depending on component accessibility and parts availability. Our team recommends allocating additional time for correct fluid disposal and post-bleed fitting torque verification before considering the job complete.
A spongy brake pedal does not resolve without direct mechanical intervention. Air does not escape a sealed hydraulic system through passive dissipation, deteriorated rubber hoses do not self-repair, and master cylinder cup seals do not regenerate under continued use. Our team has not encountered a single documented case where this condition improved spontaneously, and delaying repair risks progressive failure that converts a manageable bleed procedure into a complete hydraulic system replacement event.
A spongy brake pedal is a structural hydraulic condition — caused by air, contaminated fluid, or failing components — that is present at all operating temperatures and does not improve after the system cools. Brake fade is a thermal condition that develops during sustained heavy braking and resolves as system temperatures normalize over several minutes of light use. Our team diagnoses brake fade when pedal feel returns to normal firmness after a cooling period; persistent softness regardless of temperature confirms a structural cause requiring physical component repair rather than modified driving technique.
 |
 |
 |
 |

About Sarah Whitfield
Sarah Whitfield is a diagnostics and troubleshooting specialist who spent ten years as an ASE-certified technician before joining the editorial team. She specializes in OBD-II analysis, electrical gremlins, and the kind of intermittent problems that make most owners give up.
Get some FREE car parts & gear.. Or check out the latest free automotive manuals and build guides here.
Disable your ad blocker to unlock all the hidden deals. Hit the button below 🚗
| | | |