by Sarah Whitfield
What happens when a brake pad never stops pressing against the rotor, even when the vehicle is simply cruising at highway speed? That is the central problem a seized brake caliper creates — and the stuck brake caliper symptoms that follow range from a quiet, persistent drag to catastrophic heat buildup capable of warping rotors, boiling brake fluid, and, in extreme cases, igniting wheel components.
This article covers the full picture: how calipers fail mechanically, what warning signs appear at each stage, how to conduct a systematic diagnosis, which common explanations turn out to be wrong, and what the repair realistically costs. The evidence is straightforward. The safety implications are serious.
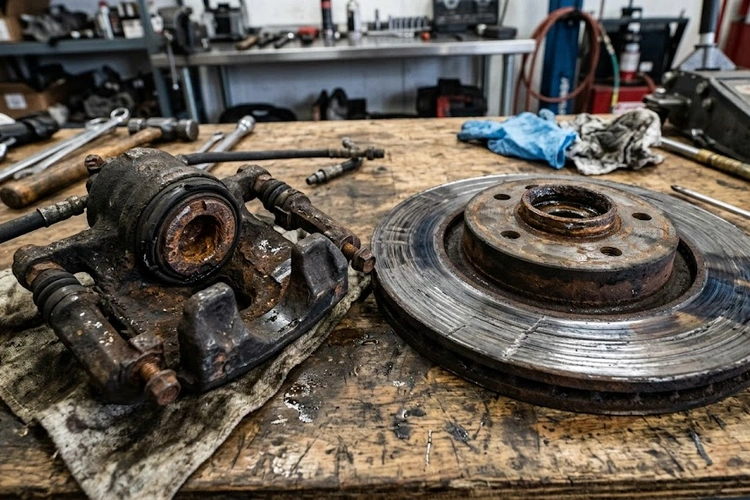
Brake calipers are hydraulic clamps mounted at each corner of the vehicle's disc brake system. Pressing the pedal forces hydraulic fluid through the brake lines, pushing the caliper's piston outward and squeezing the brake pads against the spinning rotor. Releasing the pedal allows line pressure to drop, and a small rubber seal retracts the piston by a fraction of a millimeter — enough to clear the pad from the rotor surface. A caliper that fails to retract traps friction material in constant contact with the rotor. The result is continuous heat generation regardless of whether braking is happening.
According to the National Highway Traffic Safety Administration, brake system failures are a leading mechanical contributor to vehicle crashes in the United States — which places timely diagnosis of any braking anomaly firmly in the category of safety-critical maintenance, not optional upkeep.
Contents
A disc brake system converts hydraulic pressure into clamping force with a precision that most drivers take entirely for granted. The master cylinder translates pedal movement into fluid pressure, which travels through hardened steel lines to each caliper. Inside the caliper housing, one or more aluminum or steel pistons extend outward, pressing the inboard brake pad against the rotor face. On floating calipers — the dominant design on passenger vehicles since the 1980s — the caliper body itself slides on a pair of guide pins, allowing it to pull the outboard pad inward as well. The rotor is squeezed from both sides simultaneously.
The release mechanism is entirely passive. When pedal pressure drops, the small rubber seal surrounding each piston deforms back to its natural geometry, drawing the piston inward by roughly 0.1 to 0.15 millimeters. That microscopic retraction is sufficient to break contact between the pad and rotor under normal operating temperatures. When anything disrupts that retraction — even partially — the consequences compound with every mile driven.
Corrosion is the leading root cause in most climates. Guide pins are particularly vulnerable. These pins are lubricated with high-temperature silicone grease at the factory, but that grease eventually dries, washes out, or becomes contaminated with water and road salt. Corroded guide pins prevent the floating caliper body from sliding freely, trapping one pad in contact with the rotor even when hydraulic pressure has fully released.
Piston seal failure is the second most common failure path. Brake fluid is hygroscopic — it absorbs atmospheric moisture over time. As moisture content rises, the fluid's boiling point drops and its chemical composition degrades. That degraded fluid attacks the rubber piston seals, causing swelling that prevents the piston from retracting cleanly into its bore.
A collapsed brake hose is a deceptive failure mode that produces identical symptoms to a seized piston. The outer structure of the flexible rubber hose looks intact on visual inspection, but the inner liner delaminates and acts as a one-way valve: hydraulic pressure passes inward to apply the brakes, but cannot return through the restriction to release them. The caliper stays applied. Many technicians have replaced calipers unnecessarily without first ruling out this failure.
Finally, rust and debris accumulation on the caliper bracket — particularly in high-salt regions — can physically trap brake pad ears in their slides, preventing outward pad movement even when the piston itself retracts normally. This variant tends to produce asymmetric pad wear as the primary diagnostic clue.
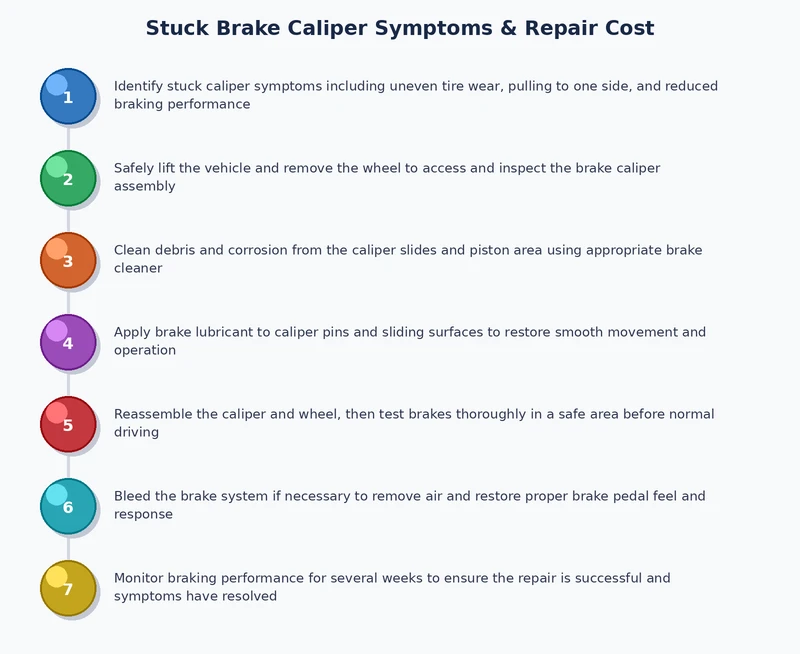
The earliest stuck brake caliper symptoms are physical and consistent. A vehicle that pulls reliably to one side during braking — not during straight-line acceleration, not randomly, but specifically under pedal application — is showing the most direct indicator of unequal braking force. The pull direction is predictable: if the left front caliper is seized, braking force on that corner is greater, and the vehicle pulls left. The pull intensifies with harder pedal pressure and remains consistent regardless of road surface or tire condition.
A burning smell concentrated at one wheel well, noticed after routine city driving rather than hard braking, is the second early signal. This smell has a characteristic bitterness — different from the sharp, chemical odor of new brake pads bedding in — and it does not dissipate within a few minutes of stopping. In many cases, drivers first notice it when exiting the vehicle after a commute.
Reduced fuel economy is a subtler first-stage indicator that most drivers attribute to other factors. A caliper dragging at one corner creates consistent rolling resistance that the engine works against with every rotation of the wheel. On highway drives where fuel consumption is measurable, a stuck rear caliper can reduce economy by ten percent or more compared to the vehicle's normal baseline.
When early signals go unaddressed, the symptom profile expands. The affected wheel runs significantly hotter than its counterpart on the opposite side. After a 15-minute drive, this temperature differential is detectable without instruments: holding a hand near (not touching) each wheel in sequence reveals a dramatic difference. Severe cases produce visible heat shimmer from the wheel surface, discoloration of the rim finish, or melted wheel weights.
Brake pedal feel changes as heat builds in the system. Excessive caliper temperature transfers into the brake fluid, which begins to boil and introduce vapor pockets into the hydraulic circuit. Vapor compresses, unlike fluid. The pedal becomes spongy, sinks further toward the floor for the same stopping force, or in worst-case scenarios requires pumping to build pressure. This symptom frequently leads to a misdiagnosis of master cylinder failure, delaying the correct repair.
Uneven tire wear develops over weeks of operation with a dragging front caliper. The constant braking force on one side creates asymmetric scrubbing across the tire contact patch. Drivers who routinely check for uneven wear — a habit recommended during inspections that also catch bad shock absorber symptoms — are more likely to identify this pattern before it reaches the rotor-damaging stage.
Effective diagnosis at home requires a floor jack rated for the vehicle's weight, a matching pair of jack stands, wheel chocks for the opposite axle, basic hand tools including a ratchet set and torque wrench, and a non-contact infrared thermometer. The thermometer alone resolves most diagnostic uncertainty: readings taken immediately after a 10-minute drive at each wheel, without allowing any cool-down time, reveal temperature differentials that confirm or rule out drag within 60 seconds.
Safety protocol is non-negotiable. The vehicle must be parked on level, stable pavement. Wheels on the axle remaining on the ground must be chocked in both directions. The parking brake must be engaged. No part of the brake hydraulic system should be opened without ensuring contamination-free conditions — moisture or debris introduced during inspection will accelerate the same failures being diagnosed.
Pro tip: Measure wheel temperatures immediately after arriving home from a normal drive — waiting even five minutes allows the seized corner to cool and narrows the temperature gap, making the comparison less definitive.
With the suspect wheel removed and the caliper accessible, the inspection proceeds in order of likelihood. Guide pins are examined first: the caliper should be removable from its bracket with moderate hand force, and the pins themselves should slide smoothly when pressed by hand. Stiff, gritty, or immovable pins confirm the most common failure without any further disassembly.
If guide pins move freely, attention shifts to the brake hose. A hose with a collapsed inner liner cannot be identified by external inspection alone. The correct test is to crack open the bleeder valve on the caliper while an assistant holds the brake pedal. If fluid releases under pressure but the caliper drag does not diminish, the hose is the likely restriction — fluid can enter but not return through the compromised liner.
Piston retraction is assessed last. With the caliper unbolted and the pads removed, a dedicated piston wind-back tool or a C-clamp pressed against the piston face reveals whether retraction is normal. Healthy pistons compress smoothly with moderate force. Pistons that resist, rotate unevenly, or require extreme force indicate seal failure or bore corrosion. The noise pattern heard before the wheel was removed also carries diagnostic weight: a rhythmic scraping tied to wheel rotation — similar in cadence to the mechanical sounds described when investigating clunking noise over bumps — points toward stuck brake pad slides rather than a piston failure, significantly narrowing the repair scope.

The most common dismissal mechanics encounter is the claim that burning smell or slight drag is simply brake dust burning off after a hard stop. Brake dust does produce odor under high-load braking conditions, but that smell dissipates within a few minutes and does not recur at low speeds or during ordinary highway driving. A smell that persists over multiple miles of normal driving — particularly one localized to a single wheel — is friction material being continuously consumed by contact with the rotor. It is not residual dust. Treating it as such delays a diagnosis that becomes more expensive with every additional mile.
Similarly, some drivers attribute wheel heat to normal brake system operation. Brakes do generate heat during use, and all four wheels run warmer after city driving than after a highway cruise. The diagnostic indicator is differential: one corner running 80 to 150 degrees Fahrenheit hotter than its pair is not a feature of normal brake operation. It is direct evidence of unequal friction work.
A drag that appears to lessen after the vehicle reaches operating temperature is frequently interpreted as a self-correcting problem. What actually occurs is heat-driven dimensional change in caliper components. As metal expands at operating temperature, the mechanical binding that produces drag at cold start temporarily reduces. The underlying failure — corroded guide pins, compromised seal, or collapsed hose — is unchanged. When the vehicle cools overnight, contraction resets the seized state, often slightly worse due to the additional corrosion accelerated by heat cycling. The symptom appears intermittent. The damage is cumulative.
The belief that a stuck rear caliper presents less urgency than a front failure is another misconception worth addressing directly. Front calipers handle approximately 70 percent of a vehicle's braking force, making their condition more immediately critical to stopping distance. However, a seized rear caliper still generates dangerous heat, risks boiling the rear brake fluid circuit, and can cause the rear wheel to lock unexpectedly under heavy braking — producing oversteer on rear-wheel-drive vehicles or an unstable, fishtailing stop on any platform. Neither failure mode is trivial.
The appropriate repair depends on which component caused the seizure and the condition of the caliper bore after the primary failure is addressed. The table below reflects labor and parts estimates from independent repair shops and dealerships across the United States. Regional variation in labor rates, as well as vehicle-specific parts pricing, means actual costs may fall outside these ranges on either end.
| Repair Type | Parts Cost | Labor Cost | Total Estimate | Notes |
|---|---|---|---|---|
| Guide pin service (clean & lubricate) | $5–$15 | $40–$80 | $45–$95 | Sufficient when piston and seal are intact |
| Brake hose replacement (single side) | $20–$60 | $50–$90 | $70–$150 | Collapsed liner often misdiagnosed as caliper failure |
| Caliper rebuild kit (single caliper) | $15–$40 | $80–$120 | $95–$160 | Replaces piston seals and dust boots |
| Remanufactured caliper replacement | $60–$150 | $80–$130 | $140–$280 | Recommended when bore shows corrosion pitting |
| OEM caliper replacement (dealer) | $150–$400 | $100–$160 | $250–$560 | Typically required for late-model luxury vehicles |
| Full axle caliper pair (both sides) | $120–$300 | $150–$220 | $270–$520 | Best practice when one caliper has already failed |
Brake pads and rotors require evaluation alongside every caliper repair. A caliper that has been dragging for weeks leaves behind a rotor with heat cracks, hard spots, or scoring too severe for resurfacing. Adding a rotor replacement raises the total job cost by $60 to $180 per axle, depending on vehicle specification. Shops that quote caliper work without evaluating rotor condition are providing an incomplete estimate.
The rebuild-versus-replace decision pivots on one variable: caliper bore condition. If the bore is smooth, the piston slides freely once the old seal is removed, and no scoring is visible with a flashlight after full piston withdrawal, a rebuild kit is the correct choice. New seals and dust boots restore full hydraulic function at a fraction of replacement cost. If the bore shows pitting, corrosion craters, or a ridge at the piston travel limit, a replacement caliper is mandatory. Rebuilding a compromised bore with fresh seals produces a repair that fails again within months, typically at the same mileage interval as the original failure.
Replacing calipers in matched axle pairs is standard shop practice, and the reasoning is structural rather than commercial. A single new caliper on one side creates a hydraulic mismatch with the aging unit on the opposite side. The older caliper — subject to the same corrosion and heat cycling as the one that failed — produces slightly different clamping force at the same pedal pressure. The result is a vehicle that pulls under braking in the direction of the older caliper. Paired replacement eliminates that outcome and consolidates labor costs into a single service visit rather than two.
When the failed caliper also shows brake fluid weeping from the piston seal, a full system inspection of the brake lines and master cylinder is warranted. Contaminated, moisture-saturated fluid degrades seals throughout the hydraulic circuit — not just at the failed caliper. This pattern of compounding failures with a single root cause is a common thread in vehicles with deferred maintenance histories, similar to the way car burning oil symptoms frequently surface alongside other age-related wear patterns when basic fluid service has been neglected.
No. A seized caliper does not recover without direct mechanical intervention. Heat cycling may temporarily reduce drag as metal expands at operating temperature, but the underlying cause — corroded guide pins, failed piston seal, or a collapsed brake hose — remains unchanged. Each heat cycle accelerates corrosion and seal degradation, so the condition worsens over time rather than resolving on its own.
Operating a vehicle with a confirmed seized caliper beyond the distance needed to reach a repair facility is not advisable. Continuous heat buildup risks rotor warping, brake fluid boiling, and hydraulic line failure. Some drivers report driving 50 to 100 miles before catastrophic symptoms appear; others experience severe brake fade within 20 miles, depending on caliper design and how completely the piston has seized.
Front calipers handle approximately 70 percent of a vehicle's total stopping force, making front failures more immediately critical to braking distance. However, a seized rear caliper is not trivial. It generates dangerous heat at the rear axle, can boil the rear brake fluid circuit, and risks inducing rear wheel lockup during hard braking — a condition that produces oversteer on rear-wheel-drive vehicles and unstable stopping behavior on any platform. Both failure modes require prompt repair.
A seized parking brake cable applies rear brakes mechanically through a cable linkage, while a stuck caliper is a hydraulic failure. Both produce heat and drag at the affected wheel. The distinction is confirmed by fully releasing the parking brake lever and verifying that the cable and equalizer move freely. If drag and heat persist after confirmed cable release, the caliper — not the cable — is the failure point.
 |
 |
 |
 |

About Sarah Whitfield
Sarah Whitfield is a diagnostics and troubleshooting specialist who spent ten years as an ASE-certified technician before joining the editorial team. She specializes in OBD-II analysis, electrical gremlins, and the kind of intermittent problems that make most owners give up.
Get some FREE car parts & gear.. Or check out the latest free automotive manuals and build guides here.
Disable your ad blocker to unlock all the hidden deals. Hit the button below 🚗
| | | |