Car Care ›
by Diego Ramirez
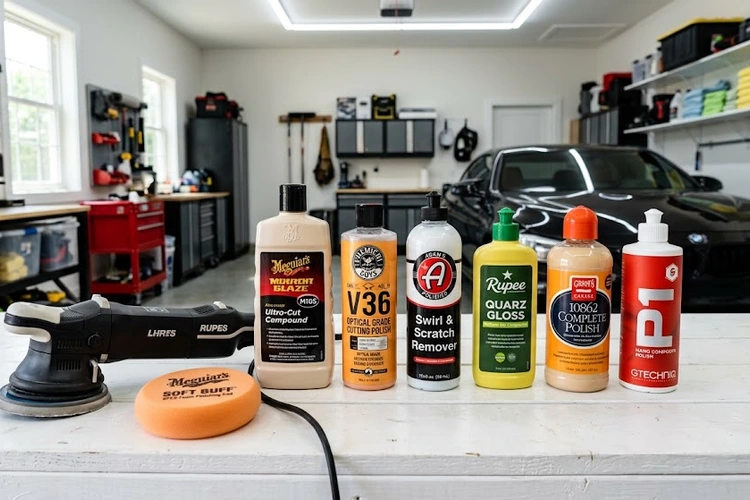
You spent a Saturday morning washing your car, but under the afternoon sun the paint still looked flat and hazy. A closer look revealed swirl marks covering the hood — tiny scratches left by months of automatic car washes. That's the exact moment most people discover what the best car polish can actually do for a neglected finish.
Car polish sits between compound and wax in your detailing kit. It removes light surface defects — swirl marks, fine scratches, mild oxidation — and restores depth and gloss to dull paint. This guide breaks down six top-performing polishes, explains which ones suit your skill level, and shows you how to apply them without making things worse.
Before you start, it's worth noting that long-term results depend on habits between sessions. Read our tips on maintaining car paint gloss between washes — they pair directly with what you'll do here.
Contents
Use this table to find your match before reading the full breakdown below.
| Product | Best For | Application | Abrasiveness | Price Range |
|---|---|---|---|---|
| Meguiar's Ultimate Polish | All paint types, beginners | Hand or machine | Mild | $$ |
| Chemical Guys VSS | Black & dark paint | Hand or machine | Moderate | $$ |
| Adam's Revive Hand Polish | Hand detailers, coated paint | Hand only | Mild | $$ |
| 3D ONE | Experienced detailers | Machine (DA polisher) | Medium-High | $$$ |
| Griot's Garage BOSS | Pro-level paint correction | Machine (DA polisher) | Medium-High | $$$ |
| CarGuys Hybrid Wax Sealer | Maintenance polishing | Hand or machine | Very Mild | $$ |
Every product was evaluated on four factors:
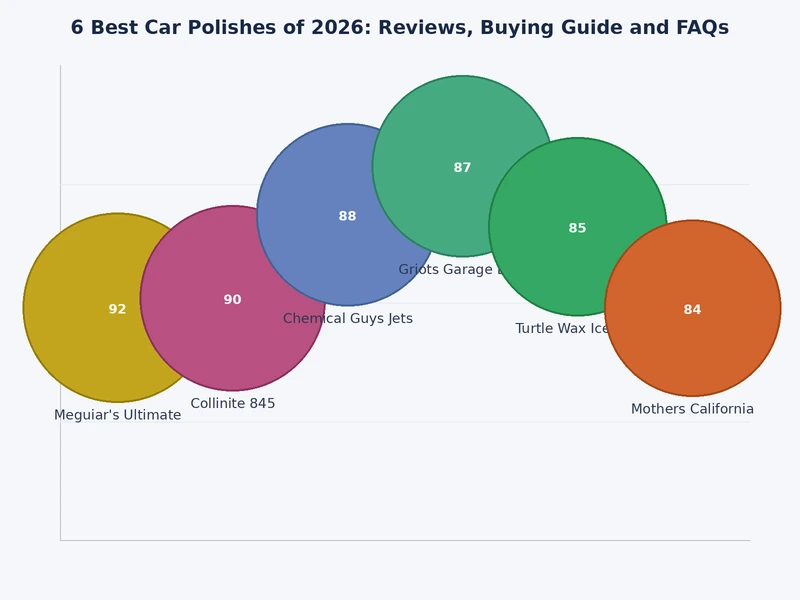
1. Meguiar's Ultimate Polish — This is the benchmark for good reason. It works on every paint color, clears up swirl marks in three or four hand passes, and removes cleanly with a microfiber towel. Mild enough to use regularly without thinning your clear coat.
2. Chemical Guys VSS Scratch & Swirl Remover — VSS handles moderate defects and leaves a high-gloss finish with no heavy filler. It performs best on black and dark paint where swirl marks show the most. Use it by hand for lighter defects, or with a DA polisher for faster results.
3. Adam's Revive Hand Polish — Formulated specifically for hand use. It breaks down through friction rather than heat, which means consistent results without a machine. Works well on both coated and uncoated paint.
4. 3D ONE Correction Compound & Polish — One product does double duty. It cuts like a compound and finishes like a polish in a single step. You save time and reduce products in your kit. Best used with a DA polisher at medium speed.
5. Griot's Garage BOSS Fast Correcting Cream — Known for low-dust formulas that break down cleanly. BOSS corrects quickly on a dual-action polisher and leaves minimal hazing behind. Pro-level results with a friendlier learning curve than rotary compounds.
6. CarGuys Hybrid Wax Sealer — A polish-and-protect combo in one step. Not the most aggressive cutter, but for lightly swirled paint it restores gloss and lays down a protective layer at the same time. Best suited for maintenance polishing between full correction sessions.
Not all polishes are the same. Some punish beginners. Others deliver nothing without a machine. Picking the wrong one wastes time and risks paint damage.
If you've never polished before, start here. These products are low-dust, easy to remove, and hard to overuse:
These are the best car polish options for someone starting out. You can apply them in a driveway, in natural light, with nothing more than a foam pad and a couple of microfiber towels.
If you're new to machine polishing, practice on a spare hood or bumper panel first. One wrong pass with a rotary machine on a hot panel can burn through the clear coat in seconds.
If you own a DA polisher and have hands-on experience, these deliver a deeper correction:
These deliver noticeably more correction than hand-grade formulas, but controlled technique is non-negotiable. Rushing the process creates more problems than it solves.
Polish is not a product you use every month. It's a corrective step for when your paint has real, visible problems.
Before you open a bottle of polish, deal with heavier surface contamination first. Read our breakdown of clay bar vs iron remover — understanding which step your car needs prevents you from scratching freshly polished paint. For deep gouges, heavy oxidation, or paint that feels like sandpaper, start with a rubbing compound before moving to polish. Compound cuts; polish refines.
Never polish a car that doesn't need it. According to Wikipedia's entry on automotive paint, modern clear coats are typically 35–60 microns thick. Every polishing session removes a thin slice of that. There's a hard limit on how many correction sessions the paint can handle over its lifetime.
The product alone doesn't decide your results. Your tools matter just as much as what's in the bottle.
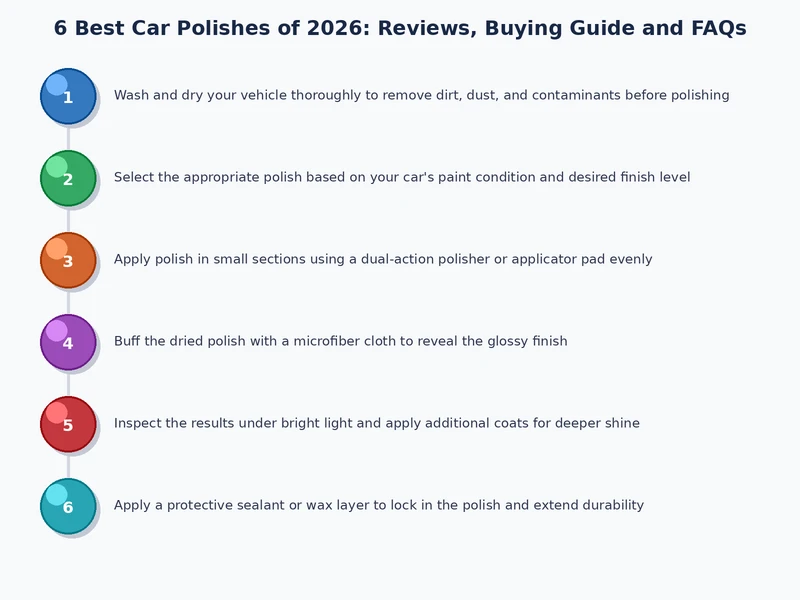
Always work in the shade or indoors. Polishing in direct sunlight causes the product to dry too fast, locking residue onto the paint before you can buff it off.
Good technique is what separates a finish that looks professional from one that looks worse than before you started.
Never skip surface prep. Polishing over dirt, old wax, or embedded contamination creates new scratches before you even begin correcting the old ones.
For hand application:
For machine application (DA polisher):
Even experienced detailers run into problems. Here's how to identify and fix the most common ones.
Symptoms you'll see:
Fix: Use far less than you think you need. A dime-sized amount covers a 2×2 foot section with room to spare. If stubborn residue won't come off, dampen a fresh microfiber with distilled water and work in small circles. Switch to a clean towel the moment the first one loads up with dried product.
If your paint looks worse after a polish session, your pad picked up surface contamination — brake dust, iron particles, or embedded grit — and dragged it across the clear coat.
Fix: Clay bar or chemically decontaminate the surface before your next session. Washing alone doesn't remove these embedded particles. The order in which you decontaminate matters — our guide on clay bar vs iron remover explains when to use each method and why sequence is critical.
Always apply a wax, sealant, or coating within 24 hours of polishing. The polishing process strips your existing protection and leaves the clear coat fully exposed to UV and environmental damage.
If you're getting ready to sell, a proper polish job is one of the highest-return steps in the process. Our full guide on how to detail and prepare your car for sale covers every step in the right order.
 |
 |
 |
 |

About Diego Ramirez
Diego Ramirez has been wrenching on cars since his teenage years and has built a deep practical knowledge of automotive maintenance and paint protection through years of hands-on work. He specializes in fluid service intervals, preventive care routines, exterior protection products, and the consistent habits that extend a vehicle's lifespan well beyond average. At CarCareTotal, he covers car care guides, cleaning and detailing products, and exterior maintenance and protection reviews.
Get some FREE car parts & gear.. Or check out the latest free automotive manuals and build guides here.
Disable your ad blocker to unlock all the hidden deals. Hit the button below 🚗
| | | |