Roughly one in five vehicles on the road carries an active oil leak, and industry inspection surveys consistently find that the majority of affected owners have no awareness the problem exists. Oil loss as modest as a quart per thousand miles accelerates internal engine wear silently, often shortening service life by fifty thousand miles or more before any dashboard warning appears. Identifying the most common car oil leak causes early is the most direct way to protect an engine before minor seepage becomes an irreversible failure. For vehicles already showing oil contamination on ignition components, the guide on oil on spark plugs covers related diagnostics in useful detail. This article addresses all eight primary causes, field-tested leak-location methods, the tools that make the job accurate rather than expensive, and clear thresholds for separating a weekend driveway repair from a necessary shop visit.
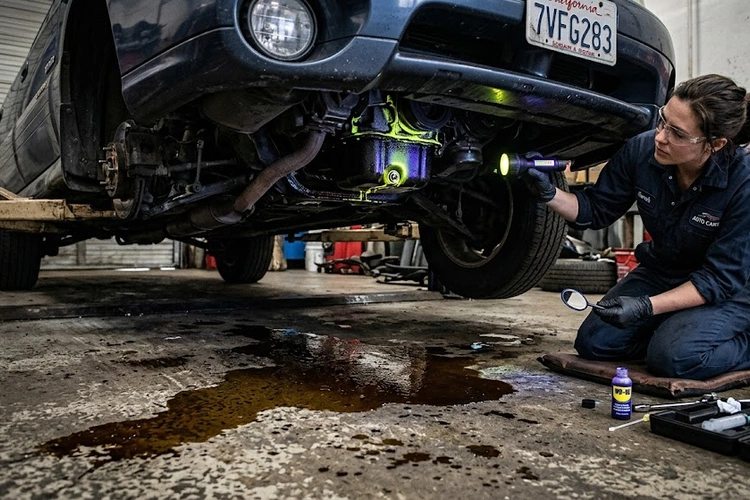
Figure 1 — Oil residue patterns on the engine underside help narrow down car oil leak causes to specific gaskets or seals.
Engine oil circulates under pressure through a sealed system that depends on dozens of gaskets, seals, and threaded connections remaining intact simultaneously. Heat cycling, age, vibration, and improper servicing degrade these components at different rates, and the failure of even one creates a pathway for oil to escape. The eight causes below account for the overwhelming majority of leaks encountered in real-world diagnostic work, ranked broadly by frequency of occurrence.
Top Four High-Frequency Leak Sources
These four components fail more often than any others, and they should be the first inspection points on any vehicle showing unexplained oil loss or a dropping dipstick reading between changes.
Valve Cover Gasket: The valve cover seals the rocker arm and camshaft assembly from above, and the gasket between the cover and the cylinder head — typically rubber or cork — degrades under constant heat exposure, becoming brittle and compressing over time. Oil seeps down the exterior of the cylinder head, collecting along the lower mating surface and eventually dripping from beneath the engine as it migrates downward. This is the single most common oil leak on high-mileage engines.
Oil Pan Gasket: The oil pan gasket seals the pan to the bottom of the engine block directly above the road surface, exposing it to both radiant heat from above and thermal cycling from cold startups. Compression set and cracking over high mileage are the dominant failure modes, producing a characteristic slow drip that collects in a puddle centered directly beneath the engine on level ground.
Drain Plug and Oil Filter: An improperly torqued drain plug or a cross-threaded, insufficiently tightened oil filter produces immediate seepage that worsens steadily with each heat cycle. Both should be ruled out before any other disassembly begins — they cost nothing to inspect and minutes to correct. A stripped drain plug thread is the preventable consequence of over-tightening, and it turns a ten-minute job into a thread repair procedure.
Rear Main Seal: The rear main seal sits where the crankshaft exits the back of the engine block into the transmission bellhousing. When this lip seal hardens and loses tracking contact with the crankshaft journal, oil escapes onto the flywheel or flexplate and drips from the lowest point of the bellhousing. Diagnosis is straightforward; repair is not — accessing this seal requires transmission removal regardless of engine design.
Four Causes That Often Go Undiagnosed
These four causes produce genuine oil loss but are consistently missed during casual visual inspection because the leak origin is either concealed from direct view or visually confused with a higher-frequency failure nearby.
Camshaft Seals: Front and rear cam seals are pressed-in lip seals that retain oil in the cylinder head where the camshaft exits the casting. As the seal lip hardens on high-mileage engines, it loses its ability to follow the journal surface under dynamic conditions, allowing oil to escape around the shaft. The leak location overlaps with valve cover gasket territory, making visual differentiation difficult without cleaning the area thoroughly first.
Front Crankshaft Seal: The front crank seal sits behind the harmonic balancer and seals the nose of the crankshaft inside the timing cover. A failing front crank seal is particularly dangerous because oil escapes directly into the timing belt or chain cavity, dramatically accelerating belt degradation and carrying the risk of catastrophic engine failure if the belt is not replaced before it fails from oil saturation.
Cracked or Punctured Oil Pan: Road debris impacts and improper jacking — placing a floor jack pad against the pan rather than the designated jacking points — can crack or puncture the oil pan itself, independent of the gasket. A cracked pan requires complete replacement rather than gasket work, and low-clearance vehicles are disproportionately affected by this failure mode.
Degraded O-Rings and Pressure Sender Seals: Oil pressure senders, variable valve timing solenoids, and sensor ports throughout the engine rely on small O-rings and crush washers that harden and lose their sealing capacity over time. Individually these produce slow, inconspicuous leaks, but on high-mileage engines they collectively account for meaningful sustained oil consumption that is difficult to attribute to any single visible source.
Quick Reference: All 8 Causes Compared
Cause
Leak Location
Severity
DIY Difficulty
Typical Repair Cost
Valve Cover Gasket
Top and sides of cylinder head
Low–Moderate
Easy
$50–$150 DIY
Oil Pan Gasket
Underside of engine block
Moderate
Moderate
$100–$300 DIY
Drain Plug / Oil Filter
Oil pan drain area
Low
Very Easy
Under $20 DIY
Rear Main Seal
Engine–transmission junction
High
Advanced
$600–$1,200 shop
Camshaft Seals
Cylinder head near valve cover
Moderate
Intermediate
$200–$500 DIY/shop
Front Crankshaft Seal
Front of engine, timing cover
High
Advanced
$300–$800 shop
Cracked Oil Pan
Underside, forward of gasket seam
High
Moderate
$150–$400 DIY
O-Rings / Sensor Seals
Various sensor ports on block or head
Low
Easy–Moderate
$10–$80 DIY
How to Track Down an Oil Leak Without a Lift
Accurate leak location is the skill that separates an efficient repair from an expensive series of replaced gaskets that turned out not to be the source. Experienced mechanics do not simply order parts and start disassembling — they invest time confirming the exact origin before a single bolt is touched.
The Cardboard Test and UV Dye Method
Two methods work reliably in a home garage without specialized equipment, and used together they narrow the leak source to a specific zone of the engine.
Cardboard Test: Park the vehicle on a clean sheet of cardboard overnight after wiping all accessible engine surfaces completely dry. The drip pattern the following morning indicates the horizontal position of the leak source relative to the engine's footprint, which combined with a clean-engine visual inspection the next day narrows the vertical origin significantly.
UV Dye Method: Add a compatible fluorescent dye to the engine oil using the supplied injector syringe, drive the vehicle for thirty to sixty minutes to circulate the dye under normal operating pressure, then inspect the entire engine with a UV lamp in a darkened garage. The dye traces the exact migration path of the oil with high precision, including slow seeps that produce no visible drip during short idle periods or overnight parking tests.
Crankcase Pressure Check: For leaks that resist location through dye methods, elevated crankcase pressure from a failed PCV system forces oil past otherwise serviceable seals and gaskets, producing symptoms that mimic multiple simultaneous gasket failures. A review of PCV valve symptoms helps determine whether crankcase pressure is amplifying or creating the leak rather than the gasket itself being the root problem.
Before cleaning the engine for a fresh diagnostic, photograph every angle thoroughly — existing residue patterns reveal the flow path of escaping oil and frequently point directly to the origin before any cleaning disturbs the evidence trail.
Reading Leak Patterns Like a Mechanic
Wind-driven oil migration is one of the most common sources of oil leak misdiagnosis and one of the least discussed. Oil originating from the front of the engine at highway speeds appears as a rear-of-engine leak when the stationary vehicle is inspected in the driveway. A few diagnostic principles help interpret what the physical evidence actually indicates rather than where it appears to point.
Oil coating the back of the engine block while the front remains dry is strong evidence of a rear main seal failure rather than a valve cover or camshaft seal issue, which both sit higher and further forward.
Oil running toward the firewall or coating the rear of the engine bay near the top suggests the leak originates above and forward — typically a valve cover gasket on the front-facing cylinder bank of a V-configuration engine.
A pool of oil forming directly beneath the engine overnight, with no visible wet oil on the engine exterior during daylight inspection, is characteristic of a drain plug or oil pan gasket seeping only under static oil head pressure when the engine sits cold and oil settles to the lowest point.
Fresh, wet, shiny oil indicates an active leak currently flowing under operating pressure; dry, darkened, crusty residue with no new oil accumulation beneath it suggests an old, self-arrested leak or a crack that has stopped progressing — both scenarios change the urgency of repair considerably.
Drivers noticing fluid loss alongside other symptoms should cross-reference the coolant leak symptoms guide to confirm whether multiple fluid systems are failing simultaneously, since concurrent oil and coolant leaks shift the diagnostic priority toward head gasket integrity and change the repair sequence entirely.
Tools Every Home Mechanic Needs for Oil Leak Diagnosis and Repair
Attempting gasket and seal work without the correct tools consistently produces poor sealing results and frequently causes new leaks by scoring soft mating surfaces with improper scrapers or by over-torquing fasteners into aluminum threads. The tool investment is modest relative to a single shop visit and recovers its cost on the first successful repair.
Diagnostic Tools
UV Dye Kit: A dye-injector syringe paired with a UV lamp — available for under $30 as a kit — provides definitive leak tracing with minimal time investment and works on any engine regardless of make or configuration.
Flexible Inspection Mirror and LED Flashlight: Most gasket seam failures are plainly visible once the correct seam is illuminated from the right angle; a compact articulating mirror reaches sealing surfaces that no direct sight line can access from above or below.
Click-Type Torque Wrench: Drain plug and oil filter over-torquing is a leading cause of stripped aluminum threads and warped filter housings, both of which create chronic leaks requiring thread repair inserts to correct. A click-type torque wrench eliminates the guesswork that causes these self-inflicted failures entirely.
Oil Pressure Gauge: Confirms that the lubrication system is maintaining adequate operating pressure before repair work begins, ruling out catastrophic internal wear as a contributing factor to abnormal oil consumption alongside the surface leak.
Repair Tools by Job Type
Valve Cover Gasket: Metric socket set, torque wrench, plastic or nylon scraper — never metal against aluminum cylinder heads — and engine-specific RTV silicone for corner seals where the manufacturer's procedure calls for it alongside the formed gasket.
Oil Pan Gasket: Floor jack and rated safety stands, complete socket set, oil drain pan, plastic gasket scraper, and a quality gasket maker or OEM-spec formed gasket. A pneumatic impact driver accelerates bolt removal on pans with sixteen or more fasteners and reduces the risk of hand fatigue causing a stripped thread.
Rear Main Seal and Front Crank Seal: Harmonic balancer puller, a sized seal driver set matched to the specific engine, and a transmission jack for rear main work. Improvised installation tools on these repairs — using sockets or pipe sections as drivers — almost always tilt the seal during installation and destroy it within a few thousand miles of operation.
O-Rings and Sensor Seals: A precision pick set for removing hardened O-rings without scoring ports, a comprehensive O-ring assortment kit for on-hand fitment, and penetrating oil for seized sensor housings. The torque specification for each sender matters — aluminum block threads stripped by an over-tightened sensor require a Helicoil insert and add hours to what should have been a five-minute job.
Preventing Oil Leaks Before They Develop
The majority of oil leaks are not sudden component failures — they are the predictable and measurable result of deferred maintenance, incorrect fluid specification, and incremental seal degradation that went unaddressed across thousands of miles. Prevention costs a fraction of repair, and most of the measures that extend gasket and seal life require nothing beyond following the manufacturer's maintenance schedule.
Service Intervals and Oil Quality
Use exclusively the viscosity grade and performance specification listed in the owner's manual for the specific engine. Running oil that is too thin for the engine's clearances increases leakage past worn seals under operating pressure, while oil that is too thick raises crankcase pressure and stresses gaskets from within. Motor oil classification standards published by the API and SAE define precisely which formulations satisfy each manufacturer's design requirements.
Change oil on the manufacturer's schedule, or more frequently under severe-duty conditions — short urban trips that never fully warm the engine, sustained towing, extreme ambient temperatures, or track use. Degraded oil becomes mildly acidic as it oxidizes and accumulates combustion byproducts, and that acidity attacks rubber seal compounds from within, measurably accelerating hardening and failure timelines.
Replace the drain plug crush washer at every oil change without exception. A deformed washer that has already taken a compression set will not seal reliably when retorqued, and a fresh washer costs under one dollar — orders of magnitude less than stripping the drain hole threads by over-tightening in an attempt to stop a seeping used washer.
Confirm oil filter and drain plug torque with a wrench, not by feel. Both components are notoriously easy to over-torque when tightened by hand strength alone, and both sit in locations where thread damage is expensive to repair on aluminum engine cases.
Extending Gasket and Seal Life
Allow the engine to warm at low load after cold starts rather than immediately driving at high throttle demand. Cold oil is substantially more viscous than warm oil, pressure builds faster through the system in the first minutes of operation, and the repeated thermal shock of rapid temperature transitions compounds long-term gasket fatigue in a way that gradual warm-up avoids.
Address PCV system maintenance on schedule. A stuck-closed PCV valve allows crankcase pressure to build progressively until it finds the weakest gasket or seal in the system and forces oil through it. Many apparent valve cover and cam seal failures are secondary symptoms of a PCV system that had been overdue for service for years before the gasket yielded.
Keep the engine bay clean enough to detect new leaks within days of their formation. A heavily oil-fouled engine conceals the development of new seeps until they become significant oil consumers, while a clean engine reveals a fresh quarter-sized wet spot within a week, enabling repair before the leak progresses.
Inspect camshaft seals, the front crankshaft seal, and the water pump whenever the timing belt is replaced, since the overlapping labor makes simultaneous replacement cost-effective. All three components share access through the same timing cover removal procedure, and replacing them at the belt service interval costs a fraction of the labor required to access them again independently.
DIY vs. Professional: Knowing Which Jobs to Hand Off
The threshold between a home repair and a professional shop job is not primarily a function of mechanical aptitude — it is a function of whether the work requires splitting major assemblies, whether a single installation error carries consequences that exceed the vehicle's value, and whether the access path to the seal unavoidably exposes other critical components to potential damage during the process.
Repairs Any Capable Home Mechanic Can Handle
The following car oil leak causes and their associated repairs are within the realistic scope of any home mechanic equipped with basic hand tools, a safe lift solution, and the discipline to torque fasteners to specification rather than feel.
Valve cover gasket replacement — accessible on most engines with a standard socket set, involves a straightforward bolt pattern, and requires no special alignment or precision beyond correct torque sequence
Drain plug replacement and crush washer renewal — the simplest corrective action for any oil leak and the first thing to check and address before investigating further
Oil filter replacement and correct torquing per manufacturer specification
O-ring and pressure sender seal replacement — low-cost, low-consequence, and completely within DIY scope on any engine with accessible sensor locations
Oil pan gasket replacement on vehicles with adequate ground clearance — time-consuming and physically awkward but not technically demanding, requiring only patience and a clean work surface preparation
When the Job Demands a Shop
Certain car oil leak causes justify unconditional professional referral. Attempting these at home without purpose-built tooling produces a statistically high rate of secondary damage that elevates the total repair cost significantly above what the shop would have charged for the original job.
Rear Main Seal: Transmission removal is mandatory on all current engine designs. The procedure demands a transmission jack, correct support of the drivetrain throughout the process, and flawless seal installation alignment — a seal installed even slightly cocked will fail within a few thousand miles and require the entire labor operation to be repeated.
Front Crankshaft Seal on Timing-Belt Engines: The seal is only accessible after removing the harmonic balancer and timing cover, at which point the timing belt is fully exposed. Industry standard practice requires inspecting and replacing the belt simultaneously, which multiplies the procedure's complexity and makes improvised tooling for harmonic balancer removal genuinely risky given the torque values involved.
Camshaft Seals on Interference Engines: Any unintended rotation of the camshaft relative to the crankshaft during seal removal or installation on an interference-fit engine produces bent valves and cylinder head damage. The financial consequence of a timing error on these engines during what is nominally a seal replacement can approach the cost of a replacement engine, making professional execution the only rational choice.
Drivers experiencing symptoms beyond visible oil loss — unusual engine odors, altered running quality, or unexpected consumption patterns — should also investigate whether the oil smells like gas, since fuel dilution of the oil supply represents a distinct failure category requiring a separate diagnostic pathway from standard car oil leak causes.
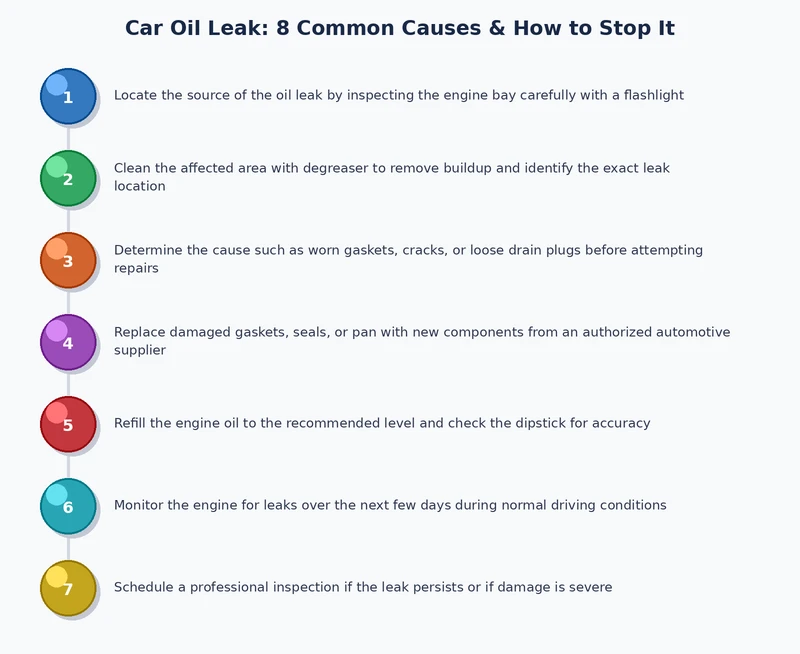
Figure 2 — Diagnostic process for tracing car oil leak causes from initial symptom observation through repair decision and component selection.
Key Takeaways
The eight most common car oil leak causes — valve cover gasket, oil pan gasket, drain plug, rear main seal, camshaft seals, front crankshaft seal, cracked oil pan, and O-rings — each produce a distinct leak location signature that guides accurate diagnosis before any parts are purchased.
UV dye tracing combined with a clean-engine cardboard test is the most reliable method for pinpointing leak origins and prevents the costly mistake of replacing gaskets that were never the source of the problem.
Correct oil specification, drain plug washer renewal at every service, and prompt PCV system maintenance are the three highest-impact prevention measures for extending gasket and seal life across high-mileage engines.
Valve cover gaskets, drain plugs, O-rings, and oil pan gaskets are legitimate DIY repairs; rear main seals, front crankshaft seals on timing-belt engines, and camshaft seals on interference engines demand professional tooling and should not be attempted without it.
Sarah Whitfield is a diagnostics and troubleshooting specialist who spent ten years as an ASE-certified technician before joining the editorial team. She specializes in OBD-II analysis, electrical gremlins, and the kind of intermittent problems that make most owners give up.