Coolant Leak Symptoms: 7 Signs & How to Find the Source
by Joshua Thomas
A neighbor of mine kept topping off her coolant reservoir every few weeks, convinced it was just normal evaporation. Then one Tuesday morning, her engine seized on the interstate. What she thought was a minor inconvenience turned into a $3,200 repair bill. The culprit was a slow coolant leak she'd been ignoring for months.
Coolant leak symptoms don't always announce themselves loudly. Sometimes it's a faint sweet smell, sometimes it's a slow temperature gauge creep — small signals that something in your cooling system needs attention. Catch them early and you're looking at a $50 hose replacement. Miss them, and you could be dealing with a blown head gasket or a seized engine. Here are the 7 warning signs to watch for and exactly how to find where the leak is coming from.
Figure 1 — A bright-colored puddle beneath your vehicle is one of the clearest coolant leak symptoms you'll encounter.
Your cooling system operates under pressure at temperatures above 200°F. When coolant escapes — even slowly — the effects ripple across multiple systems. The table below shows each symptom, its severity, and what you should do right away.
Symptom
Severity
Immediate Action
Puddle under car (green, orange, or pink)
Medium–High
Inspect source before driving again
Sweet burning smell from engine bay
Medium
Check reservoir level immediately
Low coolant warning light
High
Top off and locate the source
Temperature gauge running high
High
Pull over — do not continue driving
White steam or smoke from under the hood
Critical
Stop immediately, let engine cool
Thick white smoke from exhaust
Critical
Internal leak suspected — see a mechanic
Heater suddenly blowing cold air
Medium
Check coolant level, inspect heater core
Visual and Smell-Based Signs
Puddle under your car. Coolant is typically bright green, orange, pink, or blue depending on the formulation. It feels slightly slippery and has a faint syrupy texture. If the puddle isn't dark and oily or clear like water, coolant is the likely culprit.
Sweet burning smell. Ethylene glycol — the primary ingredient in most antifreeze — produces a distinctively sweet, slightly chemical odor when it contacts hot engine surfaces. If you catch that smell after parking, your system is losing fluid somewhere.
Crusty white or rust-colored residue. Check around hose clamps, the radiator end tanks, and the overflow reservoir cap. Dried coolant leaves a chalky or rust-tinged crust. That residue pinpoints exactly where fluid escaped — follow it.
Thick white smoke from the exhaust. This is the most serious visual sign on this list. Coolant burning inside the combustion chamber produces dense white exhaust smoke with a sweet smell. This signals an internal leak — almost always a compromised head gasket. Act immediately.
Pro tip: White exhaust smoke that appears at cold startup and clears after a minute is usually harmless condensation — completely normal in cold weather. Persistent white smoke throughout your entire drive is a red flag for an internal coolant leak.
Performance and Gauge-Based Signs
Temperature gauge climbing toward the red. Your engine depends on coolant to regulate heat. When the level drops, the gauge rises. If you notice the temp gauge pushing higher than normal, pull over and let the engine cool before you do anything else.
Low coolant warning light. Modern vehicles have a dedicated sensor in the coolant reservoir. When the light illuminates, your level has dropped below the minimum mark. Top it off — but more importantly, find the source. Simply adding more fluid without fixing the leak is a short-term solution that leads to long-term damage.
Heater blowing cold air. Your car's cabin heater exchanges heat with engine coolant through the heater core. When coolant is low, that heat source disappears. A sudden drop in heater performance — especially combined with any other symptom on this list — points directly at a coolant level problem.
How to Track Down the Source of a Coolant Leak
Knowing the symptoms gets you halfway there. Finding the exact leak source is what lets you actually fix the problem. Work methodically — guessing wastes time and money.
Start With a Cold Engine
Never open a pressurized cooling system on a warm engine. Coolant sits at over 200°F and 15+ PSI when the engine is hot. Opening the radiator cap in that state can spray scalding fluid directly at your face. Wait at least two full hours after the last drive before touching anything.
Let the engine cool completely — minimum two hours after shutting it off.
Pop the hood and do a visual sweep: check hoses, clamps, and the radiator for wet spots, drips, or dried crust.
Check the coolant reservoir. The level should sit between the MIN and MAX lines when cold.
Look under the car for fresh puddles or old staining on the ground or on the underside of the engine.
Start the engine and let it reach operating temperature with the hood up. Watch for drips, steam, or weeping seams while it warms up.
Common Leak Locations
Radiator hoses. The upper and lower radiator hoses are under constant pressure and degrade with heat cycles. Cracks, soft spots near the clamp ends, or loose clamps are the single most common source of external coolant leaks.
Radiator itself. Corrosion eats through plastic end tanks and aluminum fins over time. Look for wet staining, coolant residue, or bubbling along the front face of the radiator core.
Water pump. A dedicated weep hole in the water pump housing releases coolant when the internal shaft seal fails. You'll typically see a dried coolant trail running down the lower front of the engine, near the belt drive area.
Heater core. Heater core leaks often show up as a sweet smell inside the cabin, foggy windows on the inside of the windshield, or — in severe cases — coolant dripping onto the passenger-side floor mat. This is an internal leak that won't leave a puddle outside the car.
Head gasket. An internal head gasket leak won't produce an external puddle but will cause thick white exhaust smoke and often a rough idle from coolant entering the combustion chamber. Confirm with a combustion leak test (block test) kit, available at any auto parts store for under $25.
Expansion tank or reservoir. Plastic reservoirs develop hairline cracks over time, especially near the neck and seams. Inspect the full body of the tank and check the cap's rubber seal for cracking or deformation.
Coolant Leak Myths That Cost You Money
A lot of bad advice circulates about coolant leaks. Here are the two most damaging myths you'll run into.
The Stop-Leak Myth
Liquid stop-leak products — the kind you pour into the reservoir — can seal pinhole leaks in specific situations. They are not a universal fix, and they are not a permanent repair. Pouring stop-leak into a car with a cracked radiator hose, a failed water pump, or a blown head gasket does nothing to fix those components. Worse, certain formulations can clog your heater core, thermostat, or temperature sensor ports over time. Use these products only as a short-term bridge while you arrange a proper repair. Our guide to the best radiator stop leaks breaks down which products are appropriate for which situations — and which ones to avoid entirely.
The "It's Only a Small Leak" Myth
Slow seeps don't stay slow. Heat cycles, vibration, and pressure fatigue the surrounding material around any existing weak point. A pinhole in a radiator hose becomes a full split. A weeping head gasket becomes a failed one. The coolant leak symptoms that seem minor today rarely stay that way.
There's also a safety issue worth stating plainly: ethylene glycol, the base compound in most antifreeze, is highly toxic to animals. Its sweet taste attracts dogs and cats, and even a small puddle in your driveway poses a real danger to pets. Fix leaks promptly — for your engine and for animals around your home.
Mistakes That Make Coolant Leaks Worse
Common DIY Errors
Adding plain tap water instead of coolant. In an emergency, distilled water buys you a short trip. But tap water introduces minerals that corrode aluminum components, and diluting the mixture lowers the boiling point and raises the freeze point. Flush and refill with proper coolant as soon as possible.
Mixing incompatible coolant types. Mixing OAT (orange or pink) with HOAT or IAT (green) triggers chemical reactions that gel the fluid and produce silicate deposits. Those deposits can clog the cooling system from the inside. Always match the coolant specification listed in your owner's manual — not just the color.
Overtightening hose clamps. Cracking a plastic coolant pipe fitting or cutting into an aging hose by overtightening the clamp is an extremely common DIY mistake. Snug is enough. You don't need to apply significant torque to a hose clamp.
Skipping a pressure test. A cooling system pressure test (rental tool at most auto parts stores) pressurizes the system to reveal leaks invisible at rest. Skipping it means you might replace one part and miss a second leak that causes a repeat overheat within days.
Pro tip: UV dye kits cost under $20 at auto parts stores. Add the dye to the coolant, run the engine to temperature, then scan the engine bay with the included UV light — active leaks glow bright yellow-green and are impossible to miss.
Diagnostic Mistakes
Assuming the puddle location equals the leak location. Coolant travels along hoses, wiring harnesses, and engine surfaces before it drips. Always trace the fluid path upward and backward from where it lands — the actual source is usually several inches away from the drip point.
Overlooking a faulty thermostat. A stuck-closed thermostat causes pressure spikes that push coolant past gaskets and seals. If you keep developing leaks in the same location after replacing the component, check for a bad thermostat before swapping the same part a second time.
When to Fix It Yourself vs. When to Call a Pro
Jobs You Can Handle at Home
These repairs require basic hand tools, a drain pan, and basic mechanical comfort. Parts cost $15–$80 depending on the vehicle, and most take under two hours.
Replacing an upper or lower radiator hose
Swapping a leaking expansion tank or coolant reservoir
Replacing a failed or weak radiator cap
Tightening or replacing worn hose clamps
Performing a full coolant flush and refill
Replacing a leaking coolant temperature sensor
Jobs That Need a Mechanic
Head gasket replacement. This is a multi-day teardown on most engines. Labor alone runs $1,000–$2,500. Attempting it without proper engine work experience almost always causes additional damage — machined surfaces, torque sequences, and timing all have to be correct.
Timing-belt-driven water pump. On interference engines, the water pump lives inside the timing cover. Replacing it without also doing the timing belt — and getting the timing correct — can bend valves or destroy the engine on startup.
Heater core replacement. On most modern vehicles, the heater core sits deep inside the dashboard. Removing and reinstalling the dash assembly takes 6–10 hours of labor. This is one job where paying a shop saves more time and frustration than the labor cost.
If your symptoms point to an internal leak — white smoke from the exhaust, coolant contaminating the oil (milky, frothy oil on the dipstick), or persistent overheating after fixing external components — get a professional diagnosis before spending any more money on parts.
Keeping Your Cooling System Healthy
Most coolant leaks are preventable. The cooling system is one of the most neglected systems on the average car, but basic maintenance keeps it reliable for well over 100,000 miles.
Coolant Flush Schedule
Old coolant turns acidic as its corrosion inhibitors deplete. Acidic coolant attacks aluminum components, gaskets, and seals from the inside — and it accelerates the very leaks you're trying to prevent. Flush intervals depend on the coolant type in your system:
IAT (traditional green): Every 2 years or 30,000 miles
OAT (orange, red, or pink): Every 5 years or 50,000 miles
HOAT (yellow, gold, or turquoise): Every 5 years or 100,000 miles — always verify in your owner's manual
When you flush, inspect every hose for softness, swelling, or surface cracking. A hose that feels mushy when you squeeze it is living on borrowed time. Replace it during the flush when everything is already drained — the labor is already done.
Routine Checks to Do Yourself
Check the coolant level at every oil change — it takes 30 seconds with the engine cold
Inspect upper and lower hoses for cracking, swelling, or softness every 12 months
Test the radiator cap for proper pressure release — a weak cap vents coolant prematurely and accelerates leaks
Scan the ground where you park regularly for new staining or puddles
Watch your temperature gauge on every drive — early climbing is an early warning
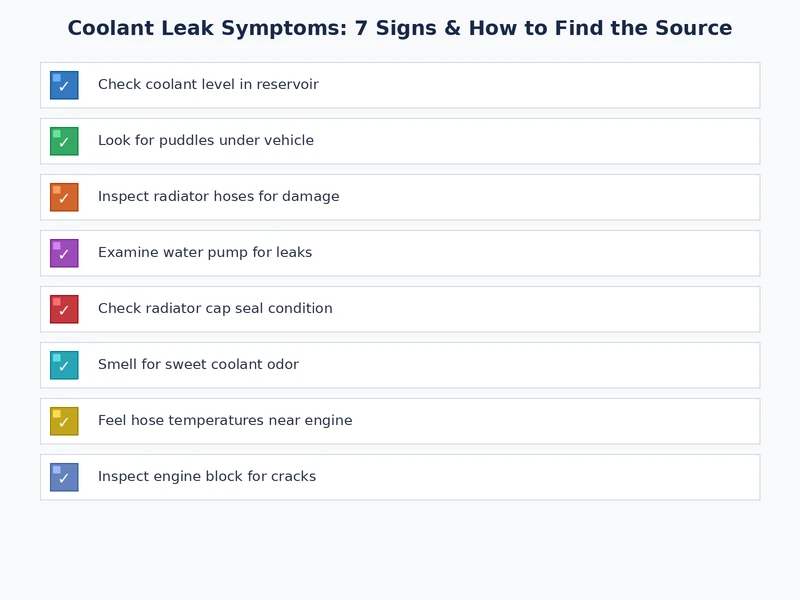
Figure 2 — A practical checklist for identifying coolant leak symptoms and prioritizing repairs by severity.
Frequently Asked Questions
What does a coolant leak smell like?
A coolant leak has a distinctively sweet, slightly syrupy odor — sometimes described as similar to maple syrup or candy. When coolant contacts hot engine surfaces, the smell intensifies into a sharper, chemical-sweet scent. If you notice this smell after parking or while driving with the heater on, check your coolant level immediately.
Can I drive with a coolant leak?
It depends on the severity. A very slow seep with the coolant level still at MIN may allow a short trip to a shop — but watch the temperature gauge the entire time. If the gauge climbs, pull over immediately. Driving with an active significant leak risks overheating and catastrophic engine damage within minutes. Don't gamble with it.
How much does it cost to fix a coolant leak?
Costs range widely depending on the source. A radiator hose replacement runs $50–$150 in parts and an hour of your time. A professional water pump replacement costs $300–$600 including labor. A head gasket replacement is the worst-case scenario at $1,200–$3,000 or more depending on the engine. Early diagnosis keeps repair costs at the low end.
What color is coolant when it leaks?
Coolant color depends on the formulation: green (traditional IAT), orange or red (OAT), pink or yellow (HOAT), or blue (some European formulations). Over time, all coolant darkens toward brown or rust-colored as it degrades. If the puddle under your car is brightly colored and slippery, it's almost certainly coolant.
How do I tell the difference between a coolant leak and normal condensation?
Condensation from the air conditioning system drips as clear, odorless water — usually from directly under the passenger-side dash area. Coolant is colored (or at minimum slightly tinted), has a sweet smell, and feels slightly slippery. Condensation evaporates quickly; coolant leaves a stain. If you're unsure, smell the puddle — coolant is unmistakable.
Can a coolant leak cause a rough idle or stalling?
Yes — indirectly and directly. Low coolant can cause the engine to run hot, which affects combustion efficiency and can produce a rough idle. More critically, an internal coolant leak that allows coolant into the combustion chamber or intake manifold directly disrupts the air-fuel mixture, leading to misfires and rough running. If you're seeing rough idle symptoms alongside any coolant leak symptoms, get a combustion leak test done immediately.
Next Steps
Check your coolant level today. With the engine cold, locate your coolant reservoir and confirm the level sits between MIN and MAX. If it's low, top it off with the correct coolant type and note the date — you need to know if the level drops again.
Do a visual inspection of your engine bay. Look for dried crust around hose clamps, wet spots on hoses, and any staining on the ground beneath your parking spot. Trace any residue back toward its source.
Run a pressure test if you suspect a slow leak. Borrow or rent a cooling system pressure test kit from an auto parts store. Pressurize the cold system and watch the gauge — a drop confirms an active leak even if you can't see it.
Schedule a coolant flush if it's overdue. If you don't know when your coolant was last changed, assume it needs a flush. Fresh coolant protects your system from internal corrosion that causes the leaks you're trying to prevent.
Get a combustion leak test if white exhaust smoke is present. Pick up a block tester kit from any auto parts store. A color change in the test fluid confirms combustion gases in the coolant — meaning an internal leak that needs immediate professional attention before you drive the vehicle further.
Joshua Thomas holds a Bachelor of Science in Mechanical Engineering from San Diego State University and has spent years applying that technical foundation to hands-on automotive work — from routine maintenance to full mechanical repairs. He founded CarCareTotal in 2017 to give car owners the kind of clear, practical guidance that helps them understand what is happening under the hood and make smarter decisions about upkeep and repairs. At CarCareTotal, he oversees editorial direction and covers automotive fundamentals, maintenance guides, and troubleshooting resources for everyday drivers.