by Joshua Thomas
A stone chip or door-scratch in your car's paint is more than a cosmetic annoyance — bare metal exposed to moisture rusts quickly, turning a minor blemish into a costly repair. Knowing how to apply touch up paint to a car is one of the most practical skills any owner can develop. With the right materials and a steady hand, you can stop damage in its tracks and keep your finish looking factory-fresh without a trip to the body shop.
Touch-up paint works best on chips and scratches smaller than a coin that haven't penetrated to bare metal or developed rust. Before any paint application, surface preparation and color matching are what separate a seamless repair from one that looks worse than the original scratch. This guide walks you through every step — from gathering supplies to final polish.
Contents
Gather everything before you start. Stopping mid-repair to find a missing product causes mistakes.
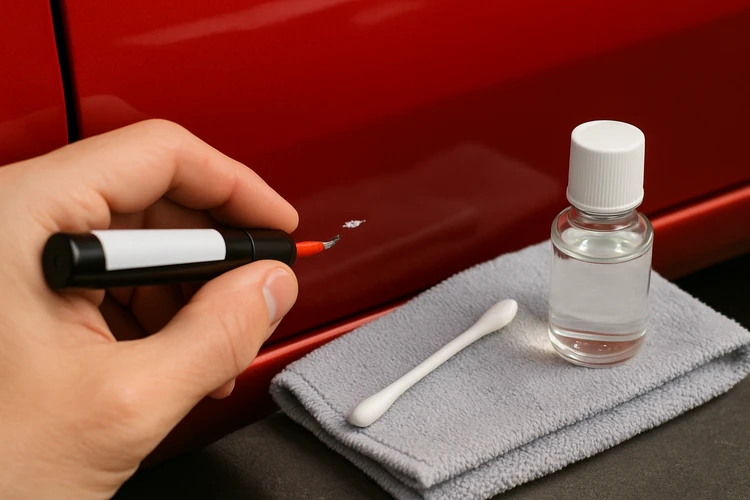
Most touch-up paint products come with a built-in brush applicator. For scratches longer than an inch, a touch-up spray can or airbrush produces a smoother, more blended finish than a bottle brush.
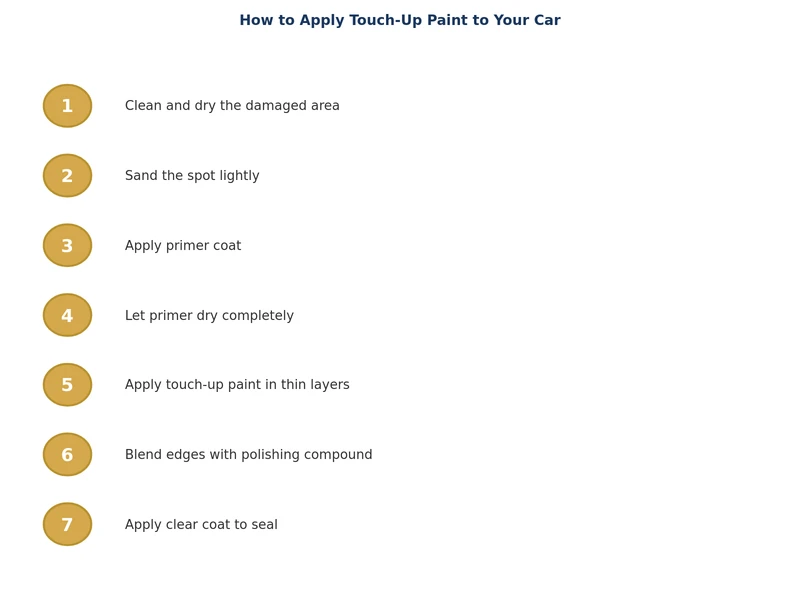
Wash the damaged area with soap and water, then wipe it down with isopropyl alcohol to remove all wax, grease, and residue. Paint won't bond properly to a contaminated surface. For chips with light rust, sand the rust away with 400-grit paper, feathering the edges of the existing paint. Wipe clean again with alcohol before moving on.
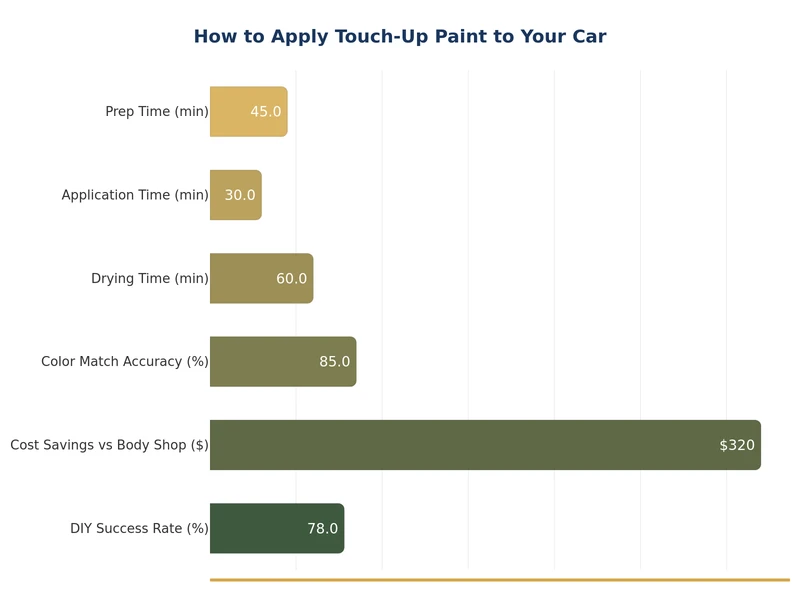
If bare metal is visible, apply a thin coat of automotive primer. Use a toothpick for pin-sized chips or a fine brush for slightly larger areas. Let primer cure for at least 30 minutes — longer in cool or humid conditions. Primer dramatically improves paint adhesion and blocks future rust.
Shake the bottle vigorously for 60 seconds. Load the brush lightly — less paint is always better. Dab or brush the color into the chip in thin layers, letting each coat dry 20–30 minutes before adding the next. Two to three coats typically achieve full, even coverage. Avoid pulling the brush across the surface; stippling (dabbing) produces a more even fill on chips and avoids drag marks on scratches.
Once the base color is fully dry — wait at least one hour, two in cooler temperatures — apply clear coat over the repaired area. Clear coat seals the color and provides UV protection. For the smoothest, most durable finish, choosing a quality product matters; our best automotive clear coat guide covers the top options tested on real vehicles.
Allow the clear coat to cure for a minimum of 24 hours. Then, using 2000-grit wet/dry sandpaper lubricated with water, gently level any raised edges. Follow with 3000-grit for a smoother surface, then apply a small amount of polishing compound with a microfiber cloth using circular motions until the repaired area blends into the surrounding paint.
Color matching is the single most important factor in an invisible repair. Every vehicle has a factory paint code that specifies the exact color formula used at the assembly plant. You can find it on a sticker inside the driver's door jamb, under the hood on the firewall, or in the owner's manual. Enter this code with any touch-up paint supplier to get a chemically accurate match.
According to NHTSA, paint codes are standardized across manufacturers, making it simple to cross-reference and source the correct product regardless of vehicle age.
Keep in mind that paint fades over time. A perfectly color-coded product may still appear slightly brighter than the surrounding aged paint. Feathering the application and polishing the edges helps blend new paint into oxidized surrounding areas more naturally.
| Applicator Type | Best For | Finish Quality | Skill Level |
|---|---|---|---|
| Brush bottle | Chips < 5mm | Good | Beginner |
| Touch-up pen | Fine scratches | Good | Beginner |
| Aerosol spray can | Larger scuffs, panels | Very Good | Intermediate |
| Airbrush kit | Panel blending | Excellent | Advanced |
| Professional spray gun | Full panel refinish | Factory Match | Professional |
Thick coats bubble, sag, and dry unevenly. They also take far longer to cure. Multiple thin coats always produce a better result — patience is the most important tool in your kit.
Paint applied over wax, grease, or loose rust will peel within weeks. The prep stage takes longer than the actual painting, and it's where most successful repairs are won or lost.
Rushing coats traps solvent vapors inside the paint film, leading to cracking and bubbling. Follow the manufacturer's recommended dry times. In cold or humid weather, add at least 50% more time.
Starting with sandpaper that is too coarse will scratch the surrounding clear coat and create more work. Always start at 2000-grit minimum for the final blending stage.
Not every scratch warrants a DIY touch-up, and not every scratch needs a body shop. Use this general rule:
DIY touch-up is appropriate for: stone chips smaller than a pencil eraser, surface scratches that haven't reached the primer layer, and minor door ding scuffs confined to the clear coat.
Professional repair is the better choice for: scratches longer than a few inches, any damage that has cut through to bare metal and begun to rust, dents paired with paint damage, and damage on prominent panels where a seamless result matters most.
Attempting to touch up a large, deep scratch yourself often produces a result that costs more to fix professionally than if you had gone to a shop in the first place. When in doubt, get a quote before committing to a DIY repair on visible bodywork.
A touch-up repair is only as durable as the protection around it. After the clear coat fully cures — allow at least 48–72 hours — apply a quality car wax or paint sealant over the repaired area. This adds UV and moisture protection and helps the repair blend visually with the surrounding finish.
For high-impact areas like the front bumper, hood leading edge, and door edges, consider going a step further. Our guide to ceramic coating vs paint protection film explains the pros and cons of each long-term solution so you can choose the right protection for your situation.
Routine care also matters. Wash your car regularly to remove road salt and debris, and avoid automatic car washes with abrasive brushes, which strip clear coat faster than anything else. A well-maintained touch-up repair can last years before requiring attention.
Most touch-up paints are dry to the touch within 20–30 minutes per coat. However, full hardness takes much longer — allow at least 24 hours before sanding and 48–72 hours before waxing or applying any protective coating. Cold or humid conditions extend these times noticeably.
Touch-up paint can fill deep scratches, but the result is rarely invisible. Deep scratches that expose bare metal require primer first and multiple paint coats, and even then the repair may remain visible on close inspection. For deep scratches on prominent panels, professional blending typically produces better results.
Yes — always apply clear coat after the base color. Clear coat protects the touch-up paint from UV fading, moisture, and abrasion. Without it, the color layer will oxidize and dull quickly. Most touch-up kits either include a clear coat pen or recommend a separate aerosol product for the final step.
The paint code is printed on a sticker or stamped plate located inside the driver's door jamb in most vehicles. It can also appear under the hood on the firewall or strut tower, in the trunk, or in the glove box. The code is typically two to six characters and may be labeled "Color," "Paint," or "Ext Color."
A factory paint code gives you a chemically accurate color match, but paint fades with age and sun exposure. Fresh touch-up paint on aged panels will often appear slightly brighter or shinier. Feathering the edges of the application and polishing the surrounding area helps blend the repaired spot into the existing finish more naturally.
Avoid applying touch-up paint below 50°F (10°C). Cold temperatures slow drying dramatically, reduce adhesion, and can cause the paint to crack or lift. Ideal conditions are 60–80°F with low humidity and no direct sun. If you must work in cooler temperatures, move the vehicle to a heated garage and allow extra dry time between coats.
 |
 |
 |
 |
About Joshua Thomas
Joshua Thomas just simply loves cars and willing to work on them whenever there's chance... sometimes for free.
He started CarCareTotal back in 2017 from the advices of total strangers who witnessed his amazing skills in car repairs here and there.
His goal with this creation is to help car owners better learn how to maintain and repair their cars; as such, the site would cover alot of areas: troubleshooting, product recommendations, tips & tricks.
Joshua received Bachelor of Science in Mechanical Engineering at San Diego State University.
Get some FREE car parts & gear.. Or check out the latest free automotive manuals and build guides here.
Disable your ad blocker to unlock all the hidden deals. Hit the button below 🚗
| | | |