by Joshua Thomas
Alloy wheels are one of the most eye-catching parts of any car, but they're also magnets for brake dust, road grime, and corrosive salt. Knowing how to clean alloy wheels properly makes the difference between a long-lasting finish and a pitted, discolored rim. Unlike steel wheels, alloys — typically made from aluminum or magnesium alloys — react badly to acidic or alkaline cleaners and abrasive brushes. Get it right from the start and your wheels will look showroom-fresh for years.
This guide covers the right products, a step-by-step process, and the mistakes that cause most of the damage people blame on normal wear. Whether your wheels have a polished, painted, or clear-coated finish, the principles are the same: gentle chemistry, the right tools, and a consistent routine.
Contents
Alloy wheels are lighter and more heat-conductive than steel, which improves handling and braking — but those same properties make them more vulnerable to chemical damage. Brake dust is the biggest threat: it's a mixture of iron particles, carbon residue, and adhesive compounds that bond to wheel surfaces within hours of driving. Left to bake on from braking heat, brake dust becomes increasingly difficult to remove and eventually causes micro-pitting.
Road salt used in winter conditions accelerates oxidation, while harsh alkaline degreasers strip clear coats. Even hard water left to dry on a wheel can leave mineral deposits that etch the finish — a problem similar to the water spots that damage car paint. The solution isn't more scrubbing — it's using the right chemistry and tools.
The most important purchase is a pH-neutral wheel cleaner formulated for alloys. Avoid generic household cleaners, dish soap (strips wax and sealants), and anything advertised as "acid-based" unless you know your wheels have a bare metal finish and you know what you're doing. A dedicated automotive shampoo works for light dust — browse options at our best car wash soaps and shampoos guide for products that are safe on alloy finishes.
You need at least two brushes: a long-handled wheel brush to reach behind spokes and into the barrel, and a smaller detailing brush for lug nut recesses and tight gaps. Both should have soft, non-abrasive bristles. Avoid steel wool, green scrubbing pads, or any brush rated for industrial use. Finish with a clean microfiber towel — never a bath towel or paper towels, which are abrasive enough to create swirl marks on polished surfaces.
| Product Type | Best For | pH Range | Risk Level |
|---|---|---|---|
| pH-neutral wheel cleaner | All alloy finishes (painted, clear-coated, polished) | 6–8 | Low |
| Iron remover / fallout remover | Heavy brake dust on clear-coated or painted wheels | ~5–6 | Low–Medium (don't leave on bare metal) |
| Acid-based wheel cleaner | Bare, uncoated polished aluminum only | 2–4 | High (strips clear coat and paint) |
| Alkaline degreaser | Engine bay or steel wheels | 10–13 | Very High (causes corrosion on alloys) |
| Car shampoo | Light dust maintenance wash | 6–8 | Low |

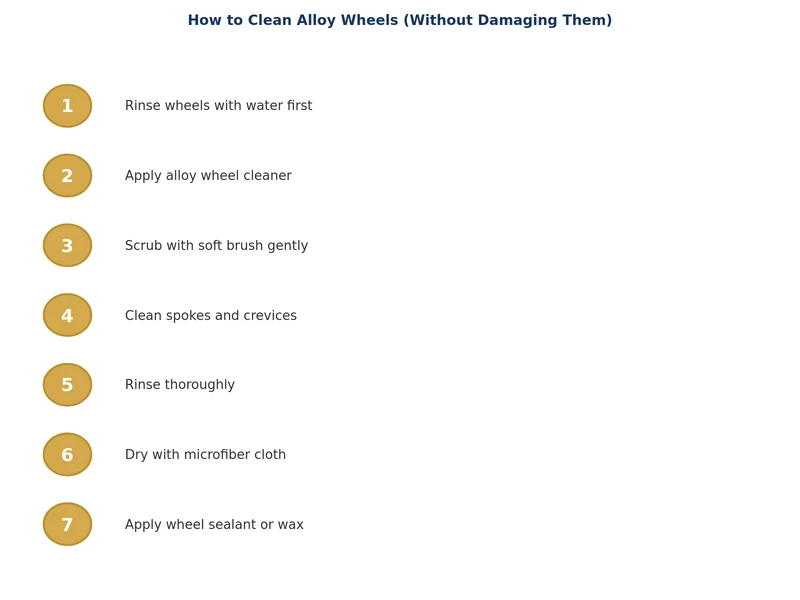
Clean wheels before washing the rest of the car — this prevents wheel cleaner and brake dust from splashing onto painted panels you've already cleaned. Always clean wheels when they are cool to the touch; applying cleaner to hot wheels causes rapid evaporation, streaking, and potential chemical damage.
Use a hose or pressure washer on a moderate setting to knock off loose dirt, mud, and surface brake dust. Hold the nozzle back at least 30 cm from the wheel face — high pressure directed straight at hub caps, valve stems, or wheel weights can dislodge them. Get water into the barrel and behind the spokes. This pre-rinse removes the abrasive grit that would otherwise scratch the finish when you start scrubbing.
Spray your pH-neutral wheel cleaner generously across the entire wheel face, into the barrel, and around the tire sidewall near the bead. Many iron-fallout removers will turn purple on contact with brake dust — this is a visual indicator that the chemistry is working. Let the product dwell for the time specified on the label, typically 1–3 minutes. Do not let it dry on the surface.
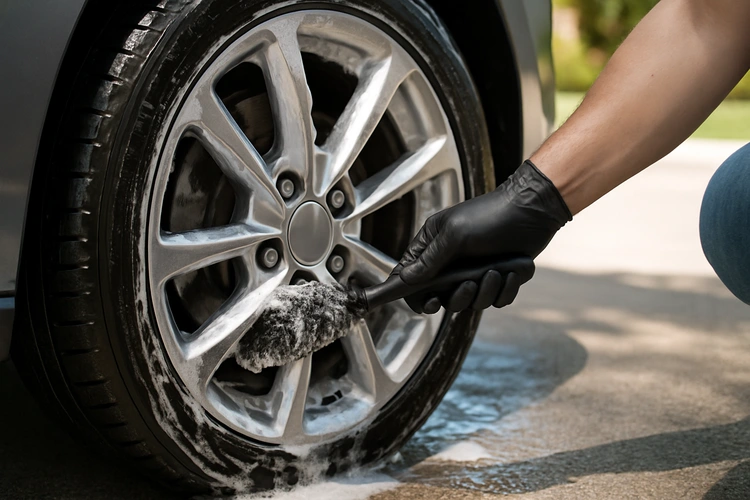
Work with your long-handled brush in circular motions across the wheel face, then push it behind each spoke to clean the barrel. Switch to your detailing brush for lug nut seats and any intricate design channels. Use a separate sponge or brush on the tire sidewall — you don't want rubber residue transferring onto the wheel face. Keep the surface wet throughout; dry scrubbing concentrates abrasion.
Rinse completely from top to bottom, making sure no cleaner residue remains in crevices. Leftover product can streak or, in concentrated form, continue reacting with the finish. Immediately dry with a clean microfiber towel. Don't air-dry — water left to evaporate leaves mineral deposits, especially if your tap water is hard. Pay attention to the valve stem area and bolt holes where water pools.
The most common mistake is grabbing a general-purpose degreaser or bathroom cleaner. These are highly alkaline and will dull a clear coat, cause white oxidation on bare aluminum, and accelerate corrosion around spoke edges. Always check the product label for "safe on alloys" or "pH neutral."
Cleaning immediately after driving — especially after aggressive braking — causes any liquid cleaner to flash-evaporate, leaving concentrated residue baked onto the surface. Wait until the wheel is genuinely cool before starting. This is the same principle that applies when learning how to clean an engine bay safely: heat and chemicals are a damaging combination.
Air-drying in direct sun is a reliable way to create water spots and mineral deposits. These etch slowly into clear coats and are far harder to remove once baked in. Always finish with a dry microfiber wipe.
The grit and brake dust from wheels will contaminate your wash water and scratch paint if you use the same tools on the car body. Keep wheel-cleaning gear completely separate.
In normal conditions, cleaning alloy wheels every two weeks alongside a regular car wash is sufficient. If you drive in heavy traffic (more brake dust), near coastal salt air, or on salted winter roads, once a week is a better cadence. Brake dust is acidic and starts bonding within 24–48 hours of driving — the longer you leave it, the more effort is required at the next clean. A quick weekly rinse-down between full washes prevents heavy buildup from accumulating. If you're putting the car into storage, clean the wheels thoroughly beforehand — the same logic covered in a guide on how to store a car for winter applies: contaminants left sitting cause far more damage over time than they would in active use.
Once clean and dry, applying a wheel sealant or ceramic coating dramatically reduces brake dust adhesion and makes future cleans faster. These products fill microscopic pores in the wheel finish, creating a slick surface that brake dust can't grip as easily. Spray-on wheel sealants are beginner-friendly and last 2–3 months; dedicated ceramic coatings last much longer but require more careful application. Avoid wax-based protectants near brake components. Reapply sealant every time you notice water no longer beading on the wheel surface.
Dish soap is not recommended for alloy wheels. While it removes grease effectively, it strips any wax or sealant from the wheel surface and can dull clear-coated finishes over time. Use a pH-neutral wheel cleaner or automotive shampoo instead.
An iron fallout remover is the most effective solution for stubborn, baked-on brake dust. These products contain a chemical that reacts with iron particles in brake dust, loosening their bond. Spray on, allow to dwell for 1–3 minutes, then agitate with a soft brush and rinse thoroughly.
Yes, with care. Keep the nozzle at least 30 cm from the wheel surface and avoid directing high-pressure water at valve stems, wheel weights, or hub cap edges. Use a moderate fan setting rather than a narrow jet, which can force water into bearings or dislodge components.
Use a long-handled barrel brush — typically a cylindrical brush on a flexible or extended handle. Spray cleaner into the barrel first, let it dwell, then work the brush back and forth inside to loosen grime. This area accumulates the heaviest brake dust and road debris, so it needs dedicated attention.
White vinegar is mildly acidic and can work on light calcium deposits, but it should not be used regularly on clear-coated or painted alloy wheels. Repeated exposure to any acid — even mild — degrades clear coats over time. Stick to products designed for automotive use.
Apply a wheel sealant or spray ceramic coating after every thorough clean. These create a slick, non-porous barrier that brake dust and road grime can't adhere to as strongly. Upgrading to lower-dust brake pads (ceramic or semi-metallic) also significantly reduces the volume of brake dust produced during normal driving.
 |
 |
 |
 |
About Joshua Thomas
Joshua Thomas just simply loves cars and willing to work on them whenever there's chance... sometimes for free.
He started CarCareTotal back in 2017 from the advices of total strangers who witnessed his amazing skills in car repairs here and there.
His goal with this creation is to help car owners better learn how to maintain and repair their cars; as such, the site would cover alot of areas: troubleshooting, product recommendations, tips & tricks.
Joshua received Bachelor of Science in Mechanical Engineering at San Diego State University.
Get some FREE car parts & gear.. Or check out the latest free automotive manuals and build guides here.
Disable your ad blocker to unlock all the hidden deals. Hit the button below 🚗
| | | |