by Joshua Thomas
Your steering wheel is the most-touched surface in your car — and if it's wrapped in leather, it needs regular attention to stay soft, clean, and grippy. Knowing how to clean a leather steering wheel the right way protects your investment, prevents cracking, and keeps the interior looking sharp. Neglect it and you'll end up with a shiny, slippery, bacteria-laden wheel that deteriorates far faster than it should. This guide walks you through every step, from the products you need to the mistakes you must avoid.
Leather is a natural material that absorbs oils from your hands, dust, and grime over time. The buildup creates a dark, greasy film that's hard to remove once it sets. Regular cleaning — done correctly — keeps that buildup from ever becoming a problem. If you're also dealing with stained upholstery elsewhere in the cabin, our guide on how to get grease out of car upholstery covers techniques that complement this process.

Contents
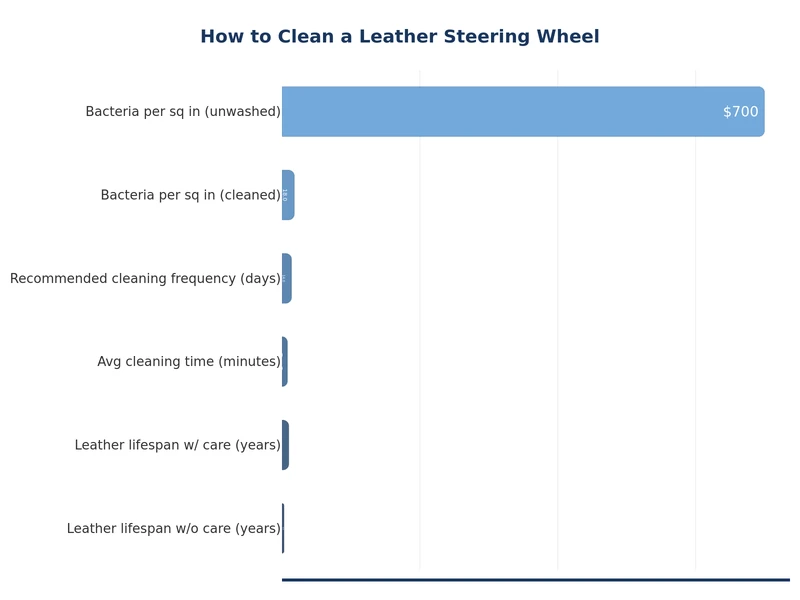
The average driver touches their steering wheel thousands of times per week. Every touch transfers skin oils, lotion, sweat, and microscopic debris onto the leather surface. Over time, this creates a grimy layer that breaks down the leather's protective finish. According to Wikipedia's overview of leather, finished leather relies on its surface coating for durability — once that coating degrades, the hide itself becomes vulnerable to drying and cracking.
Beyond aesthetics, a dirty steering wheel becomes slippery. The oils and grime reduce grip precisely where you need it most. A clean, conditioned wheel stays slightly tacky, giving you better control — especially important during emergency maneuvers.
Using the wrong products is worse than not cleaning at all. Harsh chemicals strip the leather's protective layer and cause premature aging. Stock up on the right supplies before you begin.
| Product | Purpose | Notes |
|---|---|---|
| pH-balanced leather cleaner | Lift dirt and oils | Avoid all-purpose cleaners |
| Leather conditioner | Restore moisture after cleaning | Apply after every clean |
| Soft-bristle detailing brush | Agitate cleaner into stitching and texture | Medium stiffness for heavy buildup |
| Microfiber towels (2–3) | Wipe away cleaner, buff conditioner | Use separate cloths for each step |
| Isopropyl alcohol (70%) | Pre-clean heavily soiled areas | Use sparingly — dries leather |
| Cotton swabs | Clean stitching grooves | Excellent for tight seams |
For a deeper look at the top-rated options, check out our best leather cleaner and conditioner guide, where we compare leading products across price points.
The process takes about 15–20 minutes when done properly. Work in a shaded area — direct sunlight dries products too quickly and can bake in residue.
Park in a shaded spot or work in a garage. Turn off the engine and let the wheel cool completely if the car has been sitting in the sun. A warm steering wheel absorbs cleaner too fast, reducing dwell time and effectiveness. Lay microfiber towels on the seat and center console to catch any drips. If you plan to do a full interior detail today, tackle the steering wheel first so any runoff lands on surfaces you haven't cleaned yet — similar logic applies when cleaning car door jambs, where working top-to-bottom prevents re-contamination.
Spray a small amount of leather cleaner onto your detailing brush — not directly onto the wheel. Work in sections: top half first, then bottom half. Use circular motions to agitate the cleaner into the leather grain. Pay extra attention to the 9 o'clock and 3 o'clock positions where hands rest most often — these areas accumulate the heaviest buildup.
For stitching, use a cotton swab dipped in cleaner to work along the seams. Dark residue on the swab tells you exactly how much grime was hiding there. Repeat until the swab comes back clean.
For stubborn sticky spots — often from hand lotion or food — dab a small amount of 70% isopropyl alcohol on a microfiber cloth and blot the area before applying leather cleaner. Don't scrub with alcohol; it removes moisture from the leather.
Using a clean, dry microfiber towel, wipe away the lifted grime immediately. Fold the towel to a fresh side often — spreading dirty cleaner back onto the leather defeats the purpose. After wiping, inspect the wheel under good lighting. Tilt it at an angle to catch any remaining film or haze. If you see residue, repeat the clean on that section before moving on.
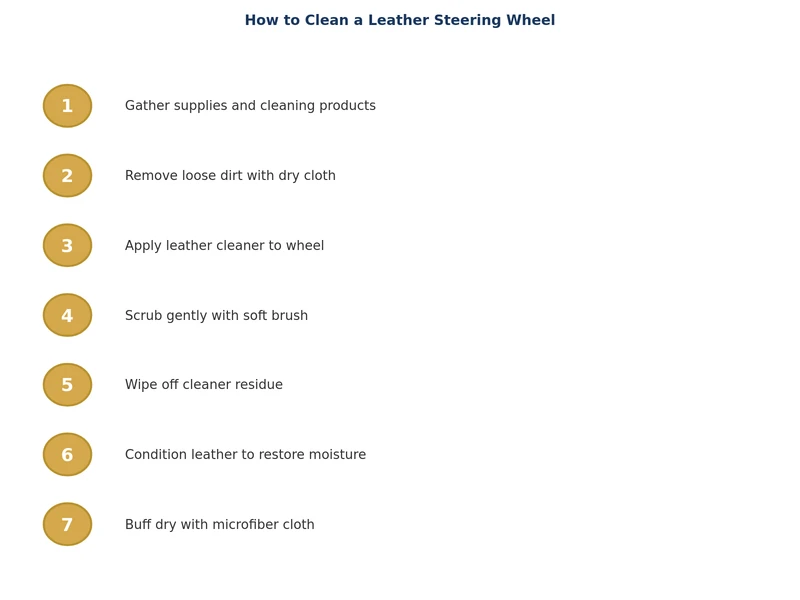
Cleaning removes oils — including some the leather needs to stay supple. Conditioning replenishes that moisture and rebuilds the protective layer. Skip this step and the leather will dry out faster than if you'd left it alone.
Apply a pea-sized amount of conditioner to a clean microfiber applicator pad. Work it into the leather using small, overlapping circular motions. You want a thin, even coat — not a thick layer that sits on the surface. Let it absorb for two to three minutes, then buff off any excess with a fresh microfiber towel. The wheel should feel slightly tacky when you grip it — that's the correct texture, not greasiness.
Well-conditioned leather resists future grime better because the surface remains slightly hydrated rather than becoming porous and absorbent. This is the same principle behind conditioning leather car seats — consistent care is always easier than restoration after neglect.
Even experienced detailers make errors with leather. These are the most common ones:
For most drivers, a light wipe-down every two weeks and a full clean-and-condition once a month is the right cadence. If you drive daily, eat in your car, wear hand lotion, or live in a hot climate, increase frequency. A quick visual check before each drive takes seconds — if the wheel looks dull or feels sticky, it's time to clean.
Seasonal deep cleans are also worthwhile. After summer, heat and UV exposure accelerate oil breakdown; after winter, salt residue from gloves and road spray can accumulate. Tie your steering wheel detail into your broader seasonal interior maintenance so nothing gets overlooked.
Baby wipes are not recommended for leather steering wheels. They contain moisturizers, fragrances, and preservatives that leave a residue on the surface, which attracts more dirt over time. Use a pH-balanced leather cleaner instead for safe, effective results.
Dark stains from accumulated skin oils respond well to a pH-balanced leather cleaner applied with a medium-stiffness brush using circular scrubbing motions. For stubborn spots, a small amount of 70% isopropyl alcohol on a microfiber cloth can help lift the stain before you apply leather cleaner. Always condition afterward.
A clean, properly conditioned leather steering wheel should feel slightly tacky — not slippery. Slipperiness is usually caused by using the wrong products, such as silicone-based sprays or heavy conditioners that don't fully absorb. Choose a light conditioner and buff off all excess product after application.
Condition your leather steering wheel every time you clean it, which for most drivers means once a month. If you live in a hot, dry climate or notice the leather starting to feel stiff or look lighter in color, condition more frequently — every two to three weeks — to prevent cracking.
Most all-purpose interior cleaners are too alkaline for leather and will strip its protective finish over time. Even products labeled as "safe for all surfaces" can degrade leather with repeated use. Always use a cleaner specifically formulated for leather to protect the material long term.
Cotton swabs dipped in leather cleaner are the most effective tool for cleaning stitching. Run the swab along each seam to pull out embedded grime. Repeat with fresh swabs until they come back clean. A soft detailing brush can also agitate cleaner into tight seam areas before you wipe with a microfiber towel.
 |
 |
 |
 |
About Joshua Thomas
Joshua Thomas just simply loves cars and willing to work on them whenever there's chance... sometimes for free.
He started CarCareTotal back in 2017 from the advices of total strangers who witnessed his amazing skills in car repairs here and there.
His goal with this creation is to help car owners better learn how to maintain and repair their cars; as such, the site would cover alot of areas: troubleshooting, product recommendations, tips & tricks.
Joshua received Bachelor of Science in Mechanical Engineering at San Diego State University.
Get some FREE car parts & gear.. Or check out the latest free automotive manuals and build guides here.
Disable your ad blocker to unlock all the hidden deals. Hit the button below 🚗
| | | |