by Joshua Thomas
Learning how to flush your car's cooling system is one of the most valuable maintenance skills you can develop as a car owner. Old coolant breaks down over time, losing its ability to prevent corrosion and regulate temperature — and a neglected cooling system is one of the leading causes of engine overheating. Flushing the system removes degraded fluid, scale deposits, and rust particles that build up inside your radiator, hoses, and water pump. Done on schedule, it extends engine life and saves you from costly repairs down the road.
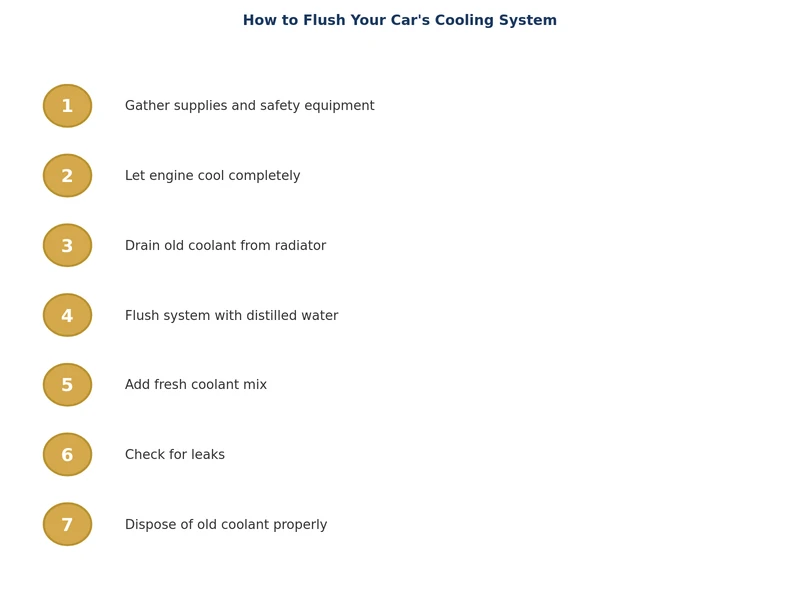
This guide walks you through the entire process — from gathering your supplies to disposing of old coolant safely. Whether you drive a daily commuter or a weekend project car, a cooling system flush is well within reach for any home mechanic.
Contents
Your engine generates enormous heat during operation. The cooling system — comprising the radiator, water pump, thermostat, hoses, and coolant — absorbs that heat and dissipates it before temperatures climb to damaging levels. Antifreeze (ethylene or propylene glycol mixed with water) does more than lower the freezing point; it also raises the boiling point and carries corrosion inhibitors that protect metal components.
Over time, those inhibitors deplete. Oxygen in the system oxidizes the coolant, acids form, and pH drops. Acidic coolant attacks aluminum heads, iron blocks, copper radiator cores, and rubber hoses from the inside — the same kind of hidden corrosion that ruins exterior metal when left unchecked. A flush removes this degraded fluid along with any scale or particulate matter before it can cause real damage.
If you notice any of these, don't wait for your next scheduled interval — flush it now.
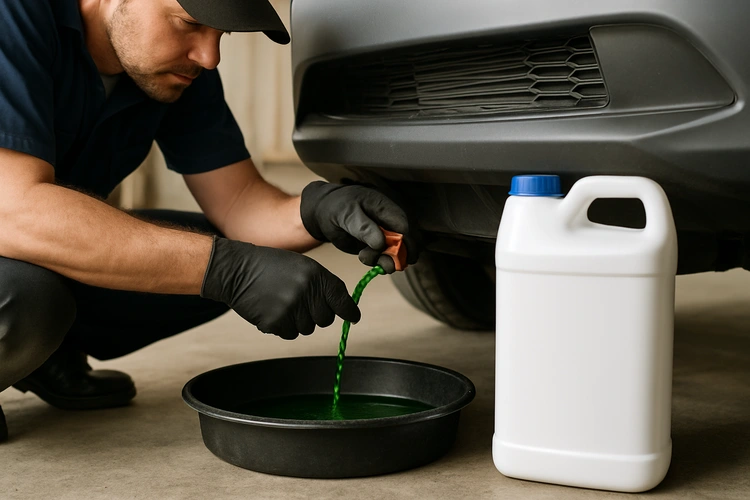
A basic flush requires no specialty equipment. Gather everything before you start so the job goes smoothly.
Not all coolants are interchangeable. Using the wrong type can actually accelerate corrosion. Check your owner's manual for the specification — common types include IAT (Inorganic Additive Technology, green), OAT (Organic Acid Technology, orange/red), and HOAT (Hybrid OAT, often yellow or blue). Our guide to the best antifreeze and coolants covers current top-rated products by type and vehicle compatibility. Never mix green IAT with extended-life OAT coolants; the chemicals react and reduce protection.
Always work on a cold engine. Opening the radiator cap on a hot system releases pressurized steam that can cause serious burns. Wait at least two hours after the last drive, or leave the car overnight.
Air trapped in the cooling system causes hot spots and inaccurate temperature readings. Some vehicles have bleed screws on the thermostat housing or upper hose; open them briefly while refilling to let air escape. On vehicles without bleed screws, squeeze the upper radiator hose several times after filling to dislodge air bubbles. Then:
Once complete, seal your old coolant in a container and take it to a local auto parts store or recycling center. Do NOT pour it down the drain or onto the ground — it's toxic to animals and the environment. If any spilled on your driveway, our guide on removing fluid stains from concrete covers cleanup techniques that work for coolant spills too.
How often you flush depends on the coolant technology your vehicle uses. The table below summarizes common types, their typical service life, and identifying colors.
| Coolant Type | Common Colors | Flush Interval | Typical Vehicles |
|---|---|---|---|
| IAT (Inorganic) | Green | Every 2 years / 30,000 mi | Older domestic vehicles (pre-2000) |
| OAT (Organic Acid) | Orange, Red, Pink | Every 5 years / 150,000 mi | GM, Chrysler, many imports |
| HOAT (Hybrid OAT) | Yellow, Gold, Blue, Purple | Every 5 years / 100,000 mi | Ford, Toyota, European brands |
| Si-OAT (Silicated) | Blue, Violet | Every 4 years / 60,000 mi | BMW, Mercedes-Benz, VW/Audi |
| P-OAT (Propylene Glycol) | Blue, Green | Every 5 years / 150,000 mi | Volvo, some Asian brands |
When in doubt, consult your owner's manual or the dealership. Mixing incompatible types — even accidentally during a top-off — accelerates the depletion of corrosion inhibitors and may void cooling system warranties on newer vehicles.
This is the single most dangerous error. A hot cooling system is under pressure — removing the cap releases a geyser of boiling coolant. Always wait for the engine to cool completely, and press the cap down while turning to release any residual pressure before removing.
Tap water contains minerals that deposit scale inside the radiator and on the water pump impeller over time. Always use distilled water, whether flushing or mixing concentrate. It costs very little and protects expensive components.
Many people flush the radiator and forget the expansion tank. The reservoir holds a significant volume of coolant, and old fluid left in it will contaminate your fresh fill. Drain, rinse, and refill it as part of every flush.
Air pockets in the system cause localized overheating. A thermostat housing full of air won't read temperature correctly, and a heater core with air in it won't produce heat. Always run the engine with the heat on and check the level a second time after the system has cycled.
Color is a manufacturer convention, not a universal chemical standard. Two green coolants from different brands may use incompatible chemistry. Always verify the specification (IAT, OAT, HOAT) rather than relying on color alone.
A flush is just one part of cooling system maintenance. Staying on top of the other components prevents expensive failures between flushes.
Squeeze radiator hoses — they should feel firm and slightly springy, not soft, mushy, or hard and brittle. Check for cracks near the ends where hoses attach. A failed hose at highway speed can drain your system in minutes. Replace any hose that shows swelling, cracking, or softness.
A thermostat stuck closed prevents coolant from reaching the radiator; stuck open means the engine never reaches full operating temperature, hurting fuel economy and accelerating wear. The radiator cap maintains system pressure — a weak cap lets coolant boil at lower temperatures. Most auto parts stores will test both for free.
Cooling system health doesn't exist in isolation. An engine burning oil introduces combustion gases into the coolant, contaminating it rapidly. Similarly, a leaking head gasket allows coolant and oil to mix — the white foam under the radiator cap is a telltale sign. Staying current on all fluid maintenance, including knowing how to check and change your transmission fluid, keeps the entire drivetrain in peak condition.
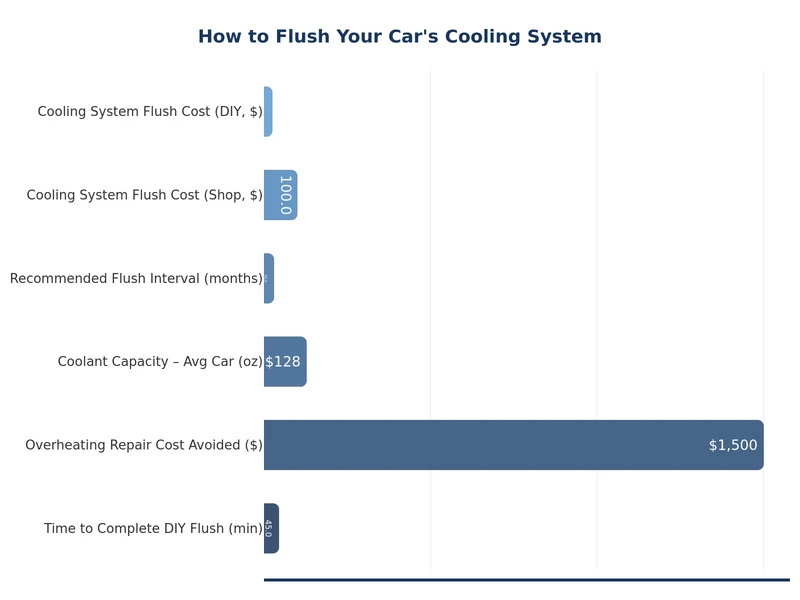
Consistent maintenance is the simplest insurance policy for a long engine life. A cooling system flush takes about an hour, costs under $30 in materials, and can prevent a repair bill measured in thousands. Mark your interval on a sticker inside the hood and stick to it.
It depends on the coolant type. Traditional green IAT coolant should be replaced every 2 years or 30,000 miles. Extended-life OAT and HOAT coolants last 5 years or up to 150,000 miles. Always follow your owner's manual — it lists the specific coolant specification and service interval for your engine.
Most home mechanics can flush a cooling system without any specialty tools. You need a drain pan, distilled water, fresh coolant, and about an hour. The main caution is working only on a cold engine to avoid burns from pressurized hot coolant. If your system has signs of serious contamination or a suspected head gasket leak, have a shop diagnose it first.
Old coolant becomes acidic as its inhibitors deplete. Acidic coolant corrodes aluminum engine components, eats through radiator fins, degrades hose interiors, and damages water pump seals. Over time, scale deposits reduce heat transfer efficiency, leading to overheating. Neglecting coolant flushes is one of the most common causes of premature radiator and water pump failure.
Only in a genuine roadside emergency to top off a low system and drive safely to a shop. Mixing incompatible coolant types reduces corrosion protection and can create sludge. As soon as possible afterward, have the system flushed and refilled with the correct single coolant type specified for your vehicle.
Never pour coolant down a drain or onto the ground. Ethylene glycol is toxic to animals and can contaminate groundwater. Seal the old fluid in a leak-proof container and take it to an auto parts store (most accept used coolant at no charge), a recycling center, or a municipal hazardous waste collection facility.
For routine maintenance flushes on a healthy system, distilled water alone is sufficient. A chemical flush product is useful when the coolant is heavily discolored, sludgy, or you've gone significantly past the service interval. These products contain detergents and mild acids that help break up scale and deposits before the final water rinse. Follow the product instructions carefully and flush thoroughly with water afterward to remove all chemical residue before adding fresh coolant.
 |
 |
 |
 |
About Joshua Thomas
Joshua Thomas just simply loves cars and willing to work on them whenever there's chance... sometimes for free.
He started CarCareTotal back in 2017 from the advices of total strangers who witnessed his amazing skills in car repairs here and there.
His goal with this creation is to help car owners better learn how to maintain and repair their cars; as such, the site would cover alot of areas: troubleshooting, product recommendations, tips & tricks.
Joshua received Bachelor of Science in Mechanical Engineering at San Diego State University.
Get some FREE car parts & gear.. Or check out the latest free automotive manuals and build guides here.
Disable your ad blocker to unlock all the hidden deals. Hit the button below 🚗
| | | |