by Joshua Thomas
Surface rust on brake rotors is one of the most common concerns car owners face, and it's almost always harmless at first. If you've parked overnight and heard a brief grinding or scraping sound on the first few stops in the morning, that's surface rust burning off. Learning how to remove rust from brake rotors the right way can prevent that minor layer from becoming a structural problem — and save you from an unnecessary rotor replacement. This guide walks you through every method, from the simplest drive-and-brake technique to full rotor removal for serious buildup.
Brake health goes hand in hand with other maintenance tasks. If you're planning a thorough brake service, our step-by-step guide on how to bleed car brakes at home covers the hydraulic side of the system in full detail.
Contents
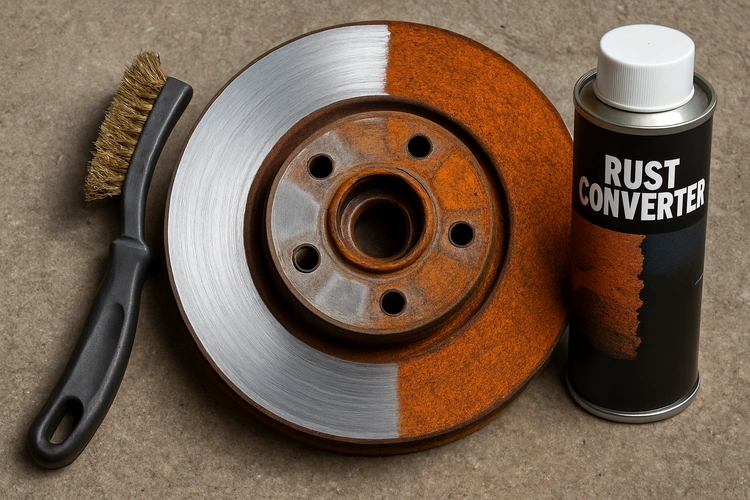
Most brake rotors are made from gray cast iron, a material chosen for its thermal capacity and friction properties. The downside is that bare iron oxidizes rapidly when exposed to moisture — rain, dew, humidity, and road spray are all it takes. Unlike painted steel body panels, rotor faces are intentionally uncoated so the brake pads can make full metal-to-metal contact.
Surface rust is a thin, orange-brown film that forms within hours of moisture exposure. It sits on top of the rotor and wipes away during normal braking. Deep rust is a different matter — it develops over weeks or months of inactivity, pits the rotor face, and can cause vibration, noise, and reduced braking effectiveness. Deep rust typically requires mechanical removal or rotor replacement.
In humid climates, visible surface rust can appear in as little as two to four hours. A vehicle parked for a weekend may develop a rust layer that needs several hard stops to clear. A vehicle stored for a month or more is likely to have deeper pitting that won't clear on its own.
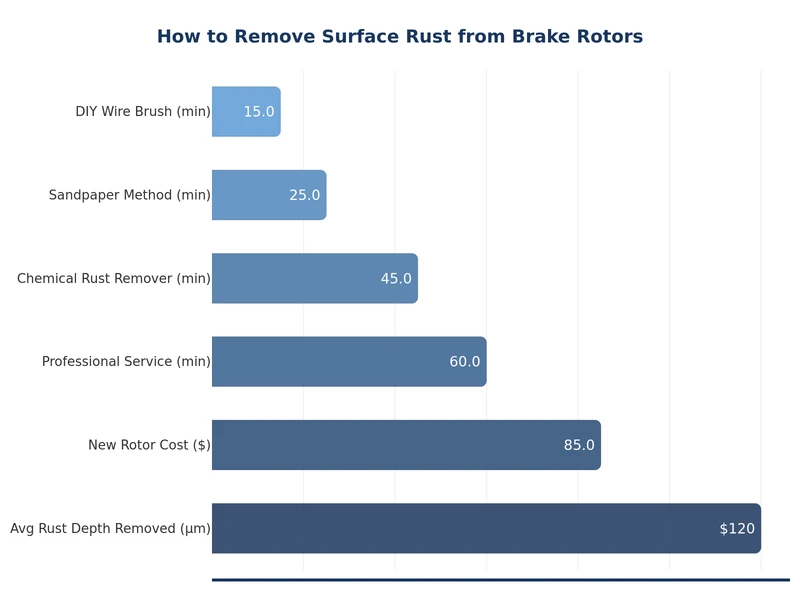
For light surface rust, you may need nothing at all. For deeper treatment, gather the following before you start:
| Rust Level | Visual Signs | Recommended Method | Estimated Time |
|---|---|---|---|
| Light (overnight) | Thin orange film, no pitting | Drive-and-brake method | 5–10 minutes of driving |
| Moderate (1–2 weeks) | Visible rust layer, slight texture | Wire brush + brake cleaner on wheel | 30–45 minutes |
| Heavy (1+ month) | Pitting, flaking, uneven surface | Remove rotor, sand or use rust remover | 1–2 hours |
| Severe (deep pitting) | Grooves, cracks, metal loss | Rotor replacement required | 1–3 hours including replacement |
For light to moderate rust, you don't need to disassemble anything. Two approaches work well depending on how much buildup you're dealing with.
This is the easiest approach and works for fresh, overnight rust. Drive to a quiet road or empty parking area and apply the brakes firmly — but not enough to lock the wheels — several times from 30–40 mph. The friction between the pad and rotor scrubs the rust layer away mechanically. You'll often hear a light grinding for the first two or three stops, then it clears. Inspect the rotors visually afterward; they should look clean and evenly worn in the contact zone.
Never use WD-40, oil, or grease on the braking surface. Any lubricant contamination on the rotor face or pads is a serious safety hazard.
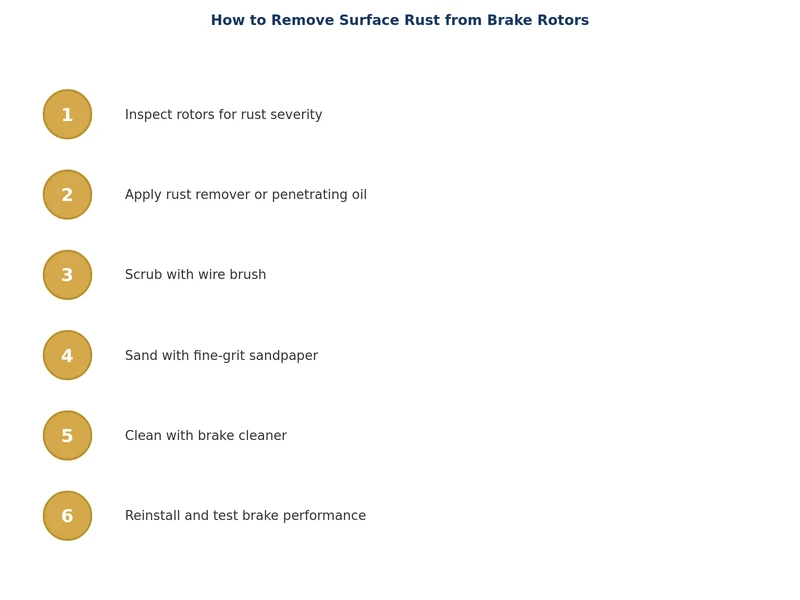
For deep pitting that survives wire brushing, removing the rotor gives you full access to treat both faces and the hat (the raised center section).
Keeping up with overall vehicle maintenance — including inspecting your brake system — is easier when you follow a structured car maintenance schedule by mileage.
The most effective rust prevention is regular use. Vehicles driven daily rarely develop problematic rust because the braking cycle continuously polishes the rotor surface. If you're parking a car for more than two weeks, try to drive it briefly at least once a week and apply the brakes firmly a few times.
For vehicles stored seasonally, you have a few options:
Not every rusty rotor can or should be saved. Rotors have a minimum thickness specification stamped on the hat — typically marked as "MIN TH" or "DISCARD AT." Use a micrometer to measure rotor thickness at several points around the face. If the rotor is at or below minimum thickness, or if pitting has created grooves deeper than 1.5mm, replacement is the only safe option.
Also inspect for cracks, heat scoring (blue discoloration indicating warping), or hard spots. These are signs of structural damage that no amount of rust removal will fix. If you're unsure about rotor condition, have a shop measure runout with a dial indicator — excessive lateral runout causes brake pedal pulsation even on otherwise clean rotors.
For a broader look at brake and suspension maintenance, it's worth checking your entire undercarriage while you're under there — rust on rotors often signals the beginning of oxidation on other components too.
Light surface rust is safe to drive on — it clears within the first few brake applications. Deep pitting, grooves, or flaking rust that doesn't clear after normal braking requires inspection before continuing to drive, as it can reduce braking effectiveness and damage brake pads.
Surface rust appears as a uniform orange film and disappears after a few firm stops. Deep rust shows visible pitting, texture variation, or raised flakes that remain after braking. Run a fingernail across the rotor face — surface rust leaves a smooth, even surface underneath, while deep rust leaves pits or grooves you can feel.
Yes, sandpaper is appropriate for light to moderate rust removal on rotors. Use 120–150 grit to remove the bulk of the rust, then finish with 220 grit to restore a smooth surface. Always clean the rotor thoroughly with brake cleaner afterward to remove any abrasive particles.
In humid conditions, visible surface rust can form in as little as two to four hours after exposure to rain or moisture. This is completely normal for uncoated cast iron rotors and does not indicate a problem with your brakes.
No. WD-40 and other oil-based products must never be applied to the braking surface of a rotor. Even a thin film of lubricant dramatically reduces friction between the pad and rotor, severely impairing braking performance and creating a significant safety hazard. Use only brake cleaner or a dedicated rust remover formulated for brake components.
Visually inspect your rotors every time you rotate your tires — typically every 5,000 to 7,500 miles. Look through the wheel spokes for pitting, grooves, or uneven wear. If you notice brake pulsation, vibration through the pedal, or a grinding noise that doesn't clear after a few stops, inspect the rotors immediately regardless of mileage.
 |
 |
 |
 |
About Joshua Thomas
Joshua Thomas just simply loves cars and willing to work on them whenever there's chance... sometimes for free.
He started CarCareTotal back in 2017 from the advices of total strangers who witnessed his amazing skills in car repairs here and there.
His goal with this creation is to help car owners better learn how to maintain and repair their cars; as such, the site would cover alot of areas: troubleshooting, product recommendations, tips & tricks.
Joshua received Bachelor of Science in Mechanical Engineering at San Diego State University.
Get some FREE car parts & gear.. Or check out the latest free automotive manuals and build guides here.
Disable your ad blocker to unlock all the hidden deals. Hit the button below 🚗
| | | |