by Diego Ramirez
Studies conducted by automotive detailing trade organizations estimate that adhesive contamination affects more than 60 percent of used vehicle interiors, making it one of the most pervasive cleanliness issues that new owners inherit. When a sticker is peeled from a dashboard, door panel, or center console, the adhesive layer frequently remains bonded to the substrate, forming a sticky, dust-attracting film that resists ordinary cleaning products. The effort to remove sticker residue from car interior surfaces requires deliberate product selection and measured technique, because the wrong chemical can discolor vinyl, cloud polycarbonate panels, or permanently soften rubberized trim. A methodical approach — beginning with the mildest effective agent and escalating only when results are inadequate — protects the surface while producing consistent, repeatable outcomes. For owners who want to condition and protect their dashboards after cleaning, the guide to the best dashboard cleaners offers comparisons covering both cleaning performance and long-term UV protection.
Contents

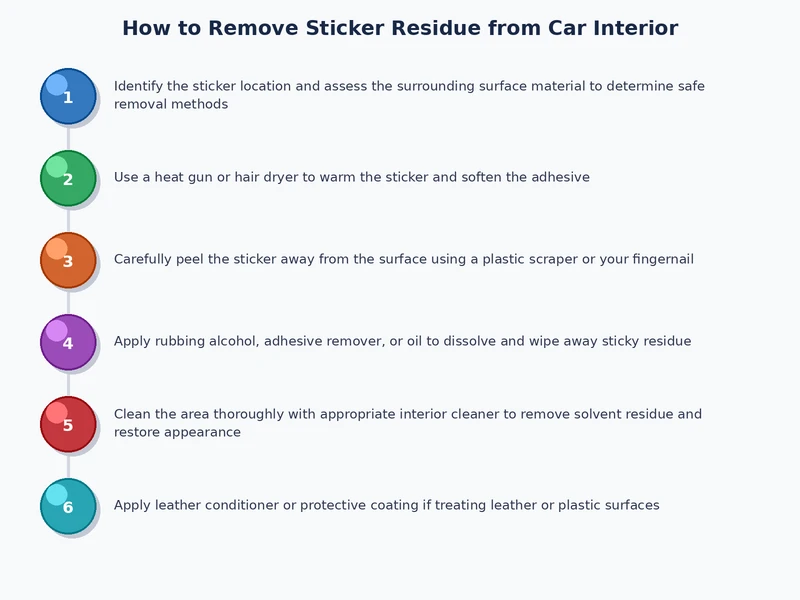
The two most reliable categories of removal technique are thermal softening and chemical dissolution, and selecting between them depends primarily on the surface material and the age of the adhesive deposit. Both approaches require patience and precise application; aggressive scrubbing is counterproductive on all interior surface types and typically introduces scratching or surface hazing that is considerably more difficult to address than the original residue.
A heat gun or hair dryer set to medium temperature softens the adhesive bond by raising the residue to approximately 120 to 150 degrees Fahrenheit, rendering it pliable and substantially reducing its grip on the substrate. Once warmed, the residue lifts cleanly from smooth plastic or glass surfaces using a plastic scraper or a folded microfiber cloth, with minimal adhesive ghosting remaining on the surface afterward. The heat source should be maintained at a distance of four to six inches from the panel, moving in slow sweeping passes rather than concentrating thermal energy in a single fixed location. Overheating rigid or rubberized plastics causes permanent warping and discoloration, making continuous tool movement a non-negotiable procedural requirement throughout the entire thermal application stage.
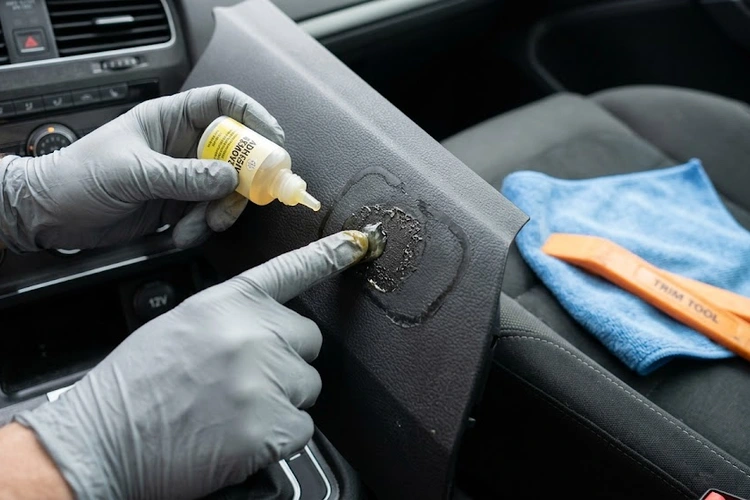
Isopropyl alcohol at 70 to 91 percent concentration is the most reliable solvent for dissolving adhesive residue on interior plastic and vinyl without aggressive chemical attack on the underlying substrate. The correct application method involves dampening a clean microfiber cloth with IPA, pressing it against the residue for a thirty-second dwell period, and then wiping in a single direction rather than in circular or scrubbing motions. For more persistent deposits, commercial automotive adhesive removers — formulated specifically for interior surfaces — outperform household solvents on aged or heat-set residue that has bonded over an extended period of time. Door panels and handle surrounds are frequent targets for sticker placement, and the complete guide on how to clean car door handles inside and out details the same surface preparation protocol applied to adjacent interior components.
The appropriate removal method scales directly with the age and chemical composition of the adhesive deposit, and most cases fall into one of two distinct categories: fresh residue from recently removed stickers, and aged residue that has undergone progressive chemical hardening during months or years of exposure to cabin heat and UV radiation. Misidentifying the category leads to wasted effort and potential surface damage from escalating chemical applications.
Most sticker residue on hard interior surfaces responds adequately to materials already present in a typical household or garage. Rubbing alcohol, cooking oils such as coconut or olive oil, and even peanut butter share a functional property: they disrupt adhesive polymer chains through lubrication or mild chemical action, loosening the bond without requiring aggressive solvents. The oil-based approach works particularly well along fabric or carpet borders, where liquid solvents risk soaking into underlying padding, though it requires a follow-up treatment with a fabric-safe degreaser to prevent persistent grease staining on the fibers. Standard masking tape pressed firmly over residue and peeled away can also mechanically lift thin adhesive layers without introducing any chemical agents to the surrounding surface area.
Aged residue — particularly from parking permits or registration stickers left in place for multiple years — undergoes a process called outgassing, during which volatile compounds escape and the adhesive hardens into a rigid, brittle film that standard solvents cannot penetrate at room temperature. These cases require dedicated adhesive removers applied with extended dwell times of two to five minutes, or in extreme situations, a clay bar treatment with appropriate lubricant to physically abrade the hardened deposit away from the surface. The comparison table below provides a structured overview of removal methods by effectiveness, surface compatibility, and approximate cost to support informed selection before beginning the process.
| Removal Method | Best Surface Type | Surface Safety | Effectiveness on Aged Residue | Approximate Cost |
|---|---|---|---|---|
| Isopropyl Alcohol (70–91%) | Hard plastic, vinyl, glass | High | Moderate | Very low |
| Heat gun / hair dryer | Smooth surfaces, glass | Medium (avoid prolonged contact) | High | Low (if tool is owned) |
| Goo Gone Automotive | Most interior surfaces | High | Very high | Low–Medium |
| WD-40 | Hard, non-porous surfaces | Medium | Moderate | Very low |
| Cooking oil (coconut, olive) | Fabric edges, light residue | High | Low | Very low |
| Clay bar with lubricant | Hard, non-porous surfaces | High (with lubrication) | Very high | Medium |
The majority of failed residue removal attempts share two root causes: applying too much solvent without adequate dwell time, and introducing mechanical force before the adhesive has sufficiently dissolved. Understanding how each error manifests on the surface allows for targeted correction rather than a cycle of escalating chemical applications that compounds the original problem.
When an adhesive remover or solvent is applied too liberally, it thins the residue and redistributes it across a wider surface area rather than breaking it down for complete removal. This occurs most frequently when the product is sprayed directly onto the target surface rather than first applied to an applicator cloth in a controlled quantity. The correct technique requires saturating a folded microfiber cloth, pressing it firmly onto the residue for thirty to sixty seconds of dwell time, and then wiping in a single straight line to lift the dissolved material cleanly. Circular motions redistribute dissolved adhesive across the panel and produce a faint haze that becomes visible when light strikes the surface at an oblique angle, requiring additional treatment to fully eliminate.
Warning: Never apply acetone-based nail polish remover to car interior plastics — it dissolves the plasticizers within the material, causing permanent brittleness and surface crazing that no polish compound can repair.
Scratched or clouded plastic surfaces typically result from the use of metal scrapers, abrasive scrubbing pads, or undiluted acetone on interior trim panels. If surface clouding has already occurred on a clear plastic panel or instrument cluster cover, automotive plastic polishing compounds can restore optical clarity through controlled micro-abrasion, removing the damaged surface layer to expose unaffected material below. Sun visor panels and overhead console covers are particularly susceptible to this type of damage, and the guide on how to clean car sun visors covers the buffing and plastic restoration process applicable to these components in detail. Instrument cluster covers require particular caution, as anti-glare coatings on certain vehicles are chemically incompatible with solvent-based polishing compounds.
Effective sticker residue removal is only the first half of the complete process; the subsequent conditioning and protection of the cleaned surface determines whether the results remain visually consistent with surrounding panels over time. Solvents used during removal partially strip the factory protective coating from interior plastics and vinyl, leaving the surface more susceptible to UV degradation, discoloration, and future contamination if reconditioning is omitted from the final procedure.
Most factory interior plastics and vinyl surfaces carry a UV-stabilizing top coat that solvent exposure partially depletes during the removal process, and restoring this protection requires a dedicated interior conditioner containing built-in UV inhibitors. The conditioner should be applied in a thin, even layer using a clean foam applicator pad, then buffed to a matte or low-sheen finish depending on the original surface texture of the panel. Truck owners managing larger interior surface areas will find detailed guidance on protectant application across dash, door panel, and console surfaces in the comprehensive guide on how to detail a truck interior, which covers each zone systematically and accounts for different material types within a single cabin.
The most effective strategy for preventing sticker residue problems is substituting permanent adhesive products with removable alternatives, such as static-cling window films or hook-and-loop mounting systems for registration documents and parking permits. When adhesive stickers must be applied, positioning them on glass rather than plastic or vinyl simplifies future removal considerably, as glass withstands higher solvent concentrations and heat applications without sustaining surface damage. Regular inspection of any adhesive-mounted accessories — particularly before the adhesive has had time to cure and harden into a semi-permanent bond — allows for quick, damage-free removal using only a microfiber cloth dampened with a minimal quantity of isopropyl alcohol.
Isopropyl alcohol at 70 to 91 percent concentration is the safest and most broadly compatible solvent for interior plastics and vinyl. It dissolves adhesive polymer chains without attacking the substrate, provided it is applied to a cloth rather than sprayed directly onto the surface, and allowed a proper dwell time of thirty to sixty seconds before wiping.
WD-40 is moderately effective on fresh to moderately aged adhesive residue on hard dashboard surfaces, as its petroleum distillate base disrupts adhesive bonds through lubrication. However, it leaves a secondary oily film that requires a follow-up wipe with an IPA-dampened cloth, and it is not recommended near fabric or porous trim materials due to significant staining risk.
On upholstery and carpet, the recommended approach is to apply a small amount of cooking oil or a foam-based fabric adhesive remover to the affected area, allow a five-minute dwell time, and then blot — never rub — with a clean microfiber cloth. After the adhesive lifts, a fabric-safe degreaser or dedicated upholstery cleaner must be applied to remove oil residue from the fibers and prevent staining.
At concentrations of 70 to 91 percent, isopropyl alcohol does not structurally damage properly formulated interior plastics or vinyl during single or occasional use. However, repeated application without follow-up conditioning gradually strips the UV-protective coating from the surface, making the application of an interior protectant an important final step rather than an optional finishing touch.
 |
 |
 |
 |

About Diego Ramirez
Diego Ramirez is a maintenance and care specialist who has been wrenching on cars since he was sixteen. He focuses on fluid changes, preventive care routines, paint protection, and the small habits that turn a five-year-old car into a fifteen-year-old car.
Get some FREE car parts & gear.. Or check out the latest free automotive manuals and build guides here.
Disable your ad blocker to unlock all the hidden deals. Hit the button below 🚗
| | | |