How to Replace a Headlight Bulb (Step-by-Step Guide)

by Diego Ramirez

Replacing a headlight bulb is one of the easiest DIY car repairs most drivers can handle in under 30 minutes — no mechanic required. Knowing how to replace a headlight bulb correctly keeps the road ahead well-lit and avoids an unnecessary trip to the shop.

Dim or failed headlights are a genuine safety issue. According to the National Highway Traffic Safety Administration (NHTSA), a large share of fatal crashes happen in low-light conditions. The good news: swapping a bulb typically costs $10–$30 in parts and a bit of patience. This guide covers everything — from picking the right bulb to avoiding the most common mistakes.

Mechanic replacing a headlight bulb in a car headlight assembly
Figure 1 — Replacing a headlight bulb from inside the engine bay on a typical passenger vehicle
Bar chart comparing halogen, LED, and HID headlight bulb types by lifespan cost and brightness
Figure 2 — Headlight bulb type comparison: lifespan, brightness, and average cost per bulb

What You Need to Know Before You Start

Before touching anything under the hood, it helps to understand the basics. Not all headlight bulbs are the same, and using the wrong type or size can cause fitment problems or damage the housing.

Types of Headlight Bulbs

Most passenger vehicles use one of three headlight technologies:

  • Halogen — The most common type. Uses a tungsten filament inside a gas-filled glass envelope. Affordable, widely available, and easy to replace.
  • HID (High-Intensity Discharge) — Also called xenon bulbs. Produce a bright bluish-white light using an electrical arc between two electrodes. More complex to replace and pricier than halogen.
  • LED (Light-Emitting Diode) — Standard on newer vehicles. Long lifespan and low power draw. Some LED assemblies are sealed units — meaning the entire housing must be replaced, not just the bulb.

Before buying a replacement, check the owner's manual or use the bulb lookup tool at any auto parts store. The bulb code (such as H7, H11, or 9005) must match the vehicle exactly — these are not interchangeable.

Tools Needed

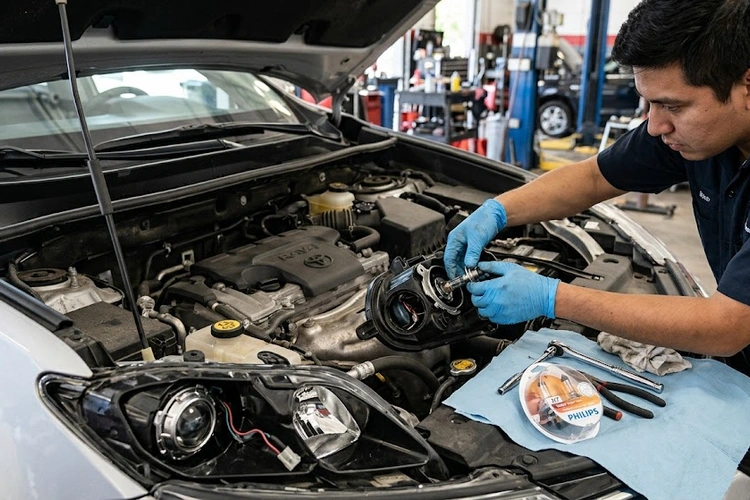
Most headlight bulb replacements require very little:

  • Replacement bulb (correct type and size for the vehicle)
  • Latex or nitrile gloves
  • Flathead or Phillips screwdriver (vehicle-dependent)
  • A flashlight or clip-on work light
  • Clean microfiber cloth and isopropyl alcohol (just in case)

Some vehicles with tight engine bays may also need a trim removal tool or a short socket extension. In rare cases — certain compact cars and crossovers — removing the wheel well liner is the only way to reach the back of the headlight housing.

Pro Tip: Always replace headlight bulbs in pairs. If one has burned out, the other is likely close behind — and mismatched brightness on the two sides reduces visibility and looks noticeably off at night.

Halogen vs. LED vs. HID: Choosing the Right Bulb

Not sure which replacement bulb to buy? Here is a side-by-side comparison of the three main types to help narrow down the choice.

Bulb Type Avg. Lifespan Brightness Avg. Cost (per bulb) DIY-Friendly?
Halogen 450–1,000 hrs Good $5–$20 Yes
HID / Xenon 2,000–3,000 hrs Excellent $20–$100 Moderate
LED (retrofit kit) 15,000–30,000 hrs Very Good $30–$150 / pair Moderate
LED (factory sealed assembly) Lifetime of vehicle Excellent $200–$800+ (full assembly) No — dealer required

For most drivers doing a standard how to replace headlight bulb job, halogen is the easiest path — parts are cheap, widely available, and the swap is straightforward. LED retrofit kits are growing in popularity but vary in street-legality by region, so it pays to confirm local regulations before installing them.

If the headlight housing shows fogging or trapped moisture after a bulb swap, that is a separate problem worth addressing. Headlight condensation inside the housing can shorten bulb life and reduce output even after a fresh bulb goes in.

How to Replace a Headlight Bulb: Step-by-Step

The process varies slightly by vehicle, but the core steps are consistent across most makes and models. Always refer to the owner's manual for any vehicle-specific notes before starting.

Step 1 — Accessing the Headlight Housing

  1. Turn off the engine and allow it to cool for at least 10 minutes.
  2. Open the hood and secure it with the prop rod.
  3. Locate the back of the headlight assembly from inside the engine bay — look for a round wiring plug or rubber boot at the rear of the housing.
  4. If the battery, air filter box, or coolant reservoir blocks access, temporarily move or remove those components as needed.
  5. On vehicles where the engine-bay route is impractical, remove the front wheel and inner wheel well liner to access the housing from the side.

A quick search for the specific year, make, and model plus "headlight bulb replacement" often reveals whether any particular obstacles are common for that vehicle.

Step 2 — Removing the Old Bulb

  1. Unplug the wiring harness connector from the back of the bulb. Most have a clip, tab, or locking lever that must be pressed before pulling.
  2. The bulb is held in by one of three retention methods:
    • A wire retaining clip — unhook it carefully by pressing the tab and swinging it aside
    • A rubber boot — twist and pull straight out
    • A plastic locking ring — twist counterclockwise to release
  3. Gently pull the old bulb straight out of the housing. Avoid wiggling or forcing it — plastic headlight housings crack under lateral pressure.
  4. Set the old bulb aside and inspect the wiring connector and housing for signs of corrosion, melted plastic, or cracked seals.

Step 3 — Installing the New Bulb

  1. Put on latex or nitrile gloves before handling the new bulb. Skin oils on halogen or HID glass create hot spots that cause premature failure — sometimes within days.
  2. If the bulb was accidentally touched bare-handed, wipe the glass gently with a cloth lightly dampened with isopropyl alcohol and let it dry fully before installing.
  3. Align the tabs or pins on the new bulb with the slots in the housing and seat it firmly. It should feel secure without forcing.
  4. Reattach the retaining wire clip, rubber boot, or locking ring in reverse order.
  5. Reconnect the wiring harness until it clicks into place.
  6. Turn the headlights on before closing the hood to confirm the new bulb is working.
  7. Aim a check: park 25 feet from a flat wall or garage door and confirm the beam pattern looks centered and level.

While under the hood, it is a good moment to check whether any interior car lights are not working — electrical issues sometimes affect multiple lighting circuits at once, and catching them early avoids a separate troubleshooting session later.

Common Mistakes to Avoid

Even a simple bulb swap can go wrong. These are the most frequent errors made during headlight replacements:

  • Touching the glass with bare hands — Halogen and HID bulbs burn out early when skin oils cause uneven heat distribution. Gloves are non-negotiable.
  • Buying the wrong bulb size — H7, H11, 9003, and 9005 look similar but are not interchangeable. Always verify the part number before purchasing.
  • Forcing a stuck wiring connector — Corroded or brittle connectors snap under force. Press the locking tab fully and wiggle gently rather than pulling hard.
  • Skipping the beam aim check — A new bulb aimed too high blinds oncoming drivers. A quick wall check takes two minutes and prevents a traffic stop.
  • Only replacing one side — Replacing just the failed bulb leaves a mismatched pair with noticeably different color and brightness at night.
  • Ignoring recurring failures — A bulb that burns out unusually fast may indicate a voltage spike or wiring fault. Using a multimeter to check the headlight socket can confirm whether the circuit is delivering the correct voltage.

What Does Headlight Bulb Replacement Cost?

DIY headlight bulb replacement is among the most cost-effective car maintenance tasks available. Here is a realistic breakdown of what to expect.

  • Halogen bulb, single: $5–$20 at any auto parts store
  • Halogen bulb pair (name brand): $15–$40
  • HID / Xenon bulb, single: $20–$100 depending on brand
  • LED retrofit kit (pair): $30–$150
  • Shop labor: $20–$100, driven mostly by how accessible the housing is
  • Dealer-replaced sealed LED assembly: $200–$800 or more

Most DIY halogen jobs cost under $30 total including a quality pair of bulbs and gloves. Shops charge primarily for labor — the actual task is quick, but cramped engine bays on certain compact cars push the labor time up considerably.

Driving with a failed headlight can result in a fix-it citation in most states, which carries its own fine if not resolved within a set number of days. Sticking with OEM-spec (original equipment manufacturer specification) bulbs rather than ultra-cheap off-brand options also helps avoid premature failures that undo the savings.

If the taillights are also acting up alongside the headlights, that may point to a shared fuse or wiring issue rather than individual bulb failure. The guide on taillights not working covers how to trace those electrical faults step by step.

Long-Term Headlight Care

Replacing a burned-out bulb solves the immediate problem. Keeping headlights performing well over the long haul takes a bit more attention to the whole assembly.

Headlight Lens Maintenance

  • Polycarbonate (plastic) headlight lenses yellow and haze over time from UV exposure and road debris. A headlight restoration kit restores clarity for $15–$30.
  • Applying a UV-protective sealant or ceramic coating after polishing extends results for one to two years before retreatment is needed.
  • Avoid spraying harsh chemical cleaners or solvent-based products directly on plastic lenses — they accelerate oxidation and cloudiness.
  • Inspect the lens surface for cracks or chips annually — even hairline cracks let water in and fog the housing interior.

Bulb Lifespan Tips

  • Replace halogen bulbs proactively every two to three years rather than waiting for failure — preventive replacement is cheaper and more convenient than a surprise outage at night.
  • Check headlight housing seals at every oil change interval. A cracked or dried-out seal admits moisture that shortens bulb life and clouds the lens.
  • After any front-end impact — even a minor parking lot tap — verify that headlights still aim correctly before driving at night.
  • Avoid aftermarket "super bright" bulbs that exceed the housing's rated wattage — they run hotter, soften plastic reflectors, and burn out faster than advertised.

When to Call a Professional

Some headlight situations are genuinely beyond a basic bulb swap:

  • Sealed LED assemblies integrated into the housing — these require full assembly replacement and sometimes dealer-level programming
  • Ballast or igniter failures on HID systems — the ballast (the power converter that drives the arc) is a separate component requiring its own replacement
  • Persistent electrical faults such as blown fuses, a failed headlight relay, or corroded grounds that keep taking out new bulbs
  • Projector headlight (a lens design that uses a focused beam through a cut-off shield) realignment after a collision repair

Frequently Asked Questions

Can headlight bulbs be replaced without going to a mechanic?

Yes — for most vehicles with halogen or standard HID bulbs, a headlight bulb swap is a straightforward DIY job requiring only basic tools and about 15 to 30 minutes. Vehicles with sealed LED assemblies are the exception, as those require full housing replacement that is better left to a professional.

Why does touching a halogen bulb with bare hands shorten its life?

Natural skin oils leave a residue on the glass that creates localized hot spots when the bulb heats up. Those hot spots weaken the glass and cause premature failure, sometimes within a few days of installation. Always handle replacement bulbs with gloves, and wipe off any accidental fingerprints with isopropyl alcohol before powering up.

How often do headlight bulbs need to be replaced?

Halogen bulbs typically last 450 to 1,000 hours of use. Under normal driving conditions that translates to roughly two to five years. HID bulbs last two to three times longer, and factory LED assemblies are generally designed to outlast the vehicle. Replacing halogen bulbs in pairs every two to three years as a preventive measure is a common recommendation.

What should be done if the new headlight bulb burns out quickly?

A bulb that fails within days or weeks of replacement usually points to something beyond the bulb itself — a voltage spike from a failing alternator, excessive resistance from a corroded connector, or oil contamination from touching the glass. Check the wiring harness for corrosion, verify the alternator output with a multimeter, and always use gloves when handling the new bulb.

Key Takeaways

  • Most headlight bulb replacements are a straightforward DIY job that takes under 30 minutes and costs as little as $10–$30 in parts.
  • Always wear gloves when handling halogen or HID bulbs — bare-hand contact leaves oils that cause premature failure.
  • Replace both bulbs at the same time for consistent brightness, and always verify the correct bulb code before purchasing.
  • A bulb that fails repeatedly or quickly usually signals an underlying electrical issue worth diagnosing before installing another replacement.

About Diego Ramirez

Diego Ramirez is a maintenance and care specialist who has been wrenching on cars since he was sixteen. He focuses on fluid changes, preventive care routines, paint protection, and the small habits that turn a five-year-old car into a fifteen-year-old car.

Get some FREE car parts & gear.. Or check out the latest free automotive manuals and build guides here.

Disable your ad blocker to unlock all the hidden deals. Hit the button below 🚗