by Joshua Thomas
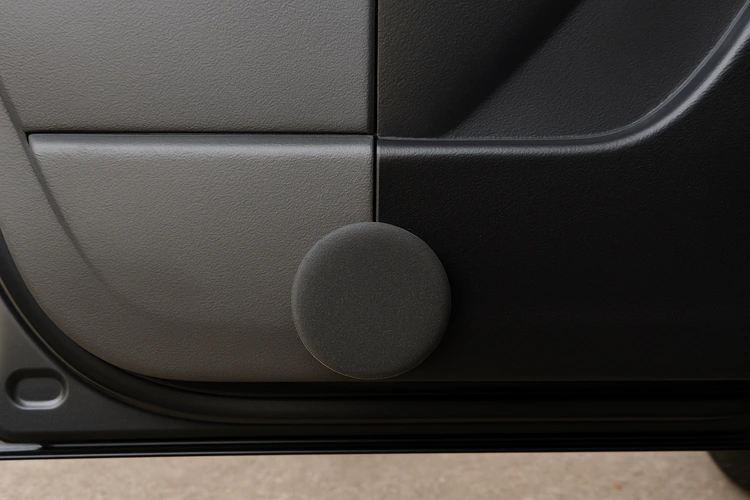
Black plastic trim gives any car a clean, finished appearance — but UV rays, heat, and oxidation gradually turn it chalky and gray. If you're searching for how to restore faded black plastic trim on car bumpers, side moldings, and door panels, the good news is that it's a straightforward DIY job. The right restorer and a bit of prep work can bring that deep, factory-black look back in under an hour. Before you spend money at a detailer, read this guide and see what's possible at home.
Faded trim is one of the most common cosmetic complaints among car owners, and it ages a vehicle faster than almost anything else. Just as protecting your car paint from sun damage extends its life, keeping trim treated prevents costly replacements down the road.
Contents

Most exterior plastic trim is made from polypropylene or ABS plastic. These materials contain carbon black pigment that gives them their dark color. Over time, UV radiation breaks down the surface layer, releasing oils from the plastic and oxidizing the pigment. The result is the chalky, faded gray appearance that looks decades older than the rest of the vehicle.
Heat accelerates this process. Trim pieces on the hood, rear bumper, and roof rack rails fade fastest because they receive the most direct sun exposure.
Before you choose a restorer, identify your trim type. Most exterior trim falls into one of three categories: textured matte plastic (most common), smooth gloss plastic, and rubber-plastic blends. Textured trim requires a product that penetrates the micro-surface rather than sitting on top of it. Using a wax-based product on textured trim often leaves a white haze in the grooves.
You can find a full breakdown of top-rated options in our guide to the best plastic restorers currently available.
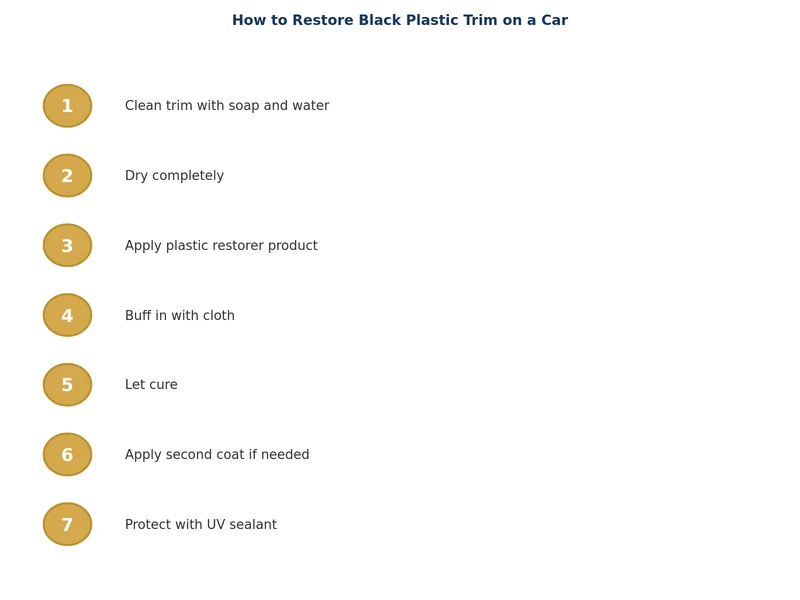
Start with a thorough cleaning. Spray an all-purpose cleaner directly onto the trim and scrub with a soft-bristle brush to lift dirt from the texture. Rinse completely and let it dry. Skipping this step is the number one reason restorers fail — product applied over grime bonds poorly and peels within days.
Wipe the trim with isopropyl alcohol on a clean microfiber cloth. This removes any wax, silicone, or old dressing from previous treatments. The surface should feel slightly rough and matte after this step. If it still looks shiny in spots, repeat the wipe. Tape off adjacent paint panels now to avoid staining.
Apply a small amount of restorer to a foam applicator or folded microfiber cloth. Work in thin, even passes along the grain of the trim texture. Do not glob it on — thin coats penetrate better and won't streak. For heavily faded trim, two thin coats applied 10 minutes apart outperform one heavy coat every time.
For door panels and interior trim, the same principles apply — check out our guide on how to clean car door panels before applying any restorer to interior surfaces.
Allow the product to penetrate for the time listed on the label — typically 5 to 15 minutes. Then lightly buff with a dry microfiber cloth to remove any excess. Do not let the product sit too long before buffing, or it can become tacky and attract dust. Remove painter's tape before the product fully cures to avoid pulling residue onto the paint.
Not all restorers work the same way. There are three main types: oil-based dressings, heat-transfer restorers, and polymer-based sealants. Each has a different durability profile and application method. The table below compares them at a glance.
| Type | How It Works | Durability | Best For | Price Range |
|---|---|---|---|---|
| Oil-Based Dressing | Coats surface with oils that darken and condition plastic | 2–6 weeks | Quick touch-ups, older trim | $8–$18 |
| Heat-Transfer Restorer | Melts surface layer with heat to redistribute carbon black pigment | 6–18 months | Heavily oxidized textured trim | $15–$30 |
| Polymer Sealant | Bonds a clear protective layer over the plastic surface | 12–24 months | Long-term protection, newer trim | $20–$45 |
| Ceramic Coating | Nano-ceramic layer fused to surface for semi-permanent protection | 2–5 years | New or fully restored trim | $35–$80 |
For most owners, a polymer sealant or heat-transfer restorer offers the best balance of results and longevity. Ceramic coatings make sense if you've just completed a full detail — similar to restoring faded car paint before applying a protective top coat.
Restoration is only half the job. Maintaining the result is what saves you time and money over years of ownership.
Even experienced DIYers fall into these traps when learning how to restore faded black plastic trim on car surfaces.
The full process — cleaning, degreasing, applying, and curing — takes 30 to 60 minutes for a typical car. Heavily oxidized trim may need two coats and an extra 15 minutes of dwell time, but most jobs are complete well within an hour.
WD-40 will temporarily darken faded trim, but it is a petroleum-based solvent, not a conditioner. It evaporates quickly, leaves a greasy residue, and can accelerate long-term drying of the plastic. Use a dedicated plastic restorer instead for lasting results.
Oil-based dressings need reapplication every 4 to 6 weeks. Polymer sealants last 3 to 6 months. Ceramic coatings can last 2 or more years. Check your specific product label for manufacturer recommendations and reapply when trim starts to look gray.
Most plastic restorers will stain or streak clear coat if they transfer onto painted panels. Always tape off paint edges before applying, and wipe off any accidental contact immediately with a clean microfiber cloth dampened with isopropyl alcohol.
For severely faded trim, a heat-transfer restorer used with a heat gun provides the deepest, most permanent results by redistributing the carbon black pigment within the plastic itself. Follow up with a polymer sealant to lock in the result and slow future oxidation.
Plastic restorers are formulated for hard plastic surfaces. For rubber seals, weather stripping, and door gaskets, use a dedicated rubber conditioner or protectant. Applying a plastic restorer to rubber can cause cracking or stickiness over time.
 |
 |
 |
 |
About Joshua Thomas
Joshua Thomas just simply loves cars and willing to work on them whenever there's chance... sometimes for free.
He started CarCareTotal back in 2017 from the advices of total strangers who witnessed his amazing skills in car repairs here and there.
His goal with this creation is to help car owners better learn how to maintain and repair their cars; as such, the site would cover alot of areas: troubleshooting, product recommendations, tips & tricks.
Joshua received Bachelor of Science in Mechanical Engineering at San Diego State University.
Get some FREE car parts & gear.. Or check out the latest free automotive manuals and build guides here.
Disable your ad blocker to unlock all the hidden deals. Hit the button below 🚗
| | | |