by Joshua Thomas
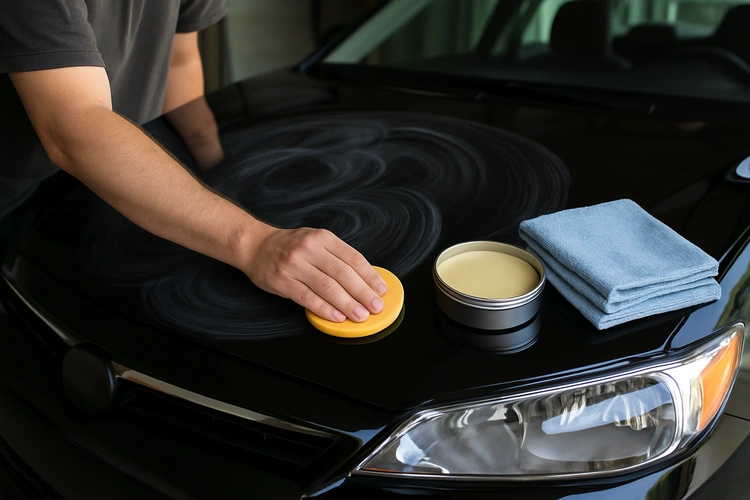
Learning how to wax a car by hand is one of the most valuable detailing skills you can develop. A proper hand wax protects your paint from UV damage, oxidation, and environmental contaminants while delivering a rich, mirror-like shine. Unlike machine polishing, hand waxing requires no special equipment — just the right products, a little patience, and a methodical approach. Before you begin, browse our guide to the best car waxes to choose the right formula for your paint type and budget.
This step-by-step walkthrough covers everything: prep work, application technique, buffing, and how to maintain your results long-term. Whether you're waxing for the first time or refining your process, follow these steps for a showroom-quality finish.
Contents
Gathering the right supplies before you start saves time and prevents mid-job interruptions. You don't need an expensive kit — the basics cover everything.
Avoid terry cloth towels or old t-shirts — they can leave fine scratches. Quality microfiber is non-negotiable for a swirl-free finish.
Wax applied over a dirty surface traps contaminants against the paint and dramatically reduces bonding. Preparation is the most important phase.
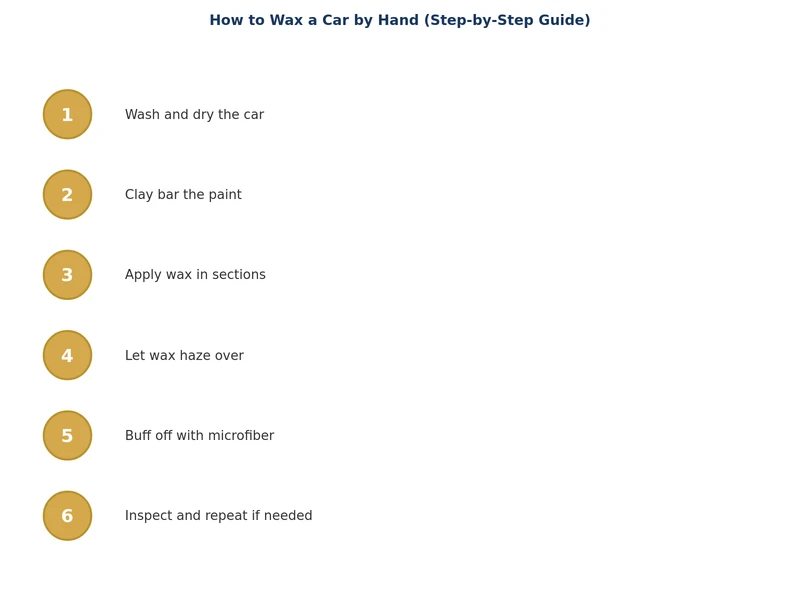
Start with a thorough two-bucket wash to remove loose dirt and grime. Use a dedicated car wash soap — dish soap strips existing wax and oils from your clear coat. After washing, if your paint feels rough or gritty when you run a clean finger across it, use a clay bar to decontaminate the surface. Clay removes bonded contaminants like brake dust, industrial fallout, and tree sap that a regular wash can't address.
While you're in the prep stage, it's also a good time to clean your alloy wheels separately before moving on to the paint — wheel brake dust can migrate onto clean bodywork if you're not careful.
Dry the car thoroughly with a clean microfiber drying towel or air blower. Never wax a wet or damp panel — moisture prevents the wax from bonding correctly and causes streaking. Once dry, inspect the paint in direct sunlight or a bright artificial light for water spots, swirls, or oxidation. Treat any defects before waxing, as wax protects existing paint but won't correct damage.
Work in a shaded area or garage. Direct sunlight causes wax to dry too quickly, making it difficult to buff off and leaving residue. Ideal surface temperature is between 50°F and 80°F.
Repeat for every panel. For recessed areas like door handles and trim gaps, wrap the microfiber around a fingertip to get into tight spots. Be careful around rubber trim and plastic — some waxes leave white residue on porous surfaces that's difficult to remove.
According to Wikipedia's overview of car wax, automotive waxes typically use carnauba wax, synthetic polymers, or a blend of both as their primary protective agents. Each format has distinct trade-offs.
| Wax Type | Durability | Gloss Level | Ease of Use | Best For |
|---|---|---|---|---|
| Paste Wax (Carnauba) | 2–3 months | Very High | Moderate | Show cars, dark colors |
| Liquid Wax | 2–4 months | High | Easy | Daily drivers, all colors |
| Spray Wax | 4–6 weeks | Moderate | Very Easy | Maintenance between full wax sessions |
| Synthetic Sealant | 4–6 months | High | Easy | Long-term protection, light-colored paint |
| Hybrid Wax/Sealant | 3–5 months | Very High | Moderate | Best of both: gloss + durability |
If you're weighing wax against longer-lasting options, read our comparison of ceramic coating vs. paint protection film to understand where wax fits in the broader paint protection spectrum.
Thick coats don't bond better — they just take longer to cure and leave behind more residue. A thin, even coat is more effective and easier to buff to a high gloss.
Heat accelerates drying, causing the wax to bond too quickly and streak when buffed. Always work in shade or a garage, and let the panels cool if the car has been sitting in the sun.
Paper towels, old rags, and terry cloth all cause micro-scratches in the clear coat. Use only high-quality, clean microfiber cloths rated for paint-safe use.
Waxing over contaminated, unwashed paint traps debris against the clear coat. Even a thin layer of dust will reduce bonding and leave a hazy, uneven finish.
Wax adds gloss but doesn't fix scratches or oxidation — it seals them in. Address paint defects with a polish or touch-up product before waxing.
A general rule is to wax every two to three months, though several factors change this. Paste carnauba waxes break down faster than synthetic sealants, especially in harsh climates with intense UV exposure, road salt, or frequent rain. A simple water bead test tells you when it's time: spray water on a clean panel and watch how it reacts. Tight, high-contact beads indicate active wax protection. Flat, sheet-like water with no beading means the wax layer has degraded and needs to be reapplied.
Vehicles kept outdoors year-round benefit from more frequent waxing — particularly before and after winter when road salt and freeze-thaw cycles accelerate paint degradation. If you're preparing your car for extended storage, our checklist on how to store a car for winter covers waxing as part of a full pre-storage paint protection routine.
Spray waxes applied after each wash extend the life of a full wax job and maintain the water-repellent layer between sessions. Think of them as maintenance, not a replacement for a proper hand wax application.
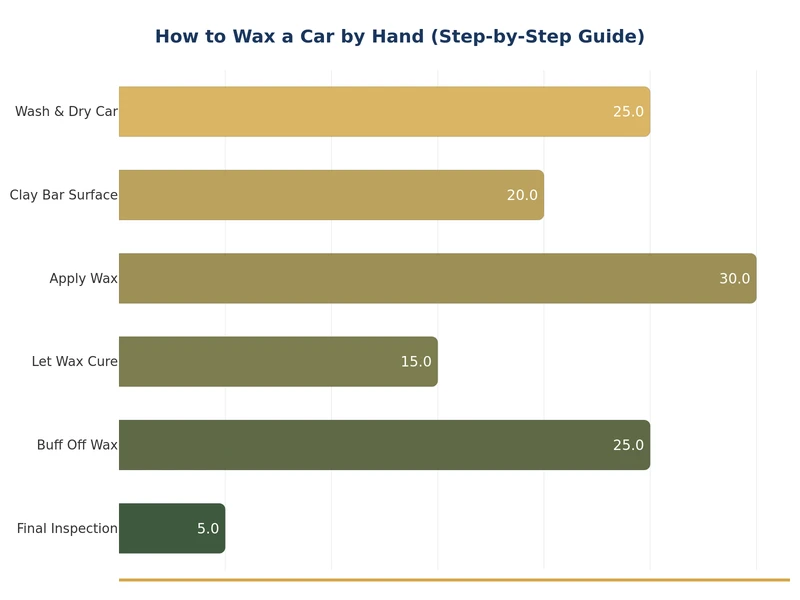
Most vehicles take between 45 minutes and two hours for a complete hand wax, depending on car size and how much preparation the paint needs. Working one panel at a time — applying, letting the wax haze, then buffing — keeps the process manageable without rushing.
No — waxing frequently doesn't damage paint. Each coat is a thin protective layer that sits on the clear coat. Over-waxing simply means applying a new coat over an existing one, which isn't harmful but isn't particularly more effective either. Let the water bead test guide your schedule.
Only if the paint has visible swirls, oxidation, or light scratches. Polish corrects surface defects in the clear coat; wax protects the corrected surface. On paint in good condition, you can skip straight to waxing after washing and claying.
Most waxes require a surface temperature above 50°F to cure and bond properly. In cold conditions, wax may not haze correctly or may become difficult to buff off. If you must wax in a cold garage, warm the panels slightly with a heat gun on its lowest setting or allow the car to warm up indoors first.
Car wax — typically carnauba-based — delivers a warm, deep gloss but lasts two to three months. Paint sealants use synthetic polymers for harder, longer-lasting protection of four to six months. Some detailers apply a sealant first, then top it with carnauba wax to combine durability with maximum gloss depth.
No — wax applied to rubber seals, plastic trim, and unpainted bumpers leaves a white, chalky residue that's difficult to remove. Mask off these areas with painter's tape before waxing, or work carefully around them and immediately wipe away any accidental overspray with a damp microfiber cloth.
 |
 |
 |
 |
About Joshua Thomas
Joshua Thomas just simply loves cars and willing to work on them whenever there's chance... sometimes for free.
He started CarCareTotal back in 2017 from the advices of total strangers who witnessed his amazing skills in car repairs here and there.
His goal with this creation is to help car owners better learn how to maintain and repair their cars; as such, the site would cover alot of areas: troubleshooting, product recommendations, tips & tricks.
Joshua received Bachelor of Science in Mechanical Engineering at San Diego State University.
Get some FREE car parts & gear.. Or check out the latest free automotive manuals and build guides here.
Disable your ad blocker to unlock all the hidden deals. Hit the button below 🚗
| | | |