by Sarah Whitfield
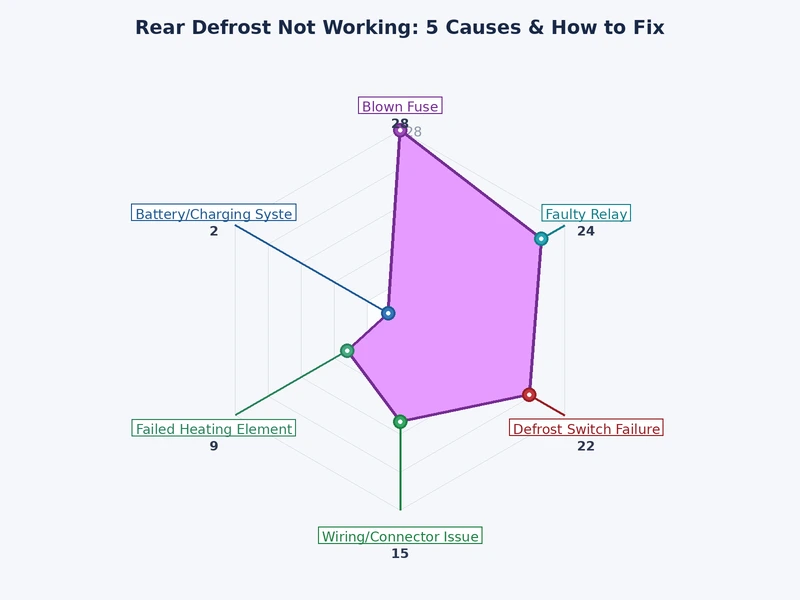
Rear defrost not working is most commonly caused by a blown fuse, a faulty relay, or a broken heating grid line. All three are diagnosable at home with basic tools and fixable without dealer-level expertise.
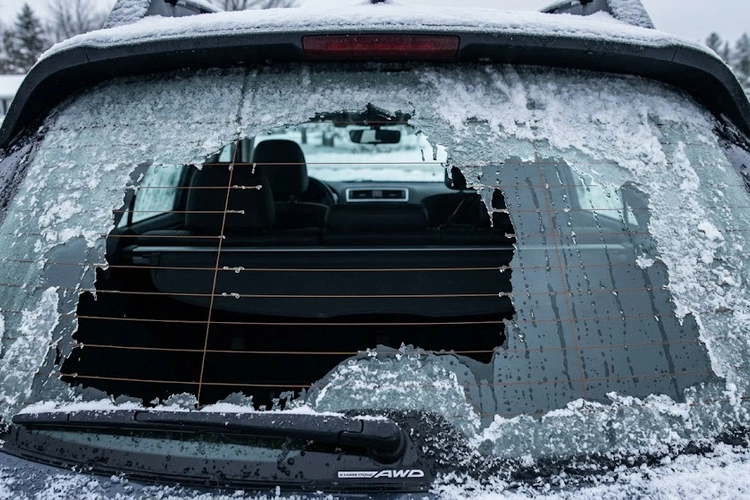
The rear window defroster — also called a rear defogger — uses a network of thin resistive wires bonded to the inside of the glass. Electric current heats these wires, clearing ice, frost, and condensation from the rear window. When this system fails, rear visibility drops sharply in cold or wet weather. A driver who cannot see through a fogged rear window faces a genuine safety risk.
Understanding the five most common failure points makes diagnosis faster. The causes range from simple electrical faults to physical damage on the glass. Most repairs cost under $30 when done at home.
Contents
The rear defroster is a dedicated high-current electrical circuit. It typically draws 15 to 30 amperes to heat the rear glass quickly. When the driver presses the defrost button, a relay closes and sends battery power to the grid. Most factory systems shut off automatically after 10 to 20 minutes to prevent battery drain.
Every rear defrost circuit shares the same core parts:
A problem in any single component kills the entire circuit. Identifying which component has failed is the entire job of diagnosis.
A rear defrost that works intermittently is nearly as dangerous as one that fails completely. Partial clearing leaves horizontal blind spots at critical rear-view angles — exactly where cross traffic and pedestrians appear.
Cold climates amplify the risk significantly. Ice-coated rear glass blocks the rearview mirror's field entirely. This creates a vehicle visibility hazard documented by the National Highway Traffic Safety Administration (NHTSA). Treat a non-functioning defroster as an urgent repair, not a minor inconvenience.
A broken rear defroster can also signal broader electrical system issues. Similar failures appear with turn signal malfunctions and windshield wiper failures — both of which trace back to fuse, relay, or wiring faults. When multiple accessories fail around the same time, inspect shared fuse panel grounds before chasing individual components.
The five causes below account for the vast majority of rear defroster failures. Work through them in order — fuse first, relay second, grid third, switch and wiring fourth, terminals fifth. This sequence moves from the cheapest and easiest fix to the most involved.
The defrost fuse blows when circuit current exceeds its rated capacity. Common triggers include a short circuit in the wiring, a failing heating grid drawing excess current, or simple fuse fatigue over time. When the fuse blows, the defroster stops working completely and immediately.
A fuse that blows again within minutes of replacement indicates a short circuit downstream. Do not continue replacing fuses without locating the underlying fault first.
The defrost relay is a small electromechanical switch that fails from burned internal contacts, coil failure, or corrosion. A dead relay prevents the grid from receiving power even when the fuse is intact and the switch appears to function normally.
Individual grid lines can break from physical impact, abrasive cleaning tools, or normal wear over years of thermal cycling. A single broken line creates a cold horizontal strip across the rear window — one band that refuses to clear while the surrounding glass defrosts normally.
Never clean the rear window with steel wool, abrasive sponges, or harsh glass cleaners. These materials scratch grid lines and cause exactly the breaks that disable the defroster.
The defrost switch sends a low-current trigger signal to activate the relay. Worn contacts, moisture infiltration, or corrosion inside the switch prevent that signal from reaching the relay. Damaged wiring between the switch and relay produces an identical result.
Vehicles experiencing flickering headlights alongside a dead defroster should inspect the vehicle's ground connections before replacing individual components. Multiple simultaneous electrical faults almost always trace back to a single corroded or loose ground strap.
The terminal tabs bonded to the left and right edges of the rear glass carry all current flowing through the grid. Corroded, loose, or physically separated terminals interrupt the circuit completely — even when every other component tests good. A poor body ground at the terminal grounding point produces the same failure.
| Cause | Primary Symptom | DIY Difficulty | Typical DIY Cost |
|---|---|---|---|
| Blown fuse | Completely dead — no light, no heat | Easy | $1–$5 |
| Faulty relay | Indicator light on, grid stays cold | Easy | $5–$15 |
| Broken grid lines | Partial defrost — cold horizontal strips | Moderate | $8–$20 |
| Bad switch or wiring | No indicator light, relay never activates | Moderate | $15–$50 |
| Damaged terminal / ground | Sudden complete failure, components test good | Moderate–Hard | $10–$60 |
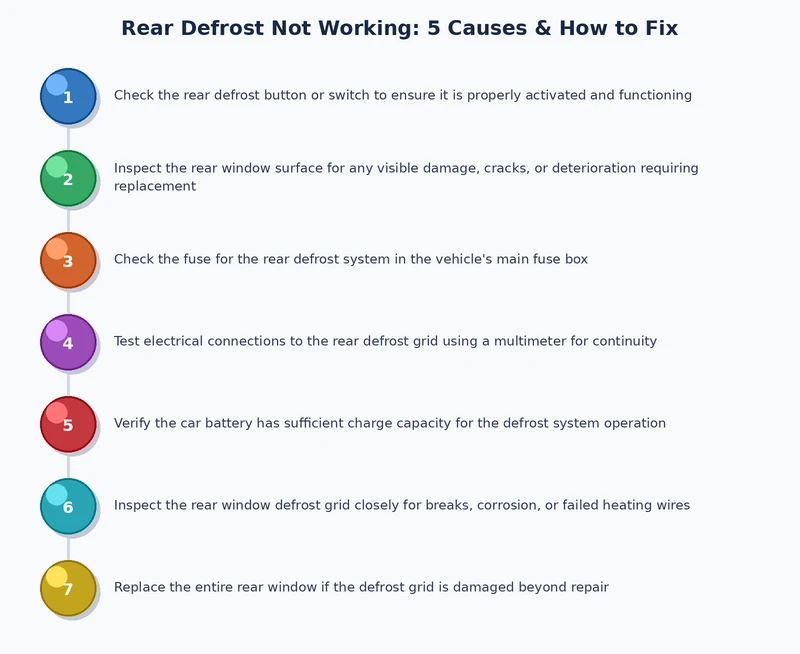
Systematic diagnosis eliminates guesswork. Start at the power source and work toward the load — fuse first, then relay, then switch, then grid, then terminals. This order prevents time wasted chasing symptoms before confirming the basics.
A non-contact voltage tester works as a quick first check. For grid line diagnosis, a digital multimeter is essential — it gives the precise voltage readings needed to pinpoint break locations along individual lines.
Three of the five causes are fully repairable at home. The repairs require no specialized equipment beyond a multimeter and standard hand tools. Parts cost is low in every case.
Fuse replacement is the fastest possible repair. It takes under two minutes and costs under $5. It is always the correct first step when the rear defrost stops working without warning.
Vehicles with repeated fuse failures — or multiple accessories failing at the same time — often have a failing alternator or a corroded main ground strap. The diagnostic process for tracing electrical faults using a multimeter is identical across all vehicle accessory circuits. The guide on car horn not working covers this process in detail and applies directly to rear defrost circuit troubleshooting.
Grid repair kits retail for $8–$20 at auto parts stores. Permatex and Prestone both produce reliable formulas. One kit handles multiple breaks. The repair is permanent when applied correctly to a clean, properly prepared surface.
Drivers who recently completed rear interior work — such as headliner repair — should check whether a terminal connector was accidentally unplugged or pinched during that job. This is a common, easily overlooked cause of sudden defroster failure after interior access. The guide on fixing a sagging headliner without removing it notes which areas of the rear interior require care around wiring connectors.
Several persistent misconceptions cause drivers to misdiagnose rear defroster problems, spend money unnecessarily, or avoid repairs that are straightforward to execute at home.
A rear wiper removes rain and surface water from the exterior glass. It does nothing for frost or condensation on the interior surface. Only the heating grid melts frost and clears interior fogging. Drivers who skip defroster repairs and rely on the wiper in cold weather will find the rear window still fogged or iced on the inside — completely unreachable by any wiper blade.
Running the rear wiper on an iced exterior surface without prior defrosting also risks stripping the wiper motor under load. The defroster and the wiper serve different, non-overlapping functions. Neither replaces the other.
This is false. Grid repair kits are sold at every major auto parts retailer. The repair process involves cleaning the break site, applying conductive paint, and allowing 24 hours of cure time. No special tools are required. No vehicle disassembly is involved.
A dealer-performed grid repair typically costs $100–$300 in labor and materials. A DIY kit costs under $20. The results are comparable for standard single-line or multi-line breaks on intact glass.
The only legitimate exception involves delaminated terminal tabs — where the metal tab has physically separated from the glass. Re-bonding a tab to the glass surface requires specialized conductive adhesive and proper surface prep. That specific repair is best handled by a glass shop. Everything else on the grid is DIY-appropriate.
Abrasion makes grid damage worse — not better. The conductive coating is extremely thin, measured in microns. Scratching, scraping, or sanding a broken line removes surrounding intact coating, widens the break, and creates multiple failure points instead of one. The correct repair is conductive adhesive applied in a controlled, narrow bead directly over the break — not abrasion.
This myth likely persists because light abrasion does help restore conductivity on corroded metal terminals — a process that does not translate to glass-bonded grid coatings. The two materials have entirely different failure modes and require different treatments.
Drivers who experience intermittent defrost operation — working some days and failing others — typically have a loose terminal connection or a marginal relay rather than a broken grid. This same intermittent-fault pattern appears in speedometer failures caused by loose connectors. The diagnostic approach is identical: inspect and reseat all connections before replacing any parts.
The indicator light only confirms the switch sent a trigger signal to the relay. It does not confirm the grid is receiving power. The most common cause in this scenario is a faulty relay that activated the light circuit but failed to close the high-current contact to the grid. Test the relay first by swapping it with an identical unit, then check for voltage at the grid terminal tabs.
Yes. A crack that passes through grid lines breaks the conductor at that point. Affected lines will not heat. A crack near one edge of the glass can also compromise terminal tab bonding, disrupting the entire circuit. A cracked rear window with grid damage typically requires full glass replacement to restore complete defroster function.
Under normal conditions, the rear defroster clears frost and light ice within 5 to 10 minutes. Heavy ice buildup may require up to 15 minutes. If clearing takes significantly longer than expected, or if only part of the window clears, broken grid lines are the most likely cause. A partial defrost pattern — with distinct cold horizontal strips — confirms grid line breaks.
Factory systems include a timer that shuts the defroster off automatically, typically after 10 to 20 minutes, to prevent excess battery and alternator load. Running the defroster continuously beyond that interval on older vehicles without a timer places prolonged strain on the charging system. It is not immediately dangerous for a single trip, but it is not recommended as a regular practice or a workaround for a failed timer module.
Fuse ratings vary by vehicle. The correct rating is stamped on the original fuse and listed in the owner's manual fuse chart. Common ratings are 15A, 20A, 25A, and 30A. Installing a higher-rated fuse than specified removes the circuit's overload protection. A fuse rated too high allows excess current to flow through the wiring before it blows — creating a potential fire hazard.
Interior moisture alone does not typically damage the heating grid. However, chronic moisture accelerates corrosion on terminal tabs and wiring connectors, eventually causing connection failures. Vehicles with water leaks around door seals, tailgates, or sunroofs are most at risk. The correct fix is sealing the water entry point — not repeatedly cleaning corroded terminals that will corrode again.
Cold temperatures cause metal to contract. A marginal terminal connection or a hairline grid crack may close tightly enough in warm conditions to allow current to pass, then open under cold-induced metal contraction. This intermittent cold-weather failure pattern is a strong indicator of a physical connection problem — a loose terminal connector or a hairline grid break — rather than a failed relay or switch.
A fuse or relay replacement at a repair shop typically costs $50 to $100 including labor. Grid line repair ranges from $100 to $200 depending on how many lines are broken. A full rear glass replacement — required for severely damaged grids or cracked glass — ranges from $200 to $500 or more depending on the vehicle make and model. DIY repairs for fuses, relays, and grid lines cost under $30 in most cases.
A rear defrost system fails at one of five points — identify that point, fix only that component, and the repair is complete in an afternoon for a fraction of the cost of a single shop visit.
 |
 |
 |
 |

About Sarah Whitfield
Sarah Whitfield is a diagnostics and troubleshooting specialist who spent ten years as an ASE-certified technician before joining the editorial team. She specializes in OBD-II analysis, electrical gremlins, and the kind of intermittent problems that make most owners give up.
Get some FREE car parts & gear.. Or check out the latest free automotive manuals and build guides here.
Disable your ad blocker to unlock all the hidden deals. Hit the button below 🚗
| | | |