by Joshua Thomas
A vehicle's headliner plays a more important role in your car than just giving the interior an aesthetically appealing look. Headliners provide insulation from the heat and cold, and also help to dampen the noise from the outside, and hence making the vehicle's interior more comfortable.
But as the vehicle is exposed to the elements, and this is more so the heat from the sun, the glue used to attach the headliner fabric to the vehicle's roof loses its potency, and hence causing sagging.
The good news is that while headliner sagging is almost inevitable, it is quite easy to fix. And here we give you different options to fix a sagging headliner without having to remove it.
Contents


Because the headliner comes stuck with some kind of glue or adhesive, the first and perhaps the most effective ways of fixing a sag is using an adhesive. And a cheap spray adhesive will be perfect as it is easy to apply and highly effective.
Recommended Product: 3M General Purpose 45 Spray Adhesive
Step by Step Directions
Step 1: Inspect Headliner
Before you even start gluing things back, the first step should be to inspect the headliner to determine whether besides sagging it also has other damages like tears. Inspecting the headliner also allows you to determine how to apply the adhesive to ensure the headliner is fixed back more evenly.
Step 2: Remove Central Cabin Light
Before you can fix your sagging headliner, you will need to remove the central cabin light as this will make it easier to line up the headliner more evenly and gives you more room to work with.
Also, with the cabin light out of the way, you will not have to worry about getting the adhesive into the wrong places, and you will have a place to pull down the headliner to spray the adhesive.
But, in case the headliner is sagging towards the front, you will need to remove the sun visor to expose the edges, which allows you to stretch it out more evenly when applying the adhesive.
Step 3: Pull Down Headliner
In some instances, and this is more so where the headliner sag is more severe, you might also need to pull it down a little before applying the adhesive.
Pulling down the headliner might make the sagging a little worse at first, but it exposes more surface area for you to spray the adhesive to ensure that it will be fixed even tighter than before. But, for some minor cases of sagging this step will not be necessary.
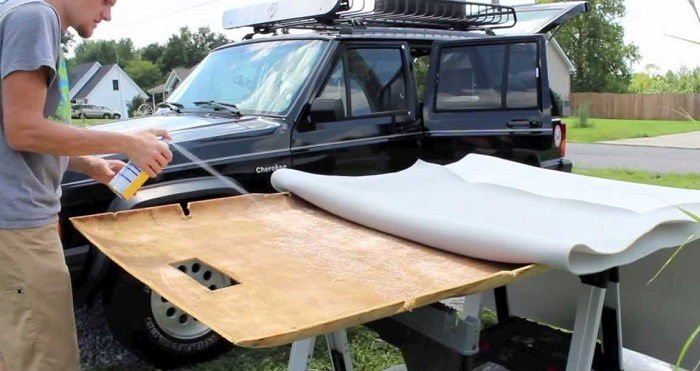
Step 4: Spray the Adhesive
The next step is to spray on the adhesive, and this is perhaps the most important one as it will determine whether it will adhere well or not.
But, the good news is that there is nothing complicated when it comes to spraying on an adhesive. Just like you would do when gluing fabric to any other surface, you should apply a thin coat of the adhesive to the inside section of the headliner and on the roof.
It is also important to make sure that besides spreading the adhesive evenly, you also cover all the areas because any section that is not glued on will end up sagging or developing some unsightly bumps. And also be careful not to overspray one section as this will also create an unsightly look.
Step 5: Allow the Adhesive to Dry
Most fabric adhesives will require a few minutes to dry and get sticky. And so before you push the headliner to the roof, you need to give the adhesive enough time to dry or cure.
Around 5 minutes is often good enough for most types, but just to be sure, you should check what the instructions say.
Step 6: Push the Headline to Stick
Once the adhesive is dry enough, the next step is to push the headliner up to the roof to stick it. And while your hands can still do a good enough job, it will be better to have something flat and blunt to help with this step as it will allow you to exert more pressure.
After securing the headliner to the roof, you still need to go through it several times and press it against the roof after every few minutes to ensure that it sticks well and will not sag again.
Step 7: Place Back the Light
The last step is to place back the central cabinet light and other things like the sun visor if you had removed them. And once this is done, the task should be complete, and you will have an all-new looking and neat headliner.

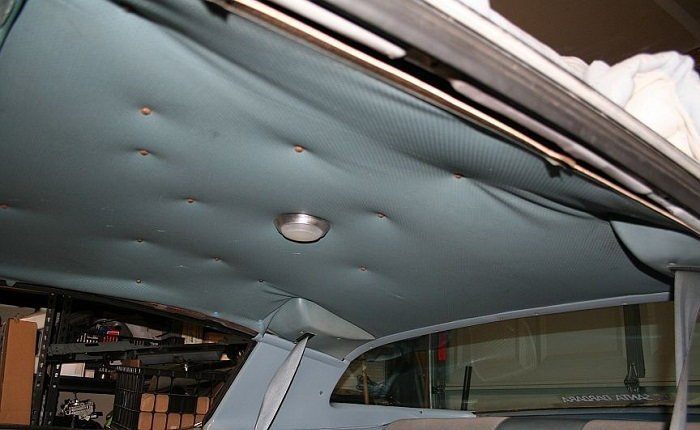
Another effective way of fixing headliners without having to remove it will be by using sequin pins, which is even more affordable than using adhesives given that you can get a box of hundreds of these pins for under $5.
Recommended Product: Darice Sequin Pins
Step by Step Directions
Step 1: Inspect the Headliner
The first step just like when using the spray adhesives will be to inspect the headliner and determine where the sag is and how best to fix it. When using these pins, this step will even be more important as you need to pick there placement careful to ensure you do not give the headliner an ugly look.
Step 2: Arrange the Pins Keenly and Creatively
While you can simply take a few of the pins and use them to hold back the sagging liner, it is always better to get creative with how you use the pins. You can set them in a square or diamond pattern depending on what is more appealing to you and does not leave an unsightly look.
This method will not require any special skills or tools and will only take a few minutes of your time. But, pins might also require more frequent reapplication than other options like glue or adhesives.
Also, besides the sequin pins, you can use others like the clear-headed twisty pins for upholstery. And the best element about these is that they are almost invisible when used on your headliner, and hence ensuring it maintains a more natural look.
Besides the use of spray adhesives and pins, there also a few other methods for fixing the headliner without removing it. They might not be as common as the other two but should still work well enough.
1. Double-Sided Tape
If you have some double-sided tape in your garage, you might not even need to look for any other solution for fixing your sagging headliner as it can do an amazing job.
And it is also quite straightforward to use as you will only need to stick one side to the roof and the other to the headliner. This method is great for sagged edges which are easily accessible.
2. Steam Cleaner
The key reason why headliners will sag over time is the fact that the glue used to hold them in place loses its adhesiveness over time. Hence, a steam cleaner can help bring back some of its stickiness and hence eliminating the sagging.
With this method, you will have to bring the steam cleaner as close as possible to the headliner to melt the glue, but be careful not to burn the delicate fabric.
Once the glue or adhesive in the fabric is melted, you can use a ruler or roller to reattach the liner to the roof and make sure you do not leave any wrinkles on the fabric.
3. Staples and Hair Spray
As weird as it might sound, staples and hair spray can help you deal with a sagging headliner and should keep it in places for almost as long as all the methods above.
But, it is important to note that regular paper staplers will not work very well, and so you will be better off with a staple gun. Using your staple gun, shoot staples on all the sagging areas and try to arrange them neatly and orderly to ensure the headliner will still look good. Also, you need to be keen sure that you do not tear the fabric when stapling.
Once the headliner is stapled in places, the next step is to spray the hairspray on all the areas that you have stapled. This will help melt down the adhesive that was previously used to stick the headliner, and hence allowing it to bond again with the roof.
After this, you can remove the staples or leave them if you do not mind how they look on your headliner. But, note that this is often just a temporary fix.
A sagging headliner is not only unsightly and annoying, but will also affect the car's comfort as it diminishes its insulation capability, and hence making it uncomfortable in both hot and cold weather.
While in some instances the only way to fix a sagging headliner, and this is more so for the older vehicles, is by removing and repairing or replacing it, there are still many ways to fix it without having to remove it.
From using spray adhesives and pins to other more temporary solutions like double-sided tape and staple, there are many options available, and hence you just need to figure out which one will work best for your particular situation.
 |
 |
 |
 |

About Joshua Thomas
Joshua Thomas just simply loves cars and willing to work on them whenever there's chance... sometimes for free.
He started CarCareTotal back in 2017 from the advices of total strangers who witnessed his amazing skills in car repairs here and there.
His goal with this creation is to help car owners better learn how to maintain and repair their cars; as such, the site would cover alot of areas: troubleshooting, product recommendations, tips & tricks.
Joshua received Bachelor of Science in Mechanical Engineering at San Diego State University.
Just Car Care