by Joshua Thomas
One of the best ways to ensure your vehicle produces as little pollution as possible is by making sure that the catalytic converter is always clean and in great working condition.
Catalytic converters are designed to reduce the toxic fumes that vehicles emit, and they will feature an insulated chamber with a honeycomb-like structure inside. This structure is coated with a catalyst like platinum that helps to oxidize the noxious compounds to make them less harmful.
Overtime, catalytic converters can get clogged and hence become less effective in controlling these toxic gasses, which leads to higher levels of emissions. But the good news is that they are quite easy to clean and here we show you how.


The first method, and perhaps what many vehicle owners will prefer to use is one that does not entail removing the catalytic converter. This will be a faster, more affordable and also less tedious method, and you will not need to be an expert or skilled mechanic to do it.
What You Will Need
Step by Step Directions
Step 1: Choose a Compatible Cleaner
The first step when cleaning a catalytic converter is to choose the right product for your particular vehicle make and model.
It is important to remember that different cleaners will come with different benefits, and will hence be ideal for different kinds of vehicles. Hence, it is worth taking the time to read and understand the product description before buying to decide if it is compatible with your vehicle.
Also, the engine type is crucial because some of these catalytic cleaners will be specially formulated for diesel cars only while others will be for those that take gas only. Using the wrong product can result in engine problems, and so you need to be very careful.
Recommended Product: Cataclean 120007
Step 2: Wait Until Tank Has the Right Amount of Fuel
You need to have the right catalytic converter cleaner to fuel ratio to ensure the product will be potent enough. And because your vehicle will probably already have some fuel, the second step is to wait for it to have the right amount for the perfect mix.
Most catalytic converter cleaners will require you to mix them with around 15 liters of gas while others might require a little more or less than this. But, the right idea would be to read the instructions on the mixing ration required before using the product.
Step 3: Add Cleaner to the Tank
The next step is to add the cleaner to the fuel tank, and depending on the type that you are using and the amount of fuel on your tank, you can either use the entire bottle or half of it.
Be sure to follow the included instructions on the cleaner bottle because while the correct mixture will keep the engine running properly, a wrong one can cause problems. And unless the instructions instruct otherwise, do not add anything else to the fuel tank.
Step 4: Drive Around to Circulate Cleaner
With the catalytic converter cleaner in your fuel tank, it is time now to drive around to circulate and allow it to do the job.
Also, review the guidelines or instructions on the bottle to determine how long or how far you need to drive to ensure the cleaning agent gets the job done.
However, when it works you can easily tell by the noticeable improvements in engine misfires, sluggish acceleration, and smoky exhaust.
Step 5: Refill Tank When Nearly Empty
The last step is to allow the car to use the fuel until the tank is nearly empty to ensure maximum effectiveness of the catalytic converter cleaner.
When the tank is almost empty, you can now refill it and go for a test drive. You should notice that the engine now runs smoothly. But, if there are no changes, you can repeat the steps above one more time for another round of cleanup.
Note: Before using this method, it is important to listen carefully to the catalytic converter and make sure that you do not hear any loose parts inside. Also, ensure that it is not too clogged, otherwise this method might not be very effective.

If the catalytic converter cleaner does not work or the results are not good enough for you, then the other method of cleaning it will entail removing and soaking it.
However, this method is only recommended for those that have at least intermediate mechanic skills as it can be a little complicated.
What You Will Need
Step by Step Directions
Step 1: Allow Vehicle to Cool Down and Jack It
Because the exhaust pipe and many other components around the catalytic converter tend to get quite hot, the first step should be to allow the vehicle to cool down before you start working. Also, note that the temperature for the catalytic converter can be upwards of 750 degrees Fahrenheit, which makes it even more important to allow it to cool down.
As the car cools down, you should be readying other supplies. And once it cools enough, the next step is to jack it up and use the stand to keep it secure as you work.
Step 2: Locate the Catalytic Converter
With the car jacked up, the next step is to locate the catalytic converter. But, before doing this, you need to make sure that you wear protective gear such as gloves and goggles for safety when working.
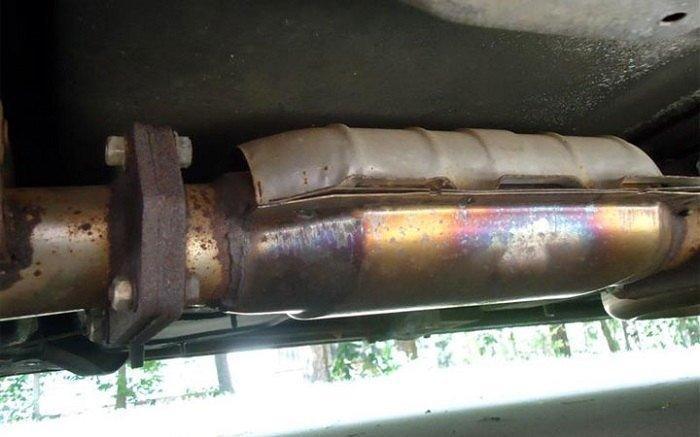
For most vehicles, the catalytic converter is somewhere between the middle and the end of the exhaust pipe. And it is a rounded or square device that will be hard to miss as it stands out.
Step 3: Remove Oxygen Sensor
Next, remove the oxygen sensor using the oxygen sensor wrench, and do it carefully to ensure you do not damage it. Some vehicle types will have more than one, but the most important thing is to ensure you handle them carefully and set them aside.
Step 4: Remove Catalytic Converter
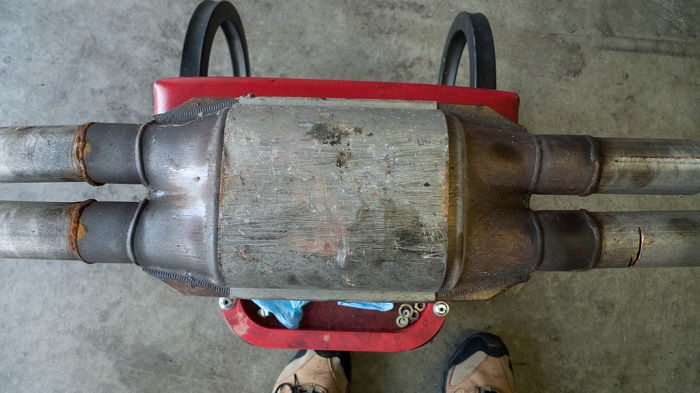
Once the oxygen sensor is out, the next step is to remove the catalytic sensor. Here you also need to be keen to ensure you do not damage it and as you loosen the bolts, you should hold the catalytic converter with the other hand.
Also, note that in many instances the bolts holding the catalytic converter will be fixed very tightly and will often be corroded, and so you need will need to apply penetrating oil.
And when you are loosening them you should start with the bolts closest to the exhausts and work your forward. As you are removing the bolts remember to hold on to the unit to ensure it does not drop.
Step 5: Wipe Down the Catalytic Converter
After removing the catalytic converter, you need to first inspect it to ensure it is not damaged and hence requiring complete replacement. If it is still in good working condition, the next step is to wipe it down using a shop towel to get rid of any residue on the surface.
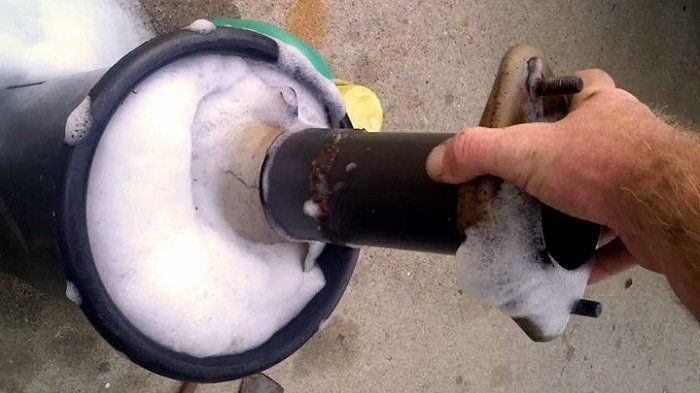
Also, it is at this step that you need to pressure wash it at low pressure. You should pressure wash the inlet and outlet pipes thoroughly to remove the deposit buildups.
Step 6: Soak Catalytic Converter
Now prepare the soaking solution, and to do this, you will need to fill a tub with some hot water and then add the degreaser to the water.
Once the solution is ready, you should now place the unit in it. Soak the catalytic converter for anywhere between 30 minutes and 1 hour while making sure you neither under or overdo it.
Step 7: Rinse and Leave it to Dry
After the soaking, you should remove the catalytic converter from the tub and then rinse it thoroughly using the pressure washer while also keeping the pressure low.
When rinsing, make sure you get rid of any build up in the outlet and inlet pipes and then allow the unit to dry. For drying, you should place it in a shop towel and allow it to dry off completely.
To be certain that the unit will dry enough, it will be a great idea to leave it for at least a few hours, but if you can wait for longer the better.
Step 8: Reinstall Everything and Go for a Test Drive
Once your catalytic converter is dry enough, you can now reinstall everything. First, secure the catalytic converter using the bolts. And once this is done, you can carefully reattach the oxygen sensors.
The last step once everything is reinstalled is to take your car for a test drive. If the cleanup was successful, you should feel some difference in how the car drives.
Note: If this method still does not work for your vehicle, you will have to take it to a professional and probably also have to pay for a replacement.
Cleaning your catalytic converter is one of those things that you must-do if you want to keep your vehicle's emissions down. And contrary to what many vehicle owners are quick to assume, it is quite easy, and you will not even need to use professional services
Overall, there are two ways to do it, which are by using a catalytic converter cleaner which will not require you to remove it and by removing and soaking it in a degreaser solution.
The first method is the simplest and should always be the first that you try while the second will be perfect when you suspect that you are dealing with severe clogging.
But, if neither of these methods works well, or they end up turning on the check engine light, then you need to take your vehicle to a licensed mechanic.
Sources
 |
 |
 |
 |

About Joshua Thomas
Joshua Thomas just simply loves cars and willing to work on them whenever there's chance... sometimes for free.
He started CarCareTotal back in 2017 from the advices of total strangers who witnessed his amazing skills in car repairs here and there.
His goal with this creation is to help car owners better learn how to maintain and repair their cars; as such, the site would cover alot of areas: troubleshooting, product recommendations, tips & tricks.
Joshua received Bachelor of Science in Mechanical Engineering at San Diego State University.
Just Car Care