by Joshua Thomas
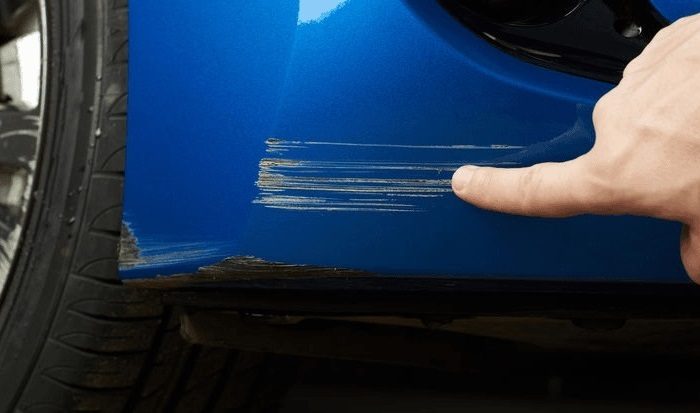
Car scratches are common and as long as your vehicle is on the road or even parked somewhere, there is always a significant risk of getting scratches. But, they are even more irritating when they leave some paint transfer.
Paint transfer or paint scuff will occur when the paint from the object or item scratching the car is transferred to your vehicle's paint. The good news is that paint transfer is often superficial and hence easy to remove with common car cleaning and polishing compounds.
However, like everything else car-related, you need to know how to do it correctly for the best results. Below we provide a more comprehensive guide on paint transfer removal.
Contents

Before you get to the paint transfer removal, it is also worth knowing how your vehicle's paint works and its anatomy. Knowing this makes it easy to take care of it and have a better understanding of how to deal with paint transfer.
First, the paint will be made up of four different layers, which are the primer, base coat, transparent or clear coat and the layer of wax at the top.
The primer will be tasked with protecting the vehicle's metal body from rust and corrosion while the base coat is what gives the car its color, the clear coat protects the color underneath and the wax provides protection from the elements.
A paint transfer from another object will only cut through the layer of wax and affect the clear coat layer only, which makes it fairly easy to remove. In the rare event that the paint transfer goes beyond this layer, you might be forced to repaint the vehicle.

There are different ways of handling a paint transfer and in many instances, you will not even need to take the car to an automotive paint shop for professional help.
But, you need to know how to do it correctly to not only ensure you remove the paint transfer and also that you do not damage the vehicle’s paint further in the process.
Step 1: Clean up the Car
The first step is to give the vehicle a thorough clean up using the cleaning agents that you have. But, if you do not have the time to clean the entire vehicle, it is still okay to clean up the areas with the paint transfer that you need to work on.
Cleaning the vehicle will allow you to remove the surface contaminants such as loose paint particles, dirt, and debris, which can give the vehicle some minor scratches when scrubbing off the paint transfer in the steps that will follow. And after washing also make sure you dry the surface completely.
Step 2: Work on the Scratches
With the car clean and dry, the next step will be to work on the scratches. And here the scratch remover and the applicator pads will be very useful.
First, you will need to smoothen the edges of the scratches, and here you can use the sandpaper that is often included in most scratch removal kits. But, you will need to be extra keen when doing this because applying too much pressure can damage the paint further.
Once the scratches are smoothened out, you can now use the applicator pads to apply the scratch remover product that you have. If what you are using does not have any abrasive compounds, it is okay to apply it in a circular motion, but if it is abrasive, use a side by side motion. But, the right idea here is to follow the included directions.
It is important to keep checking your progress as it will often take several passes to see results. And in case the scratch remover does not seem abrasive enough to remove the paint transfer, you should use a rubbing compound.
Step 3: Polish the Surface
The scratch remover or rubbing compound used in the step above should be effective enough at removing paint transfer. If at first, it does not seem to work, you will only need to give it a few more tries, and you should start seeing results.
With the paint transfer removed, then the next step is to give the paint a nice polish to bring back its lost natural shine.
For effective polish application, you should apply a small amount of the car polish to the applicator pad and then apply it over the cleaned paint surface. Use an overlapping circular motion when polishing to ensure you do not leave unsightly marks on the vehicle.
This often takes some time, and you should continue polishing until you start seeing the color looking more even. Also, remember to wipe off the excess car polish with a clean microfiber towel or applicator pad once the job is done.
Step 4: Wax the Vehicle
While many people will stop at the polishing part, waxing is also equally important and is hence a crucial step of the process that you should not overlook. Wax is what will protect the vehicle from the elements and also help to maintain the shiny look.
Waxing is also a straightforward process just like polishing. To wax the vehicle, you will only need to apply a small amount of wax on a clean applicator pad and then spread it in the area. Next, rub the wax gently over the area until you give the vehicle a nice shine and protective layer.
After waxing, you also need to remember to wipe off the extra wax. And to ensure your vehicle maintains a more uniform look, it will be a great idea to wax the entire surface and not just the area that had the paint transfer.

The steps above will be effective at removing almost any kind of paint transfer. But, in some instances, you might not have all the tools and products required. In such situations, you need to get innovative and look for alternative methods. Here are a few other DIY options.
Gas can be an effective way to remove paint transfer when you do not have things like scratch removers and rubbing compounds around. However, when handling gas you need to be extra careful to prevent accidents.
The process is also fairly easy as you will only need to soak a clean microfiber towel in gas, and then use it to wipe off the paint transfer. The gas will react with the paint transfer making it easy to wipe off. But, you should not leave it for too long as you can easily end up also removing some of the vehicle's paint.
Also, make sure that you clean the area thoroughly afterward to get rid of the gas smell. Next, polish and wax it to bring back the natural shine. And do not forget to clean the microfiber cloth that you used before discarding it to prevent accidental fires.
If the paint transfer you are dealing with is not too embedded or it is in only a small area and not very pronounced, cooking oil can also help to remove it.
Like when using gas, you will only need to apply a small amount of the cooking oil to a microfiber towel. You should then use the towel to scrub off the paint transfer and clean up the area before waxing and polishing.
When dealing with severe paint transfer, cooking oil will only be able to remove a little of it and in some instances, the difference it makes might not even be noticeable.
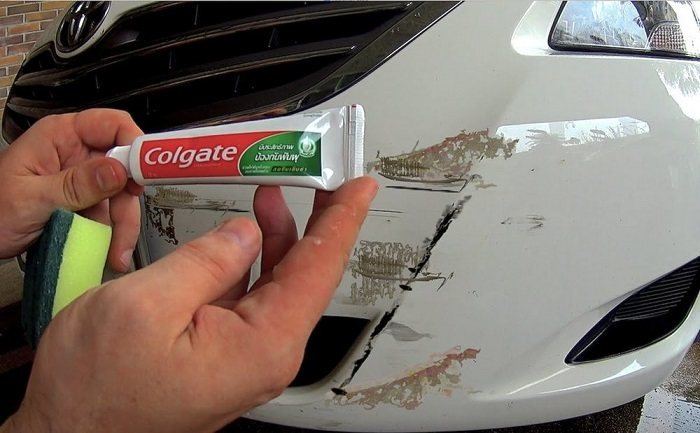
Toothpaste and this is more so the kinds with a whitening agent, can also be a very useful DIY solution for removing paint transfer. And here you will hardly need to spend anything given that the chances are you already have toothpaste and some soft cloths or microfiber towels.
What makes toothpaste effective is the fact that it will contain a gritty texture and with some minute abrasives like what you get in a car polish. These abrasive compounds will work like sandpaper and remove thin layers of paint transfer when enough pressure is applied by scrubbing.
Better yet, toothpaste will also help to smooth out the edges of the scratches that come with the paint transfer and can also fill them up and give the surface a nice, shiny finish.
Using toothpaste to deal with paint transfer is quite straightforward. You will only need to apply a small dub of it in a moist cloth and then rub it over the paint transfer using a circular motion. Finish by wiping off the toothpaste residue using a clean cloth.
Paint transfer can be irritating as it can give the vehicle's surface an unsightly look. But, the good news is that it will only affect the clear coat layer, which makes it quick and easy to remove without any professional help.
With the few products listed above, a few minutes to spare and by following the simple steps described above, you can remove almost any kind of paint transfer without breaking a sweat.
And even if you do not have these car cleaning and scratch removal products required, there are still many other things that you already have that you can use such as gas and toothpaste. Hence, paint transfer should not give you sleepless nights as it is something easy to take care of.
 |
 |
 |
 |

About Joshua Thomas
Joshua Thomas just simply loves cars and willing to work on them whenever there's chance... sometimes for free.
He started CarCareTotal back in 2017 from the advices of total strangers who witnessed his amazing skills in car repairs here and there.
His goal with this creation is to help car owners better learn how to maintain and repair their cars; as such, the site would cover alot of areas: troubleshooting, product recommendations, tips & tricks.
Joshua received Bachelor of Science in Mechanical Engineering at San Diego State University.